Index
- Part 1, Intro and making central pattern wider: click here to go to that page
- Part 2, Making the central pattern smaller: that’s this page
- Part 3, Widen the borders: click here
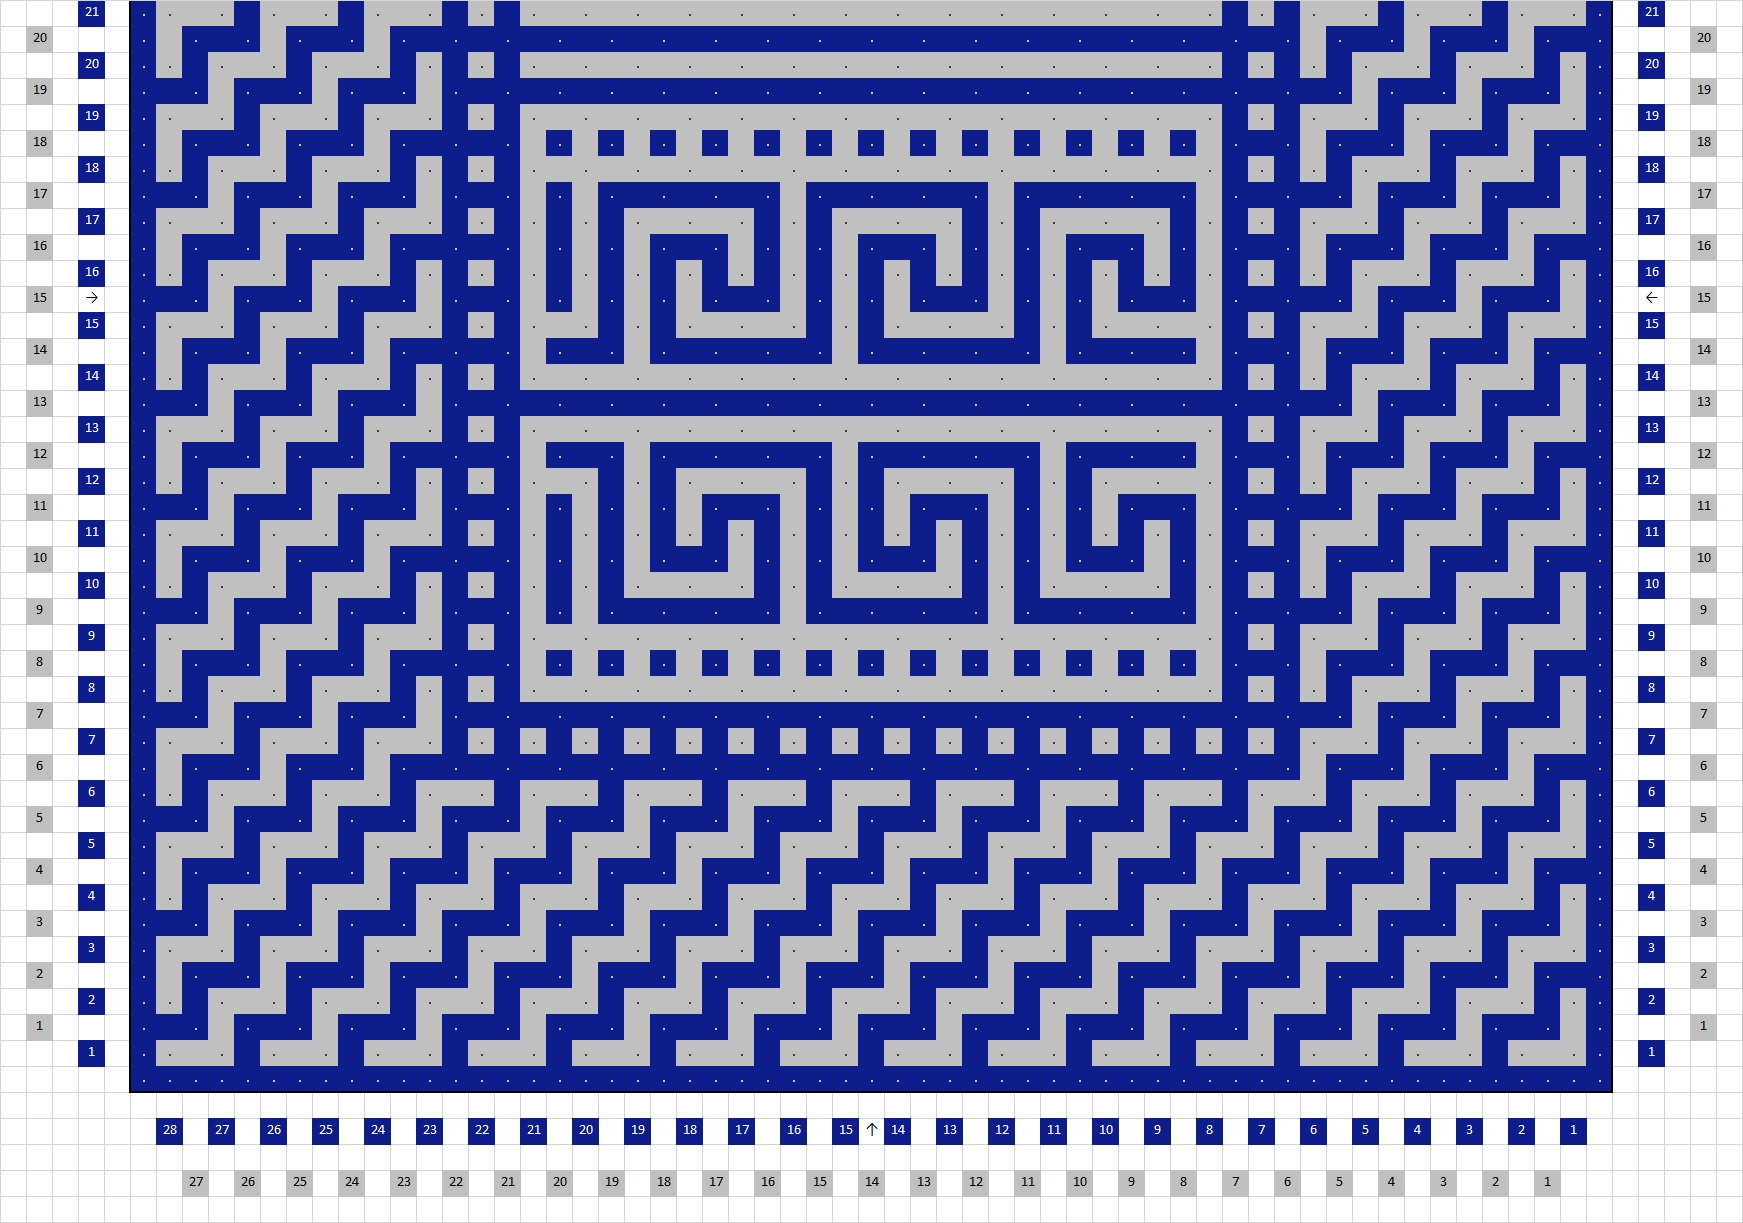
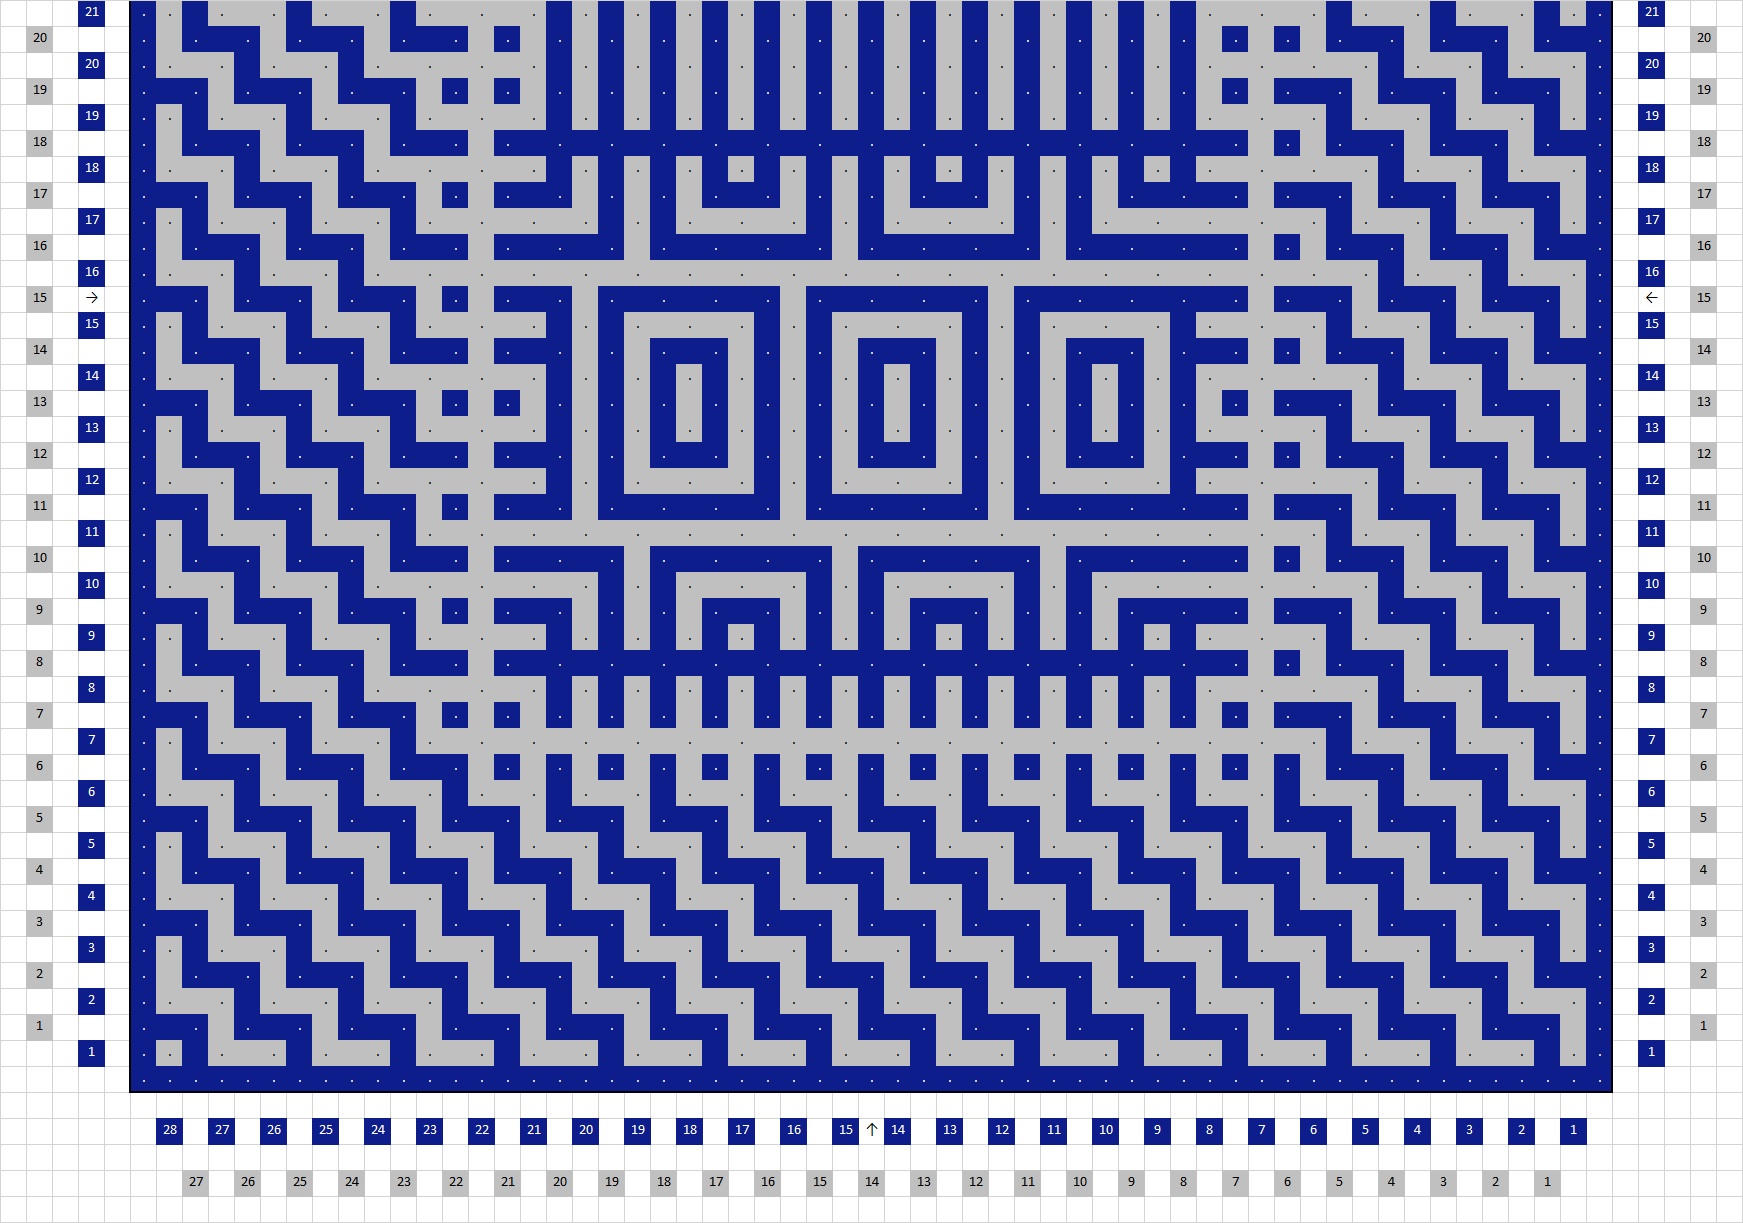
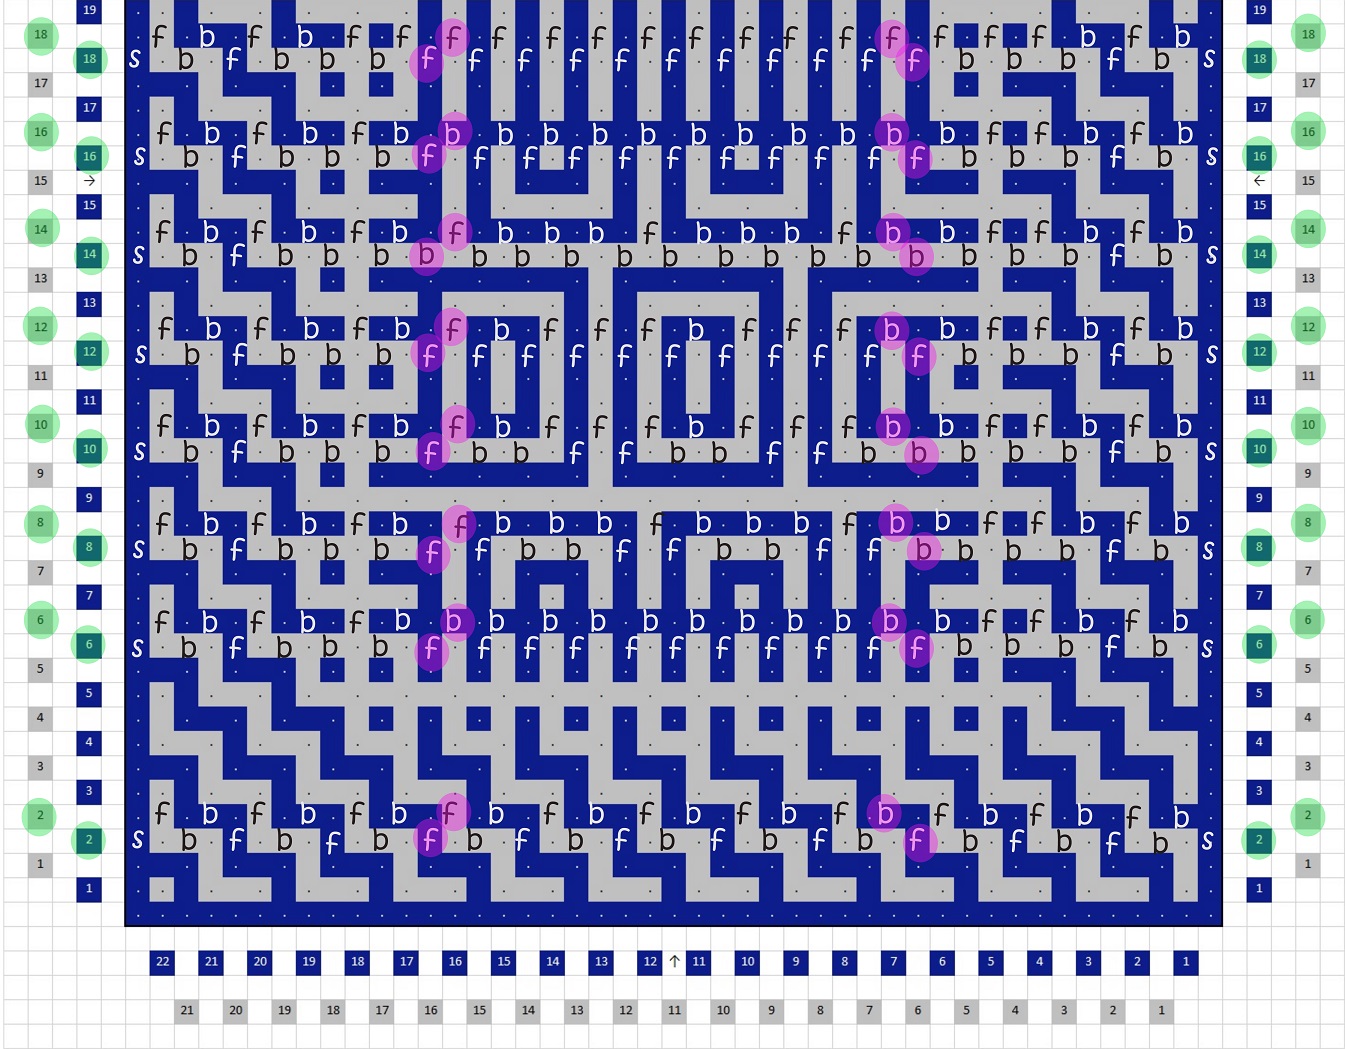
Part 2: Removing squares from the central part
For the removal of squares from the central part you apply the same technique. You will leave the first and last 6 stitches of the pattern intact. After that you delete the same number of stitches on both sides right on the inside.
I elaborated on 2 examples for deleting 1 square on both sides or 2 squares.
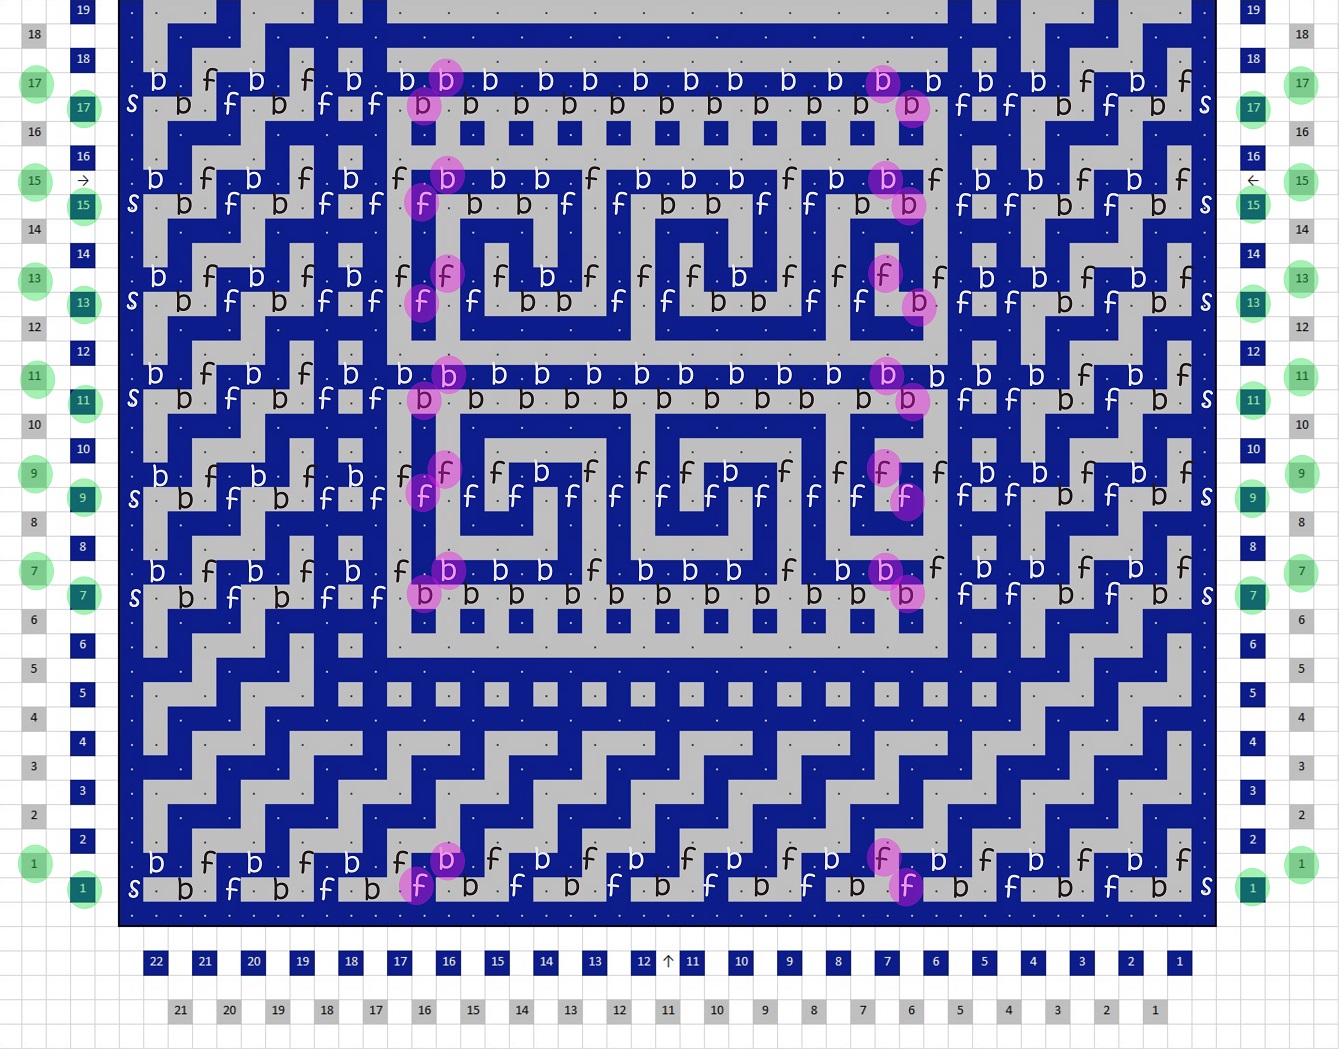
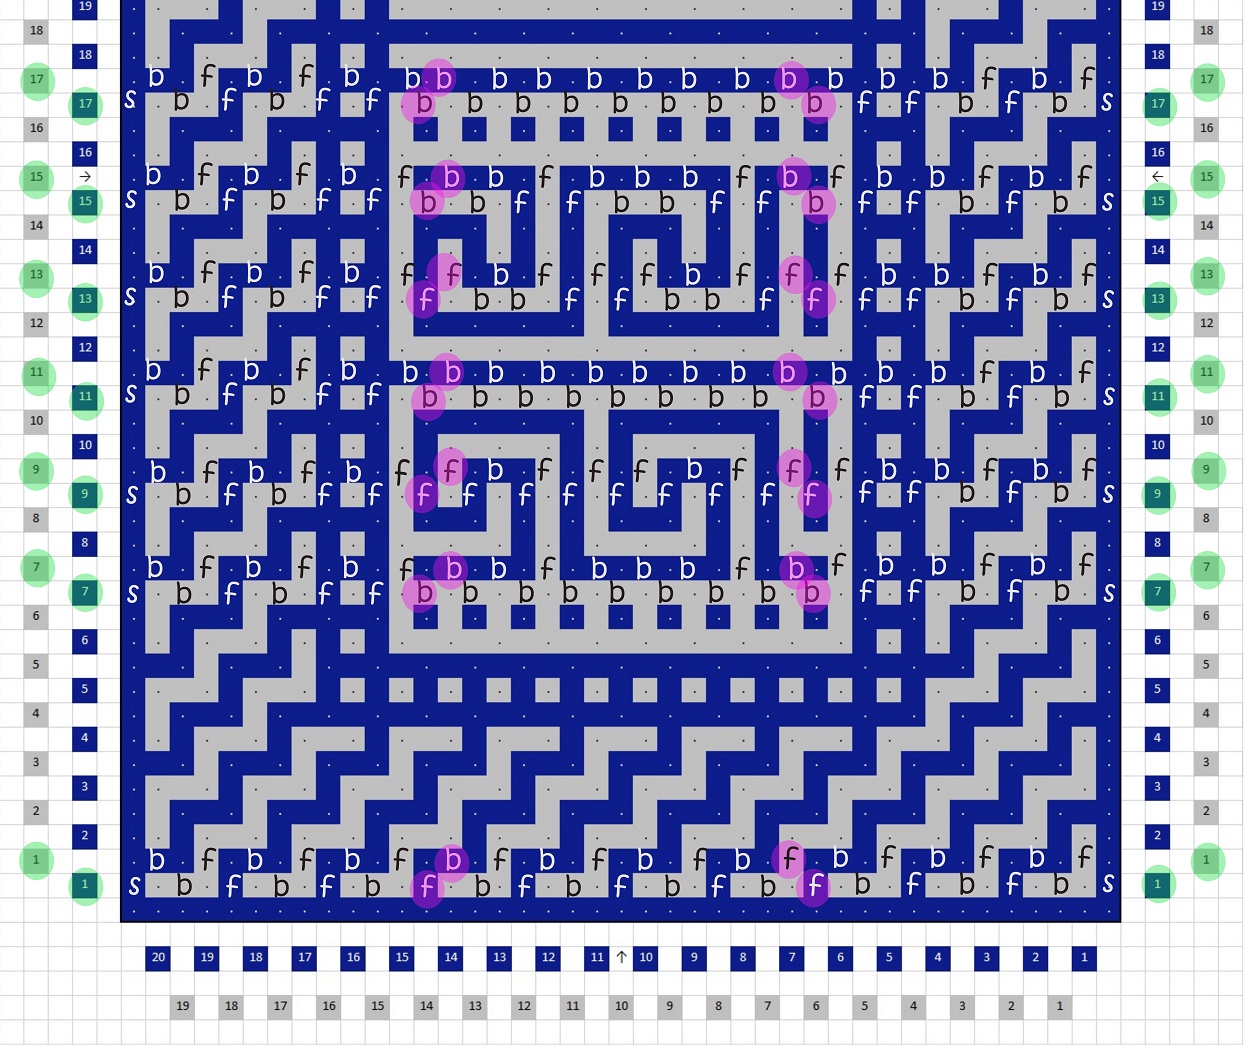
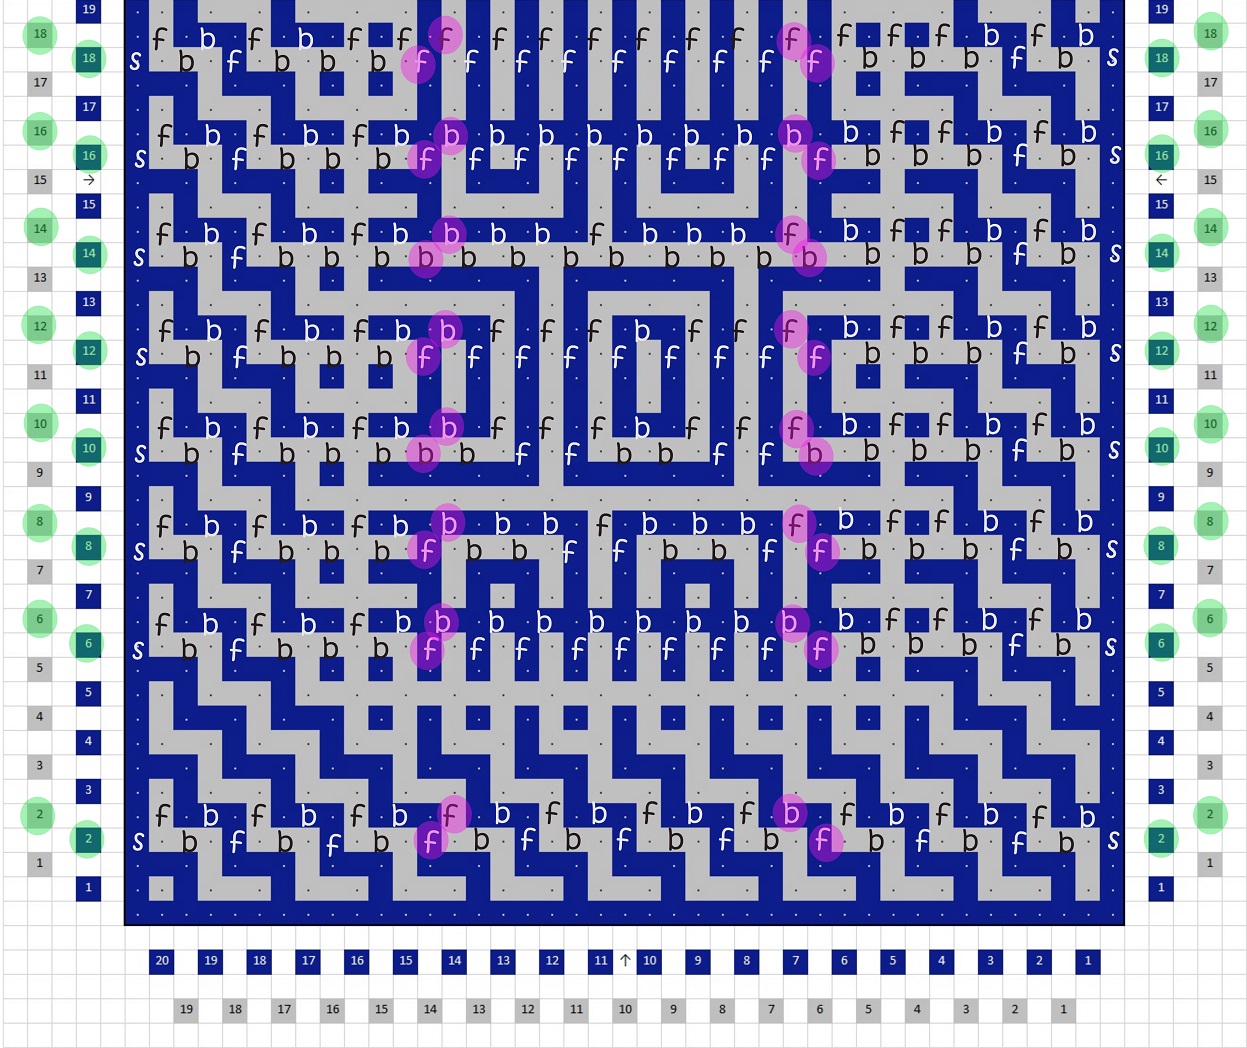
Part 3: Making the borders wider
For making the borders wider, you will add extra squares to them, the same number on both sides. That’s quite easy. You can use the instructions that I gave for adding squares to the bottom border.
If you want to keep all borders equally high and wide though, so also the bottom and top border, then you have to remember that you let the patterns start ‘at the same spot’. The written patterns start at an even or odd row. If you would add 1 square to the bottom part (so an extra row in color 1 and 2), these patterns will start at at an odd or even row, and then the descriptions will not be correct anymore. If you are skilled with using the pattern charts, you could do that of course, but it’s more handy to add 2 squares (or rows) per side, or a multiple of that. This way all descriptions for the middle pattern will just stay intact, they will only start a couple of rows later.
Here I’ve added an example how it looks when you add 2 squares on both sides as well as the bottom part. You can see here that the central pattern is still the same, and that all sides are equally wide and high.