
Tadaa! We are going to start with the large blanket! We will start with the setup, that will be done slightly different than with the practice piece. After that we will do the border and the first ‘new’ pattern. The border will be done in the same pattern around the whole blanket, and you are already familiar with that pattern by making the practice piece: the stairs. So that’s a nice and easy start. And pattern 2 are the crosses. Also supersimple, but something different right away, to keep this start a bit more exciting.
If you haven’t done the practice piece yet, I advice you to really do that first. Because in the next pages I will not repeat everything I told you there. So look here for the tutorial on this website. You will also find the links to the video’s there.
Availability of the pattern
The pattern is no longer available for free. See here for info where to purchase it: https://www.dehandwerkjuf.nl/en/crochet/hooked-and-locked-cal/hooked-and-locked-cal-introduction-and-overview/
Index for part 1
- Intro and setup: that’s this page
- Row 1: click the link to go to that page
- Row 2 and further: click the link to go to that page
The video’s
I also made video’s for this.
The link for doing the setup and rows 1a and 1b: https://youtu.be/fo1azHj_1uk
The link for rows 4b to 6b: https://youtu.be/wUGQdgiNyPw
Or see the links at the end of this page.
The patterns
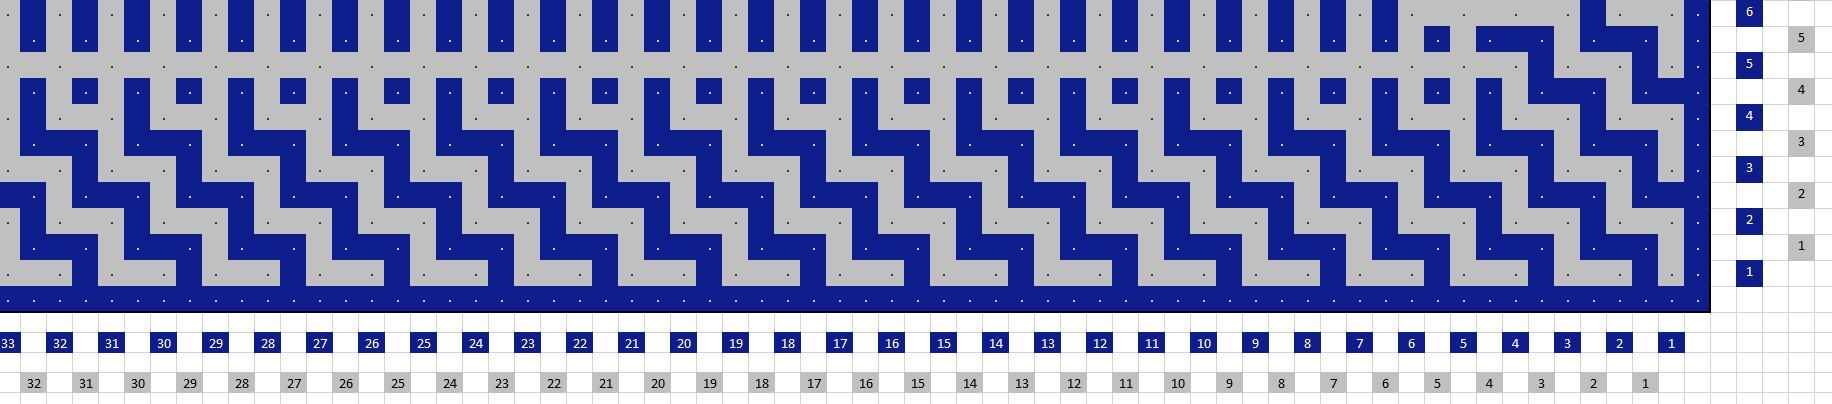
Click here to download the pdf with the charts and the written pattern.
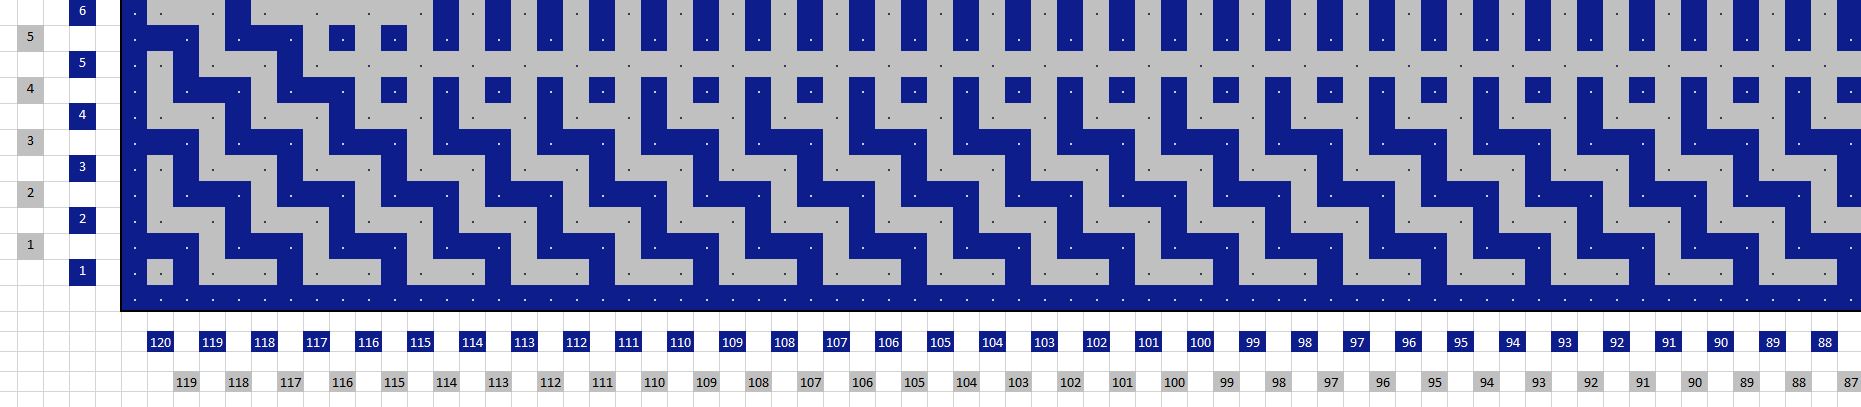
For the start I will also show the charts here. These are the charts for the front. Click on the small charts to see the bigger charts.
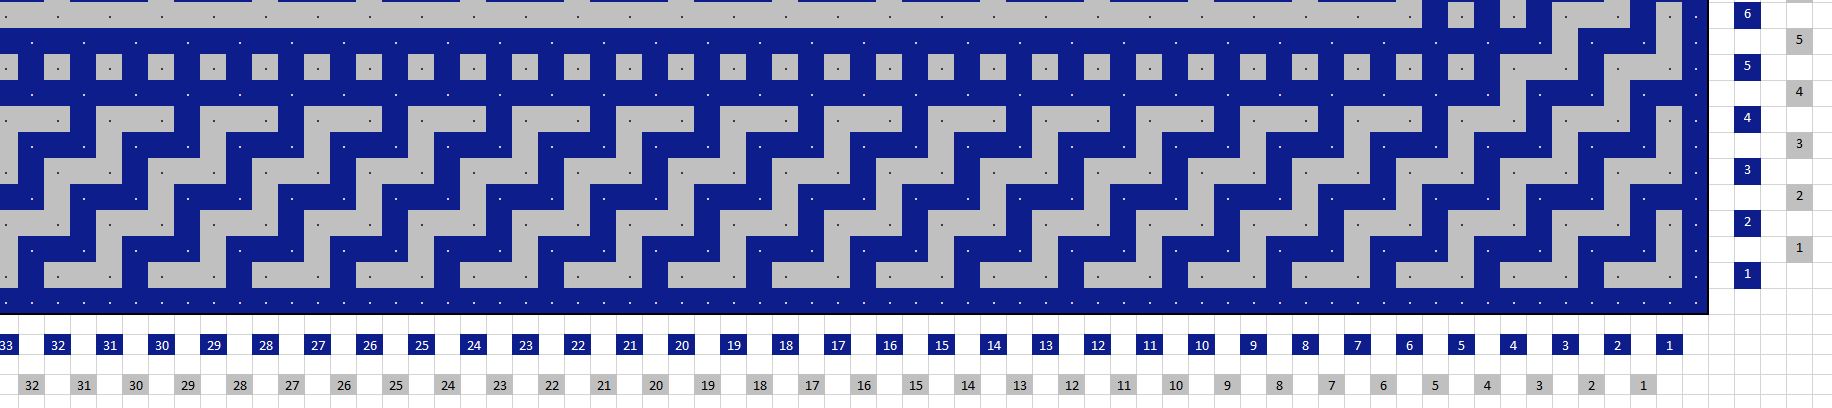
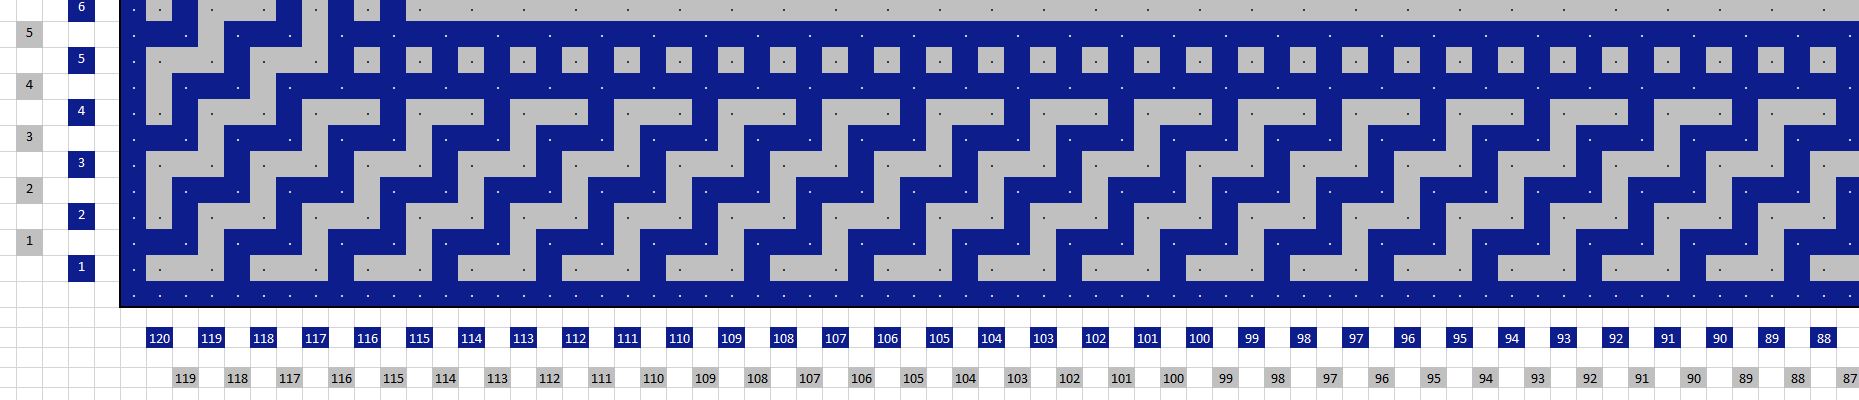
The charts for the back.
Instructions for the setup
First a tip! This is the hardest part of the whole blanket. I do not say this to discourage you, but to take care you will take your time for this in a restful way. You will really manage to do this with all the instructions I give you, but take a cup of tea, put your mobile away, send the kids to school, and have your partner take a long walk outside, but please do this with a restful mindset. So relax!
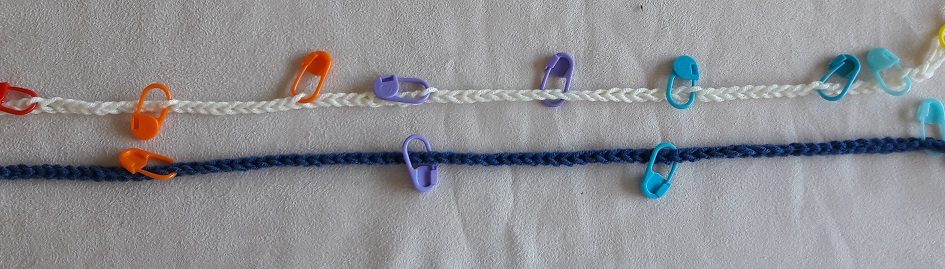
Color 1
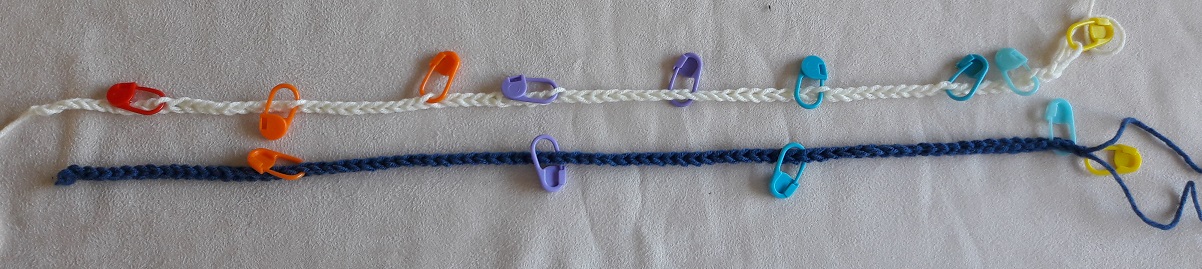
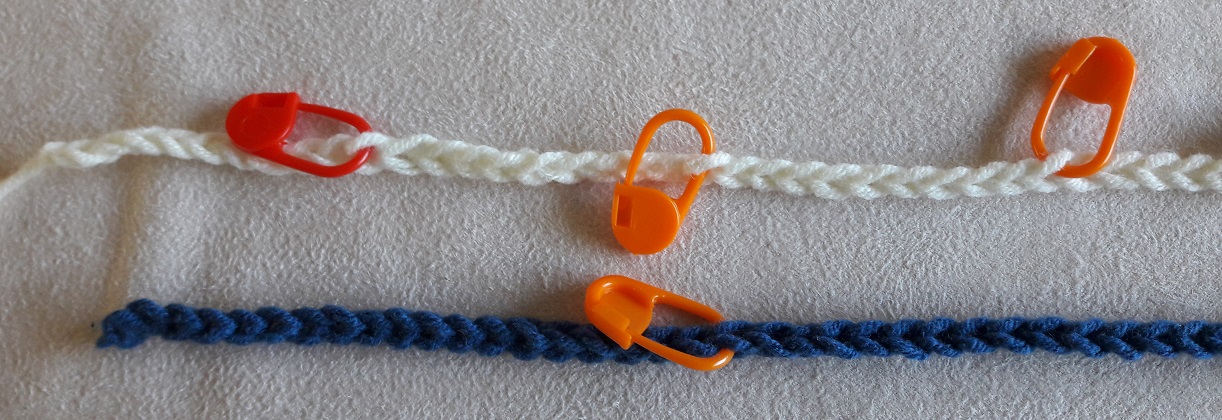
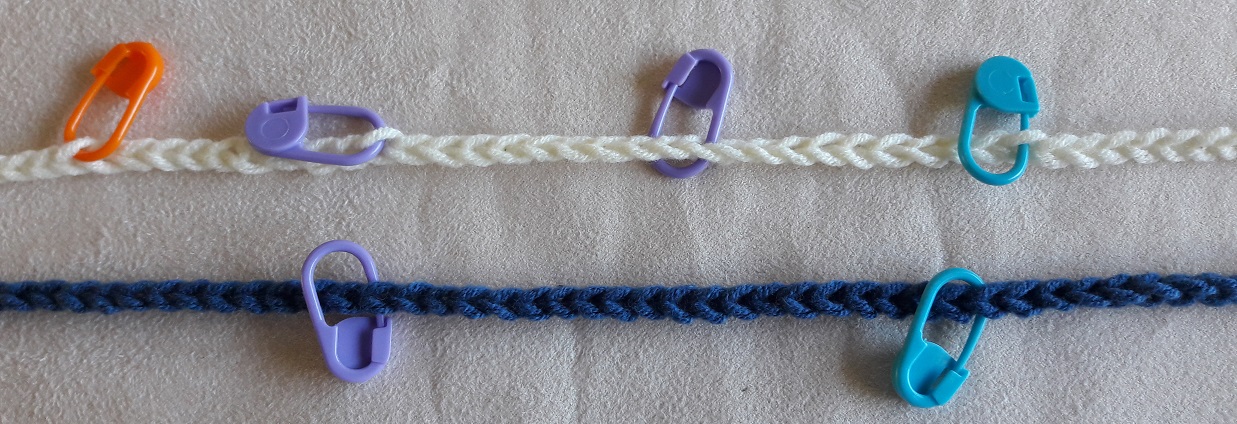
The pattern for the outside is 120 squares wide. So setup 120 x 2 + 1 = 241 stitches in color 1. Use chain stitches or the long tail method that I showed with the practice piece. The long tail method has my personal preference. You will need a thread that’s 3.5 meter long.
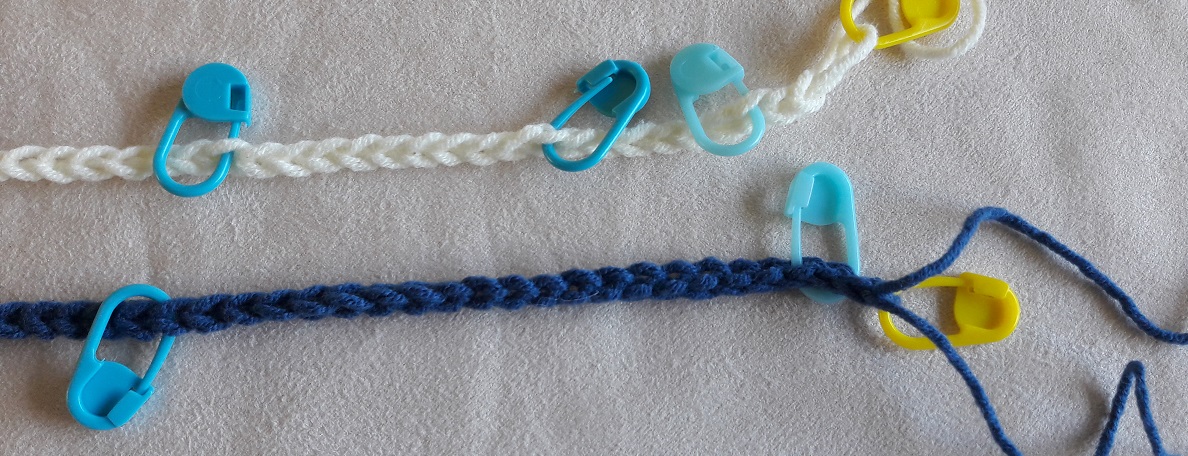
Place a stitchmarker in every 20th stitch: in stitch 20, 40, 60, 80, 100, 120, 140, 160, 180, 200 and 220. You don’t have to put a marker in stitch 240, but do put one in stitch 239, because you will make your 2nd double crochet there (compare this with the practice piece, you will do the same actually). If you have them, use stitchmarkers in different colors. In the pictures after this (where I did a little piece as an example) you can see how I did that.
With the long tail method it’s not really necessary to mark every 10th stitch. With this way of setting up it is so clear to see where to insert your hook, I found it superfluous to do so. But if you prefer to do it anyway, please do so!
Color 2
The inner side in color 2 is 1 square shorter again. So make a chain row of 2 x 119 + 1 = 239 chain stitches in color 2. Don’t use the long tail method for this!
Do mark every 10th stitch here, because it’s easier to make mistakes with this one. Mark stitch 10, 20, 30, and so on, until stitch 230. And place a marker in stitch 237 also. Here you actually do the same again as with the practice piece. If you use stitchmarkers in several colors, then use a way of color coding to match it all up. Look at the pictures how I did this. This is just another way of checking again.
Row 1 of part 1
Click here to go to the page with the tutorial for row 1
Video’s