
This wrap is really supersimple, and with the method I will teach you it can’t go wrong. The pattern itself is very easy to do, because it only consists of double crochets (US-terminology) in a simple short repeat that will be repeated each row. By using stitchmarkers in a clever way you can take care you will hardly make mistakes. And that’s very nice when you make a very wide wrap, because you don’t have to frog long long rows.
You can use yarn in a plain color, but it’s more beautiful to use a yarn yarn with long color changes. This makes the waves stand out better. The effect depends of course on the lenght of the color changes, and if you make a wide or a small shawl or wrap. You could also use several different solid colors of yarn each row or repeated over a couple of rows. You will have to do a lot of hiding ends, unless you do repeats in such a way that you can take the yarn alongside of your work. So, a lot of possibilities.
I used a yarn cake of a cheap brand for this wrap. A nice soft yarn, that only costed me about 9 euros (in total). So if you don’t have much money to spend, this is often doable. And you can enjoy it for a long time.
I will give the details of the wrap you see here in the tutorial, but you can easily adapt the pattern for whatever you want to make with it. I also did a crab stitch (or also called the reverse single crochet) around the entire shawl, so it has a lovely border around it.
Video
I made a video of how to do this crochet pattern, that you can see on my YouTube channel through the link here. See further below the videolink to see the pattern on this page.
What do you need for the wrap
- Used yarn: Yarn cake (200 grams = 7 ounce)
- Amount used: 600 grams (21 ounce).
- Crochet hook: 5 mm (H) for the pattern and 5.5 mm (I) for the cast on. Adjust this depending on the yarn you use!
- A lot of stitchmarkers!
Sizes of the wrap
- Width: 180 cm (70 inch)
- Heigth: 50 cm (19.5 inch)
Used stitches
- l = chain stitch
- dc = double crochet (UK treble)
- dc2tog = double crochet 2 stitches together
- crab stitch of reverse single crochet stitch
Important info about the stitches and some tips
- Use stitchmarkers! This is really handy with this pattern to prevent mistakes. Especially when you do not have much experience crocheting! But even if you do have a lot of experience, it is just nice to notice where you are with the repeats, so you don’t have to pay attention all the time. I used them myself all the time, simply because I wanted to avoid having to frog 2 long rows. I will show in the tutorial where to put them in a smart way.
- Count your stitches after each repeat. The pattern repeats over 12 stitches. Just count after 1 repeat (or a number of repeats), so you will see quickly if you’ve maybe forgotten to do an increase or a decrease.
- Look at your stitches to learn to recognize them. How does a stitch actually look? You don’t actually need it with this pattern, but it can help for other projects you will do in the future, especially when a pattern isn’t completely written clearly. So you can see how something has to be done yourself, or for tracing where you were.
- Make a small sample before you start your project. In this way you can see what size of hook to use for the chain row, if it needs to be larger or if you have to crochet more loosely, and you can measure how wide the repeat is and how many repeats you need for your project.
The pattern
Click on the pattern drawing for a bigger version.
![]()
Cast on row
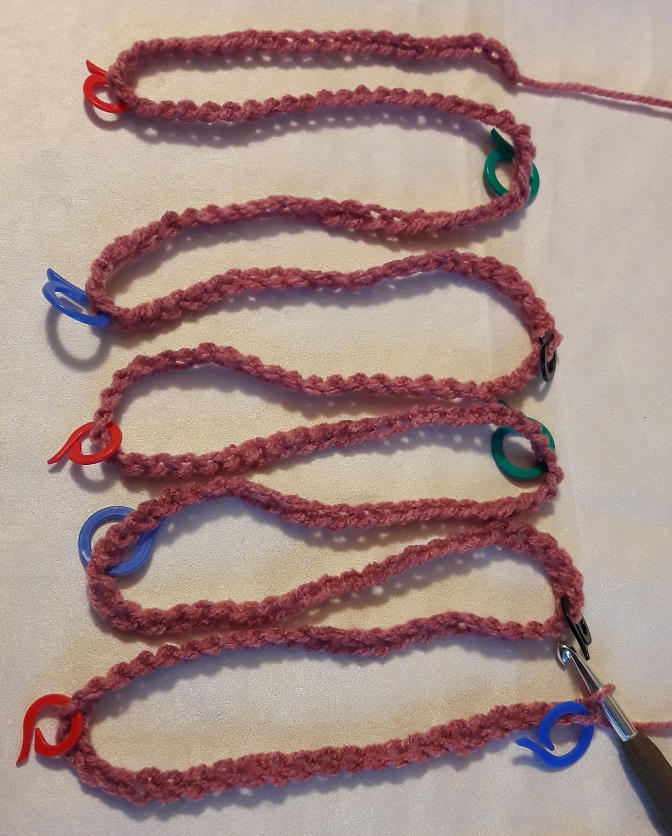
Make a row of chain stitches in a multiple of 12 stitches. Mark each 12th stitch with a stitchmarker. For the wrap I made 240 stitches.
Pattern row 1
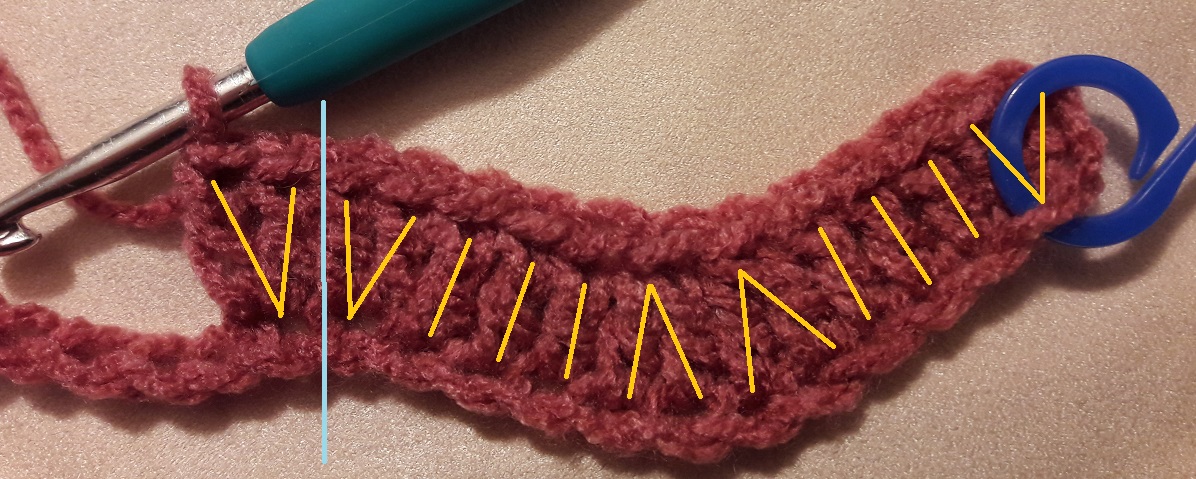
The pattern repeats itself over 12 stitches. Actually it’s even only 6 stitches (or 5, depending on how you count them) that are mirrored. On the tops you will do 2 increases next to eachother, in the valleys you will do 2 decreases, and in between there are 3 double crochets. Each repeat starts and ends with 1 increase.
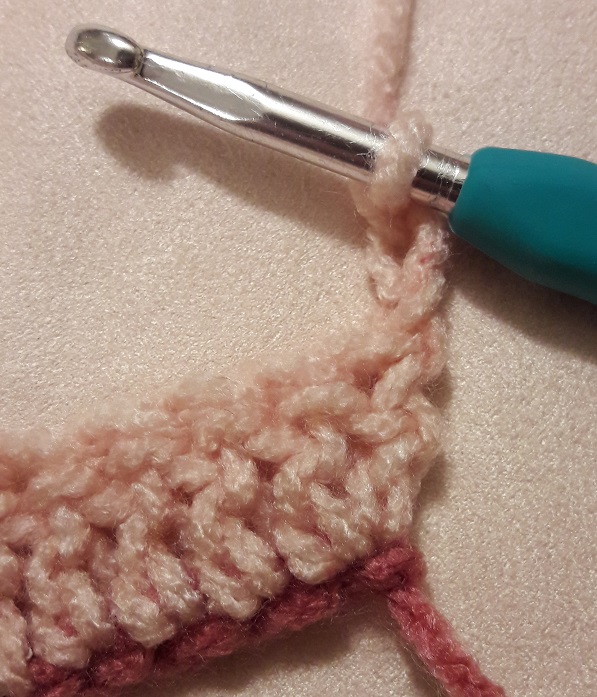
You will start with making an increase, by making 2 double crochets in the first stitch of your chain row. At the start of each row you will do this by making 3 turning chain stitches (they count as 1 double crochet), and next you make a double crochet in the stitch with a stitchmarker. This is the 4th stitch counted from your hook.
Next you will make 3 double crochets in the next 3 stitches of the chain row.
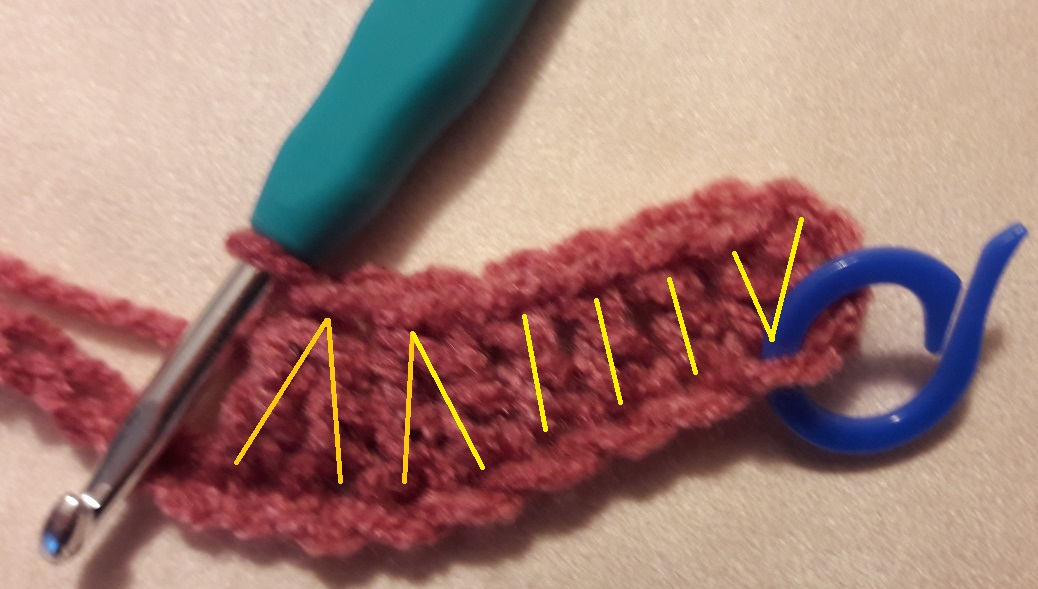
After this you will do 2 decreases by making a double crochet 2 together twice. So you will decrease from 4 to 2 stitches.
The 2nd decrease you just made is actually the start of mirroring the pattern, because now you will do 3 double crochets again in the next 3 stitches and an increase by making 2 double crochets in the same stitch.
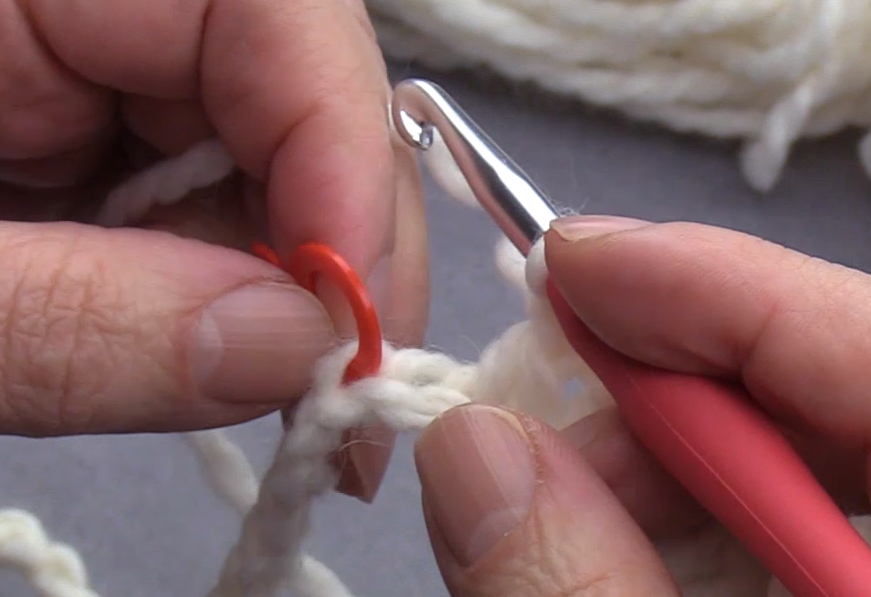
I have a screenshot from the video for you here, because I want to show you how to cleverly use the stitchmarkers at this point. I forgot to do that in the photoseries with the darker yarn 🙁 .
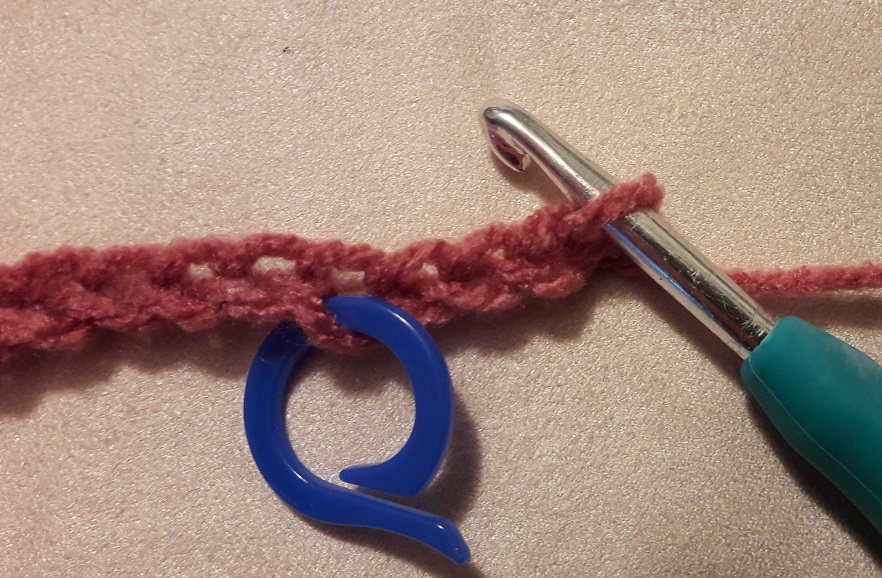
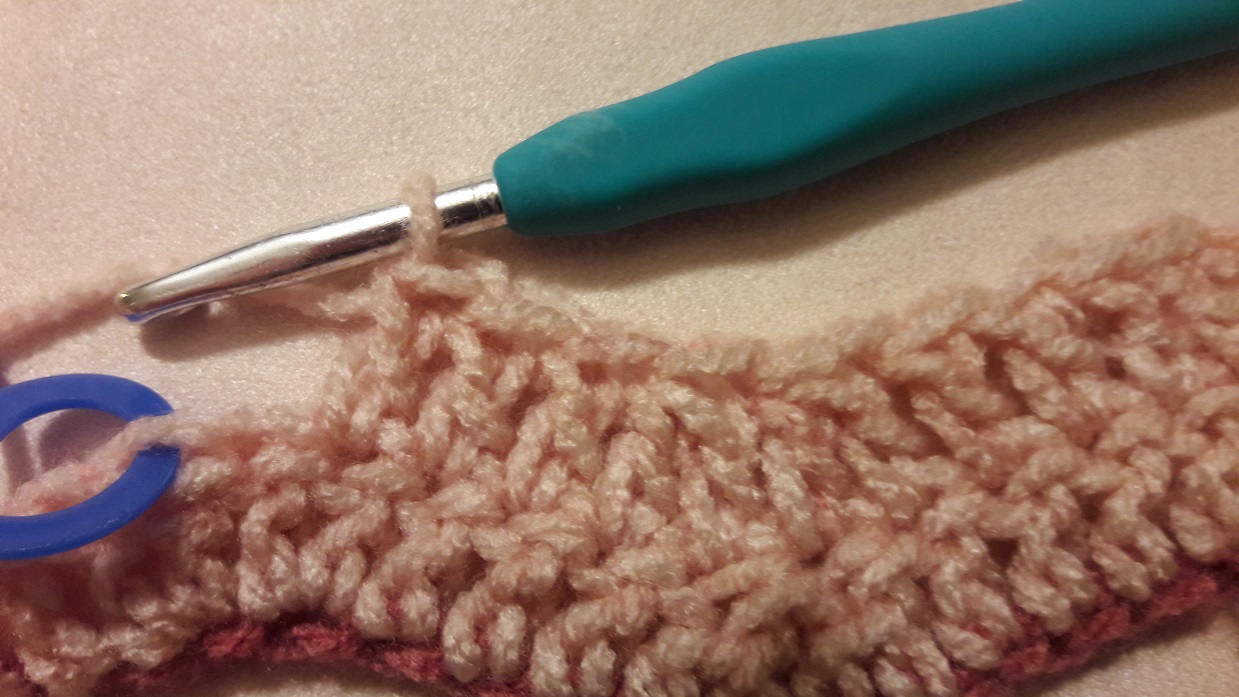
You see the red marker here in the chain row. This is a marker that sits in a 12th stitch (12, 24, 36, 48 and so on). It marks the place where a new repeat has to start in the next row. Just before the stitch with the marker you see 1 chain stitch left. This is the place where the last increase of the pattern repeat should be done. It works like kind of a reminder telling you: ‘hello, you’ve almost finished a repeat again, 1 more increase to go, and start with a new repeat after this!’.
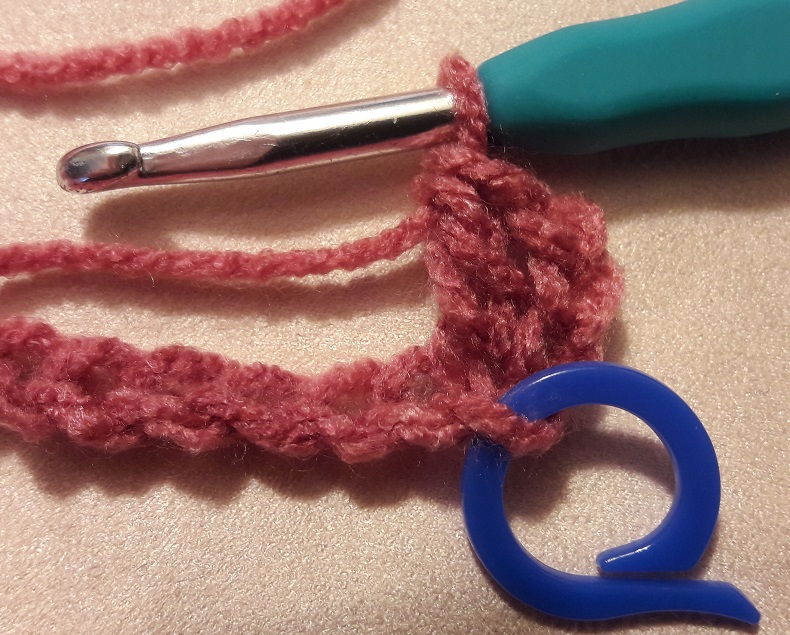
When you have done the first increase in that last stitch before the marker, you will take the marker out of the chain row, and move it to the top of the last double crochet you made. You now marked the 12th stitch of the repeat, and it serves as a flag for the next row!
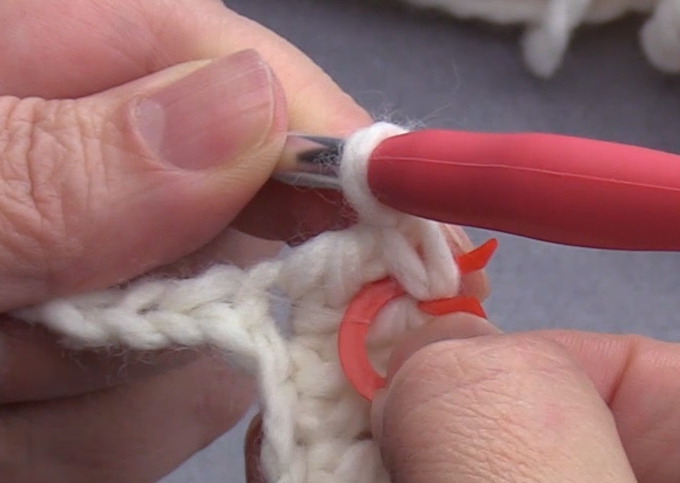
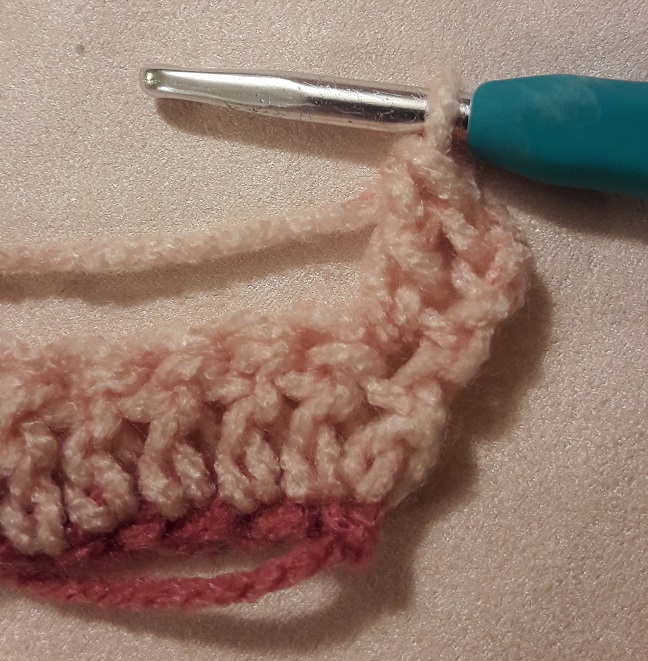
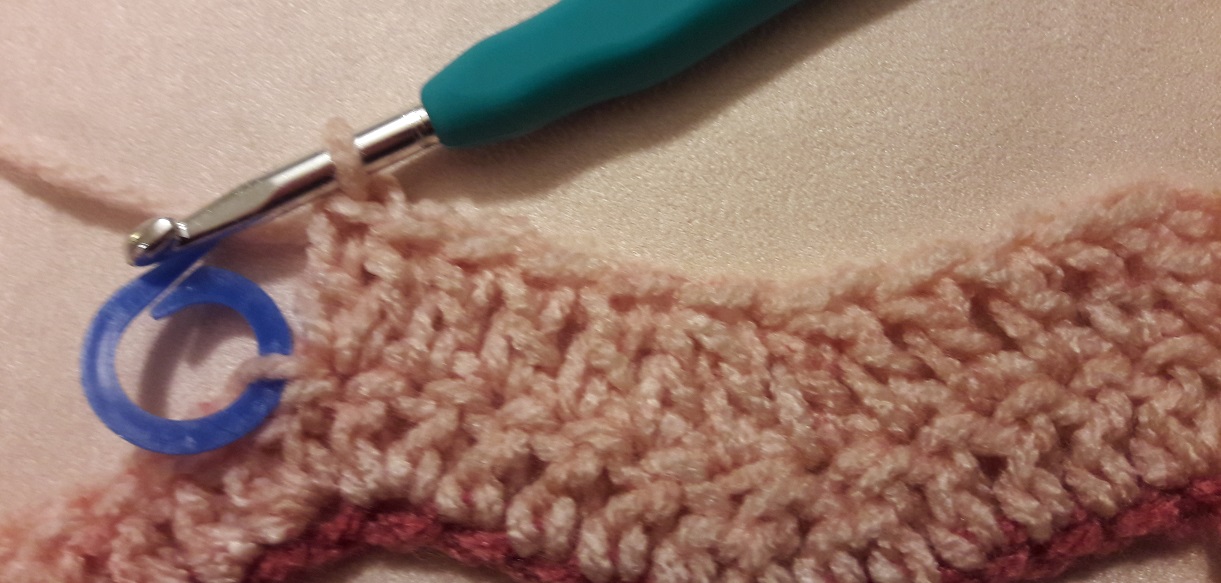
In the picture with the increases you see I did 2 increases. The 2nd increase is the start of the next repeat of the pattern.
Count your stitches after each repeat. You have to get back to 12 stitches after each repeat, because you did a decrease twice, but also did an increase twice, so the number of stitches stays the same!
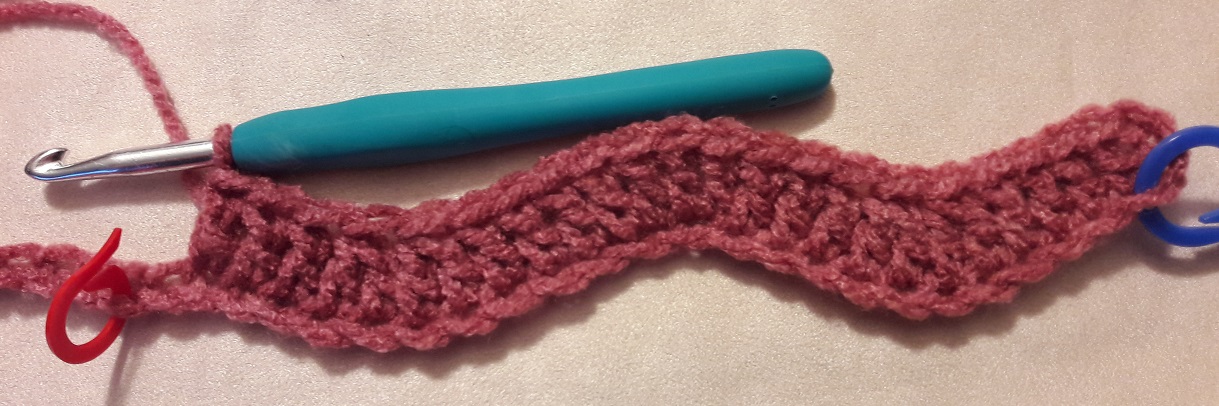
Repeat the wave pattern as many times as you need for your project. Here I will also show some pictures of the end of the first row. You see the shape of the wave already starting because of the increases and the decreases. You see the blue marker in the last stitch of the previous repeat.
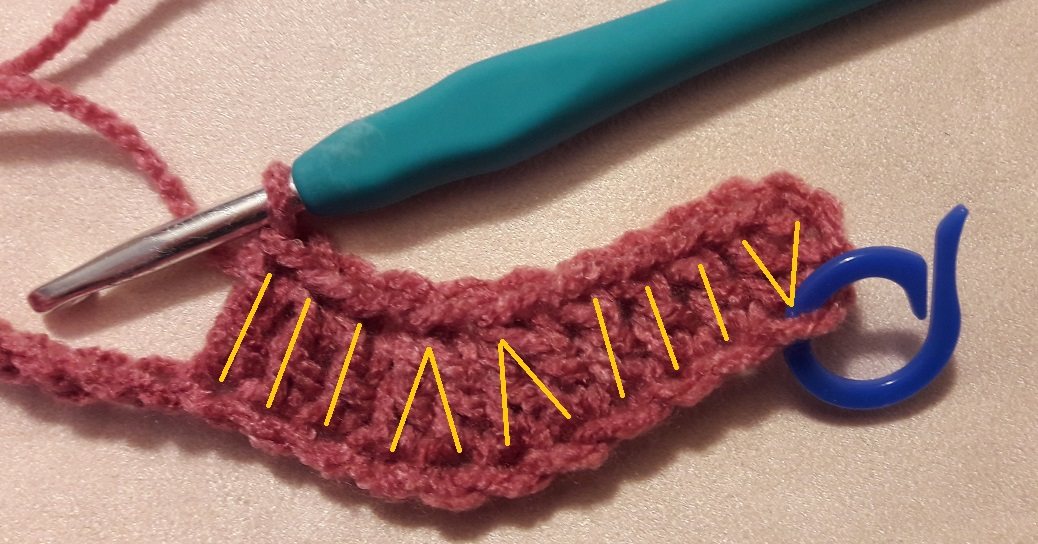
Pattern row 2
This row is actually just the same a pattern row 1.
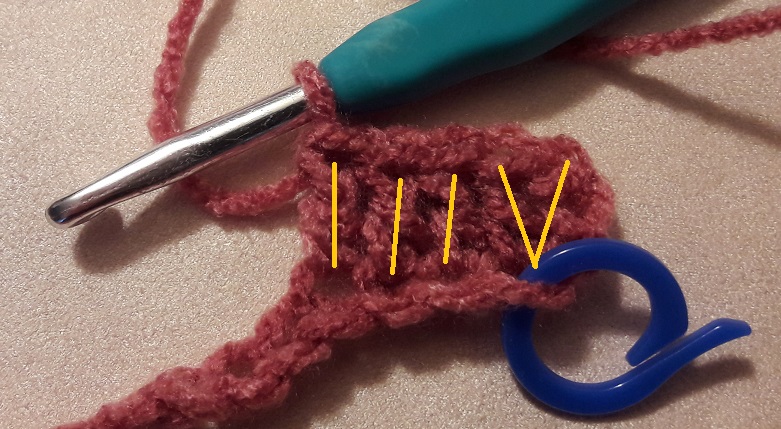
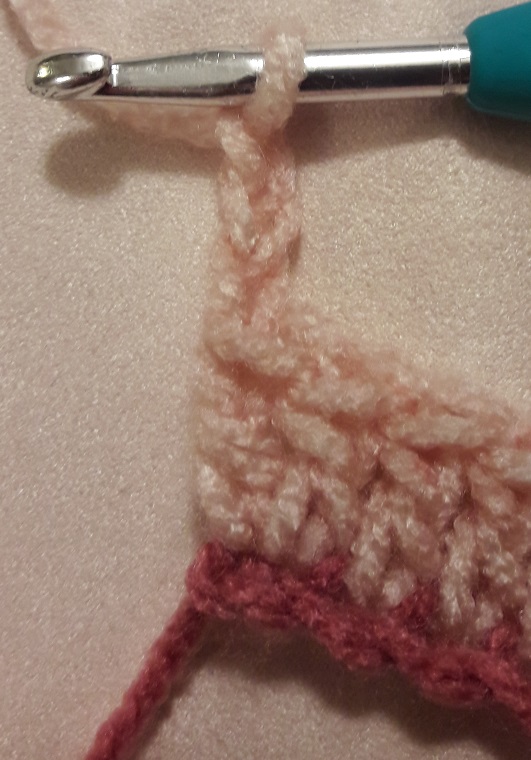
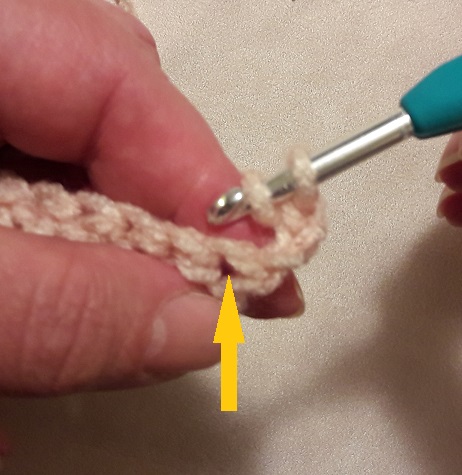
You start again with making 3 turning chains and a double crochet right away in the first stitch of the previous row. It doesn’t matter by the way if you do 3 chains first and than turn your work or the other way around. Pay attention: you start with an increase, so the first double crochet you make has to be done in the first stitch! I marked that with the yellow arrow.
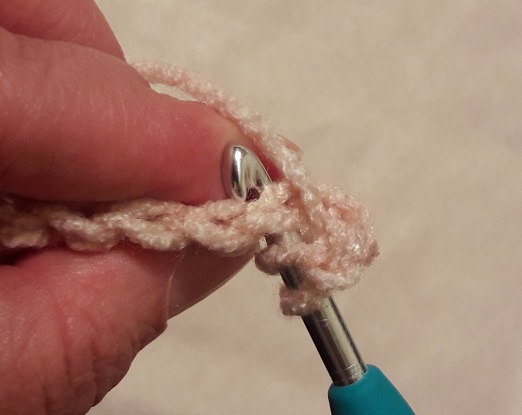
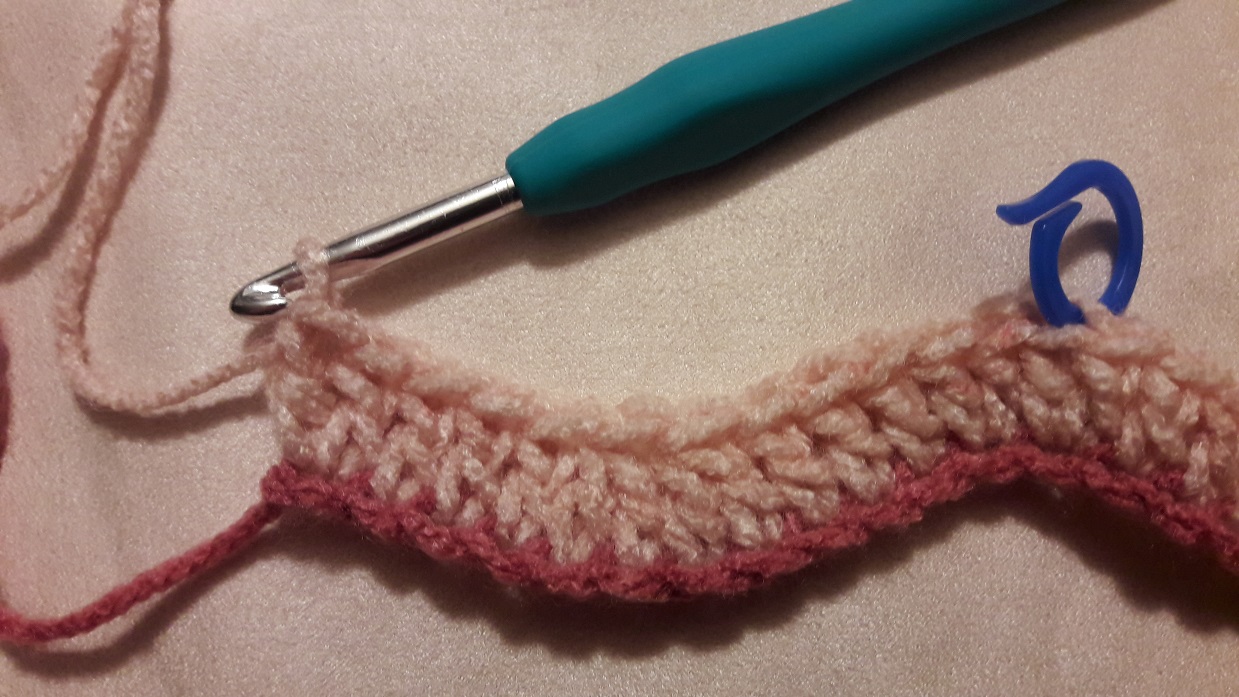
For my wrap I worked each time under the 2 legs of the V-shape of the stitches of the previous row. You can also choose to work through the front loop only or the back loop only. And try doing something crazy and make variations on it 🙂 . Who knows what you will end up with. Okay, try this on a sample first 🙂 .
Here I will show some more pictures to end this tutorial: the first increase, just before an increase, the aha-place where you will be reminded that you’ve come to the last stitch of your repeat, and the picture where the last increase of the repeat is made. This is again the moment that you move the marker over from the previous row to the top of the last double crochet you made. And of course count again if you’ve done 12 stitches!
Finishing
I made a crab stitch around the entire wrap. The sides look just a bit better this way, and because you go all the way around the shawl it gives a nice equal look at all sides. I didn’t show that on the video, and I don’t have a video for it myself, but I definitely plan to make that one day!
Wash your shawl or wrap and block it. And enjoy your work you’ve done and your nice result.