
Introduction
This is a sequel on the 2 previous tutorials about how to do a crochet border around your weave. You can find the first one, where I used slip stitches, here, you can find the tutorial where I used single crochets here. I use the US terminology, for the UK it’s double crochet. Take a look at these tutorial first, because they give a much more detailed explanation with a lot more pictures and drawings. This tutorial is an extension, to show you how to do 4 stitches per corner. You have 2 flavors in that, that I will show both.
2 Or 4 stitches in the corner, that’s the question
In the previous video I already mentioned shortly if you should do 2 or 4 stitches in a corner. With crocheting squares, like granny squares, you have to make extra stitches in the corners, because your piece gets bigger with each round. But with crocheting a border around your weave that’s not always necessary, because of the drawing in of the weave the moment it gets off the loom. It’s definitely not necessary when using slip stitches, and with a border with single crochets it just depends a little bit. It isn’t really necessary, but the corners do curl to the inside a little bit. If you don’t want that, you can do more stitches in the corners. So, you will get extra stitches per side, so it’s important that you make a consistent choice for you project which kind of border to do. Each type of border has his own height and it’s own number of stitches.
When making 4 stitches per corner, you will 2 extra stitches per side!
4 Single crochets, or 2 single crochets plus 2 chain stitches?
I will show both, but I will give it away now: 4 single crochets in a corner hasn’t got my preference. In the previous tutorials I already told that I’d rather not make too many stitches in a corner. The corners get smaller when the weave is off the loom, and if you’ve done too many stitches through them, then the threads of crocheting have to go somewhere. The corners will get distorted and stretched, the weave will get out of balance in the corners: I do not like that. But, maybe you do like it, and I will show it, all the way at the end.
But now first: 2 single crochets plus 2 chain stitches in a corner.
The start
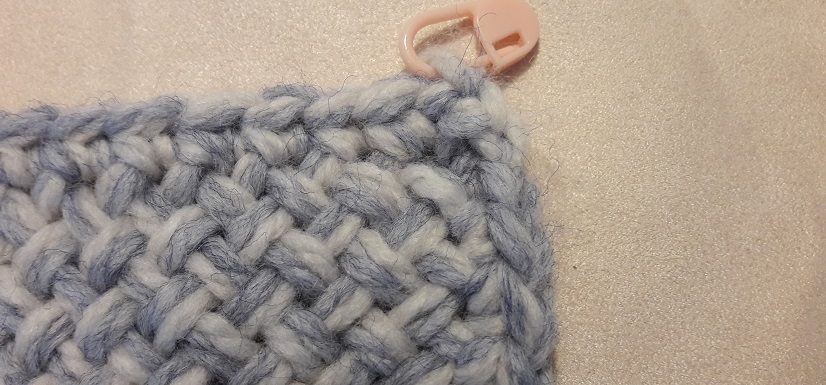
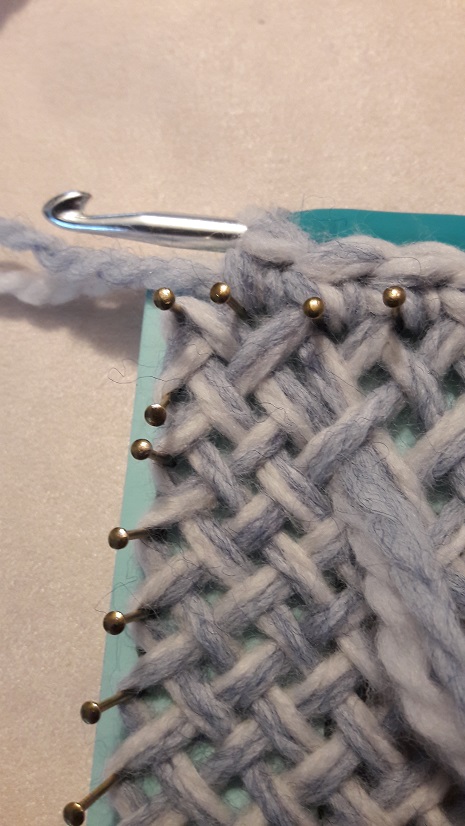
The start is just a bit different than with the previous 2 tutorials. There you started with making the first stitch of side AB, in corner A. Now you will also start in corner A, but you will first make 2 stitches that have to be counted for side DA.
Your first stitch is a single crochet in corner A. Rememer this already: this is the second to last stitch of side AD when you’ve come all the way around.
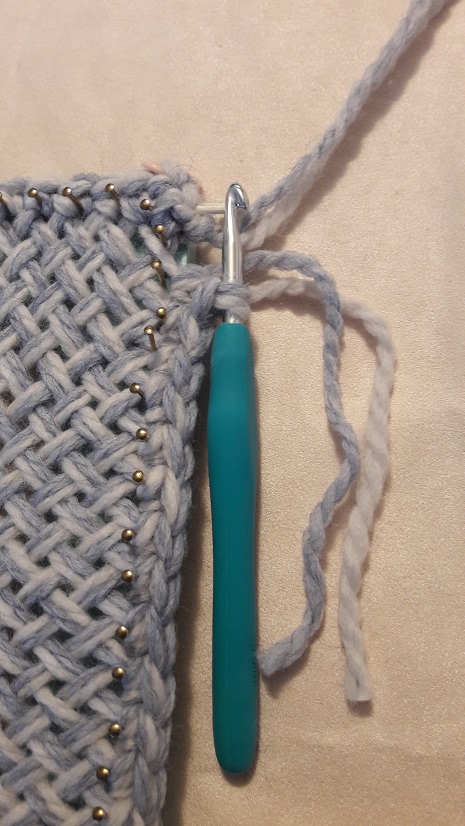
Next you will be making 2 chain stitches. I will show you in the next pictures how to do that.
Wrap the yarn around the hook.
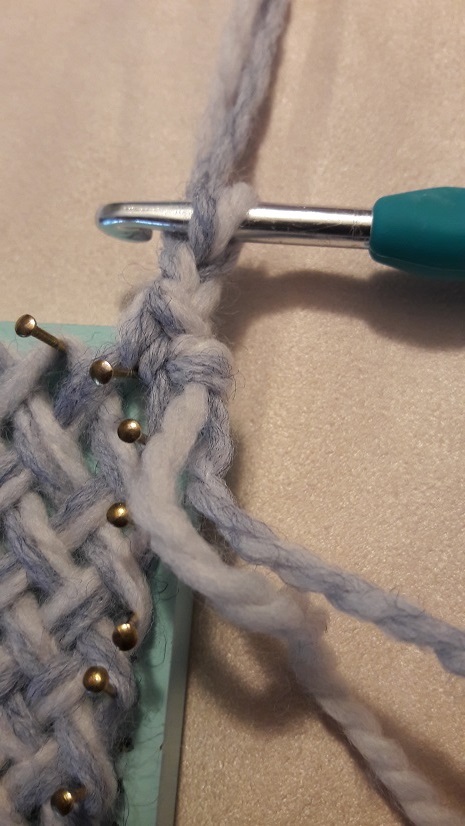
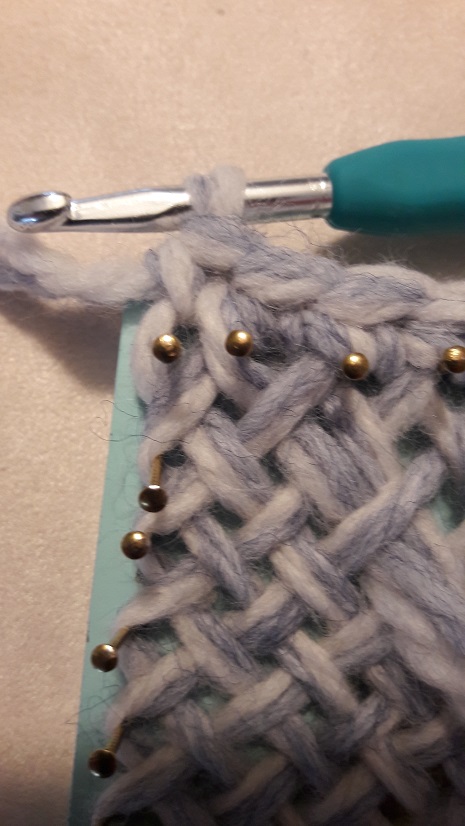
Pull the yarn right away through the loop on your hook. You now made 1 chain stitch. If you look closely, you see 2 V-shapes on the side. This stitch is the last stitch of side AD.
Now you will make your 2nd chain stitch.

Wrap the yarn around the hook again.
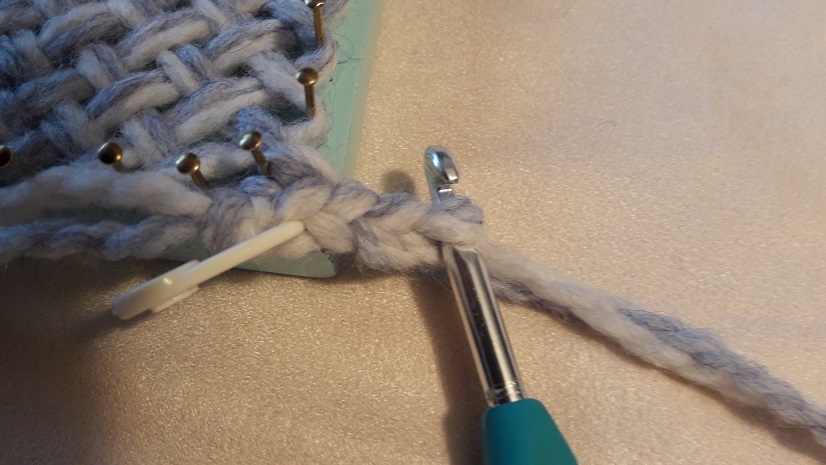
Pull the yarn through the loop on your hook again. You now have made 1 single crochet and 2 chain stitches. In the picture you see 3 V-shapes. I marked the first stitch, the singe crochet, with a stitch marker, for later.
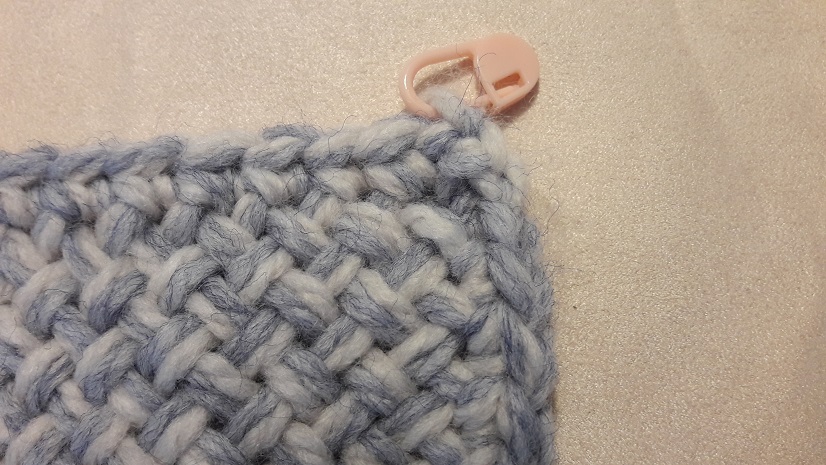
The 2nd chain stitch you made, is the 1st stitch of side AB!
Mark this stitch with a stitch marker, or a piece of scrap yarn, because it facilitates counting, and it’s handy later when attaching pieces together. I didn’t do it on these pictures (yet), but make it a habit. Especially when you don’t have much experience!
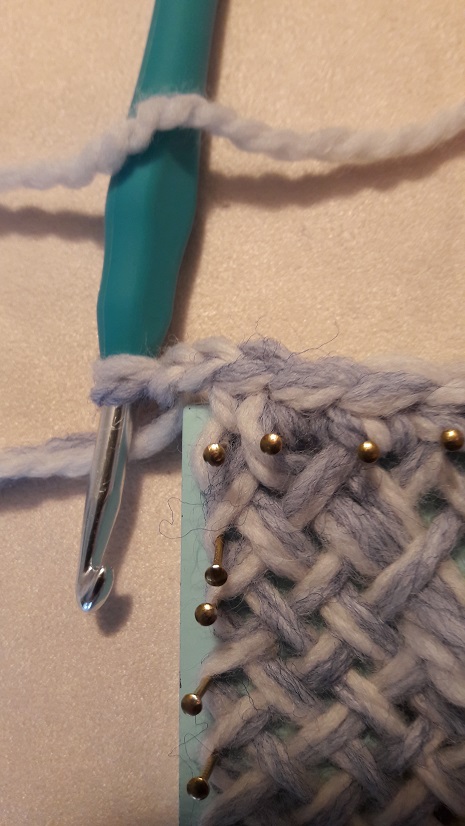
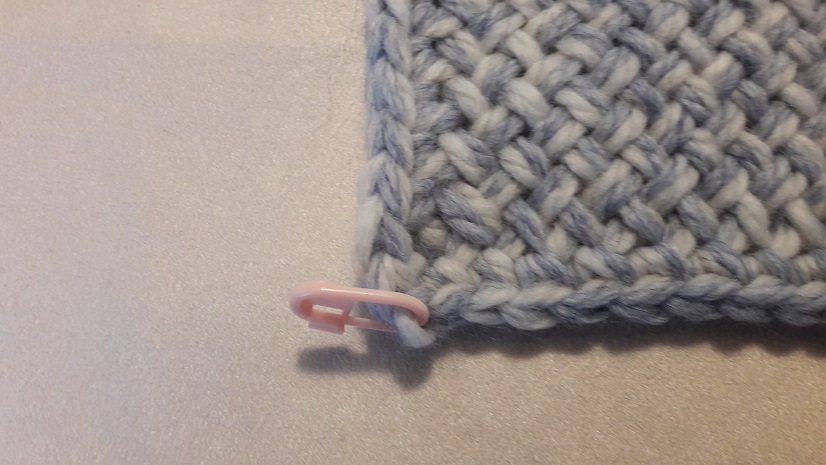
Now we will complete corner A by making the 2nd single crochet in the same corner loop.
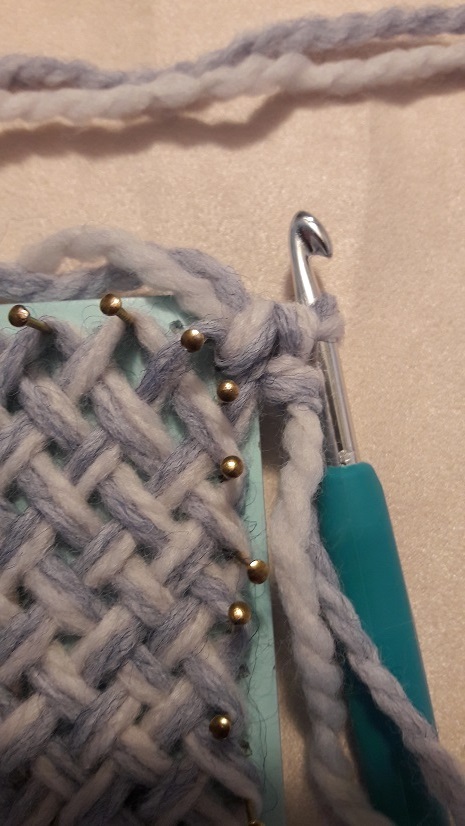
Corner B
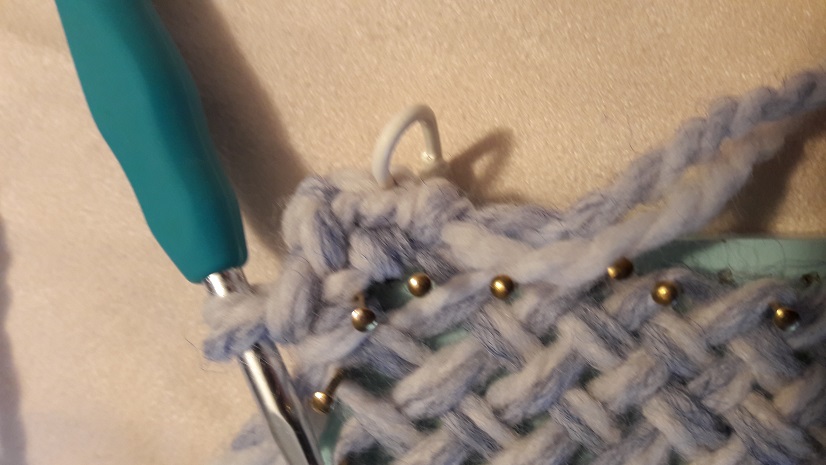
Look at the previous tutorials how to deal with the corners. I’ve come here just before corner B, where I made a temporary loop around the corner nail.
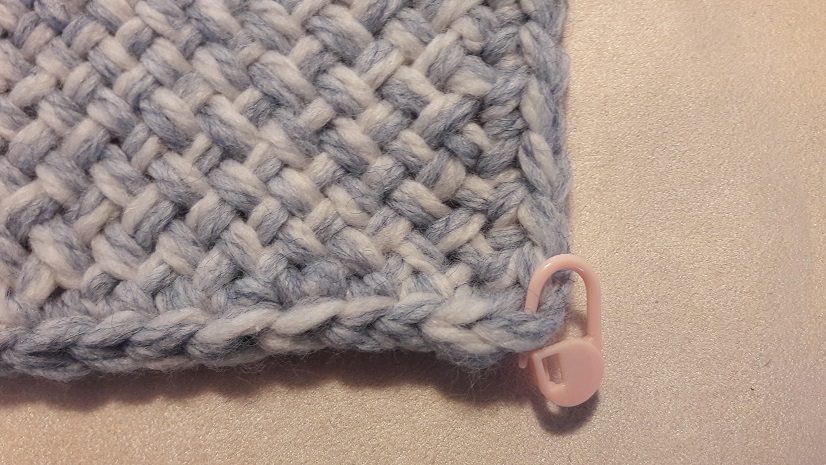
I crocheted around 23 nails now: the corner nail in corner A, and the 22 nails after that. I also did a chain stitch for this side (the second chain stitch that was made in that corner), so I made 24 stitches now for side AB. And we have to have 26 in the end.
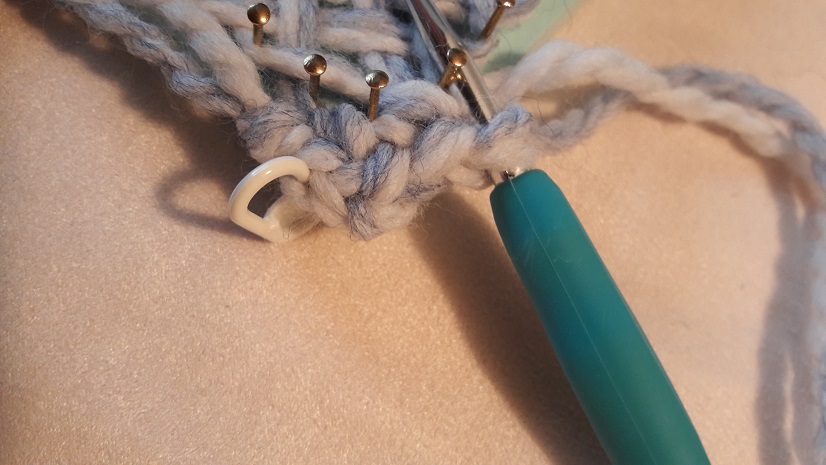
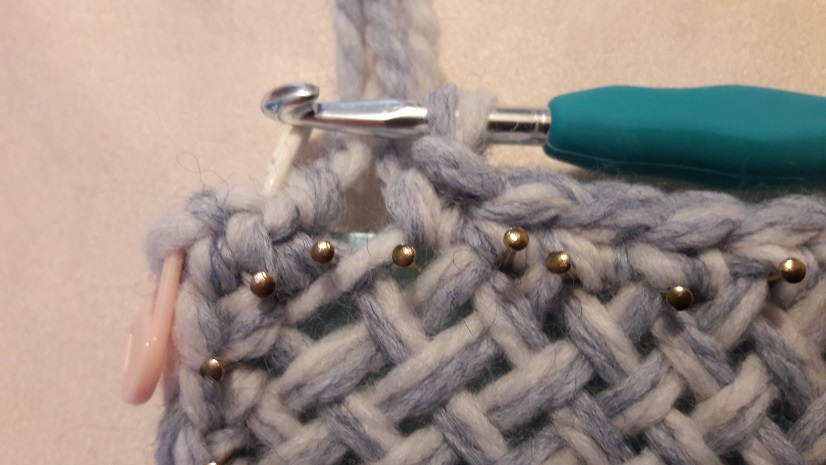
First make a single crochet in corner B. This is stitch 25.
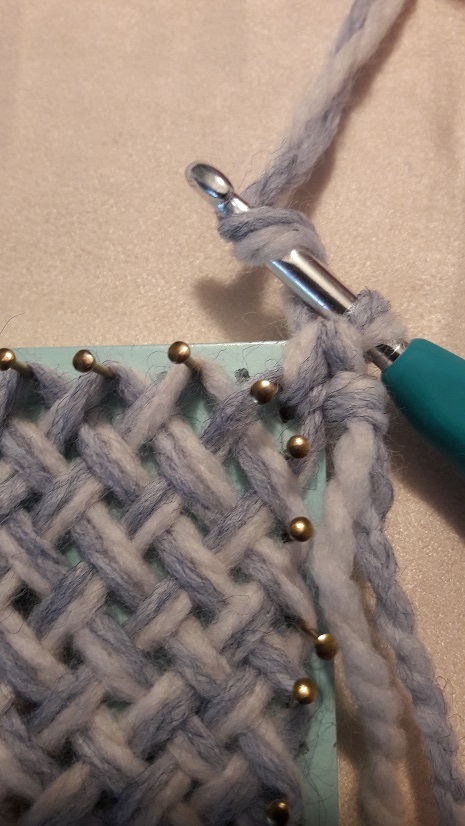
Next make 2 chain stitches in corner B. Here the same again: the first chain stitch counts as the last stitch of side AB (stitch 26), the seocnd chain stitch count as the first stitch of side !

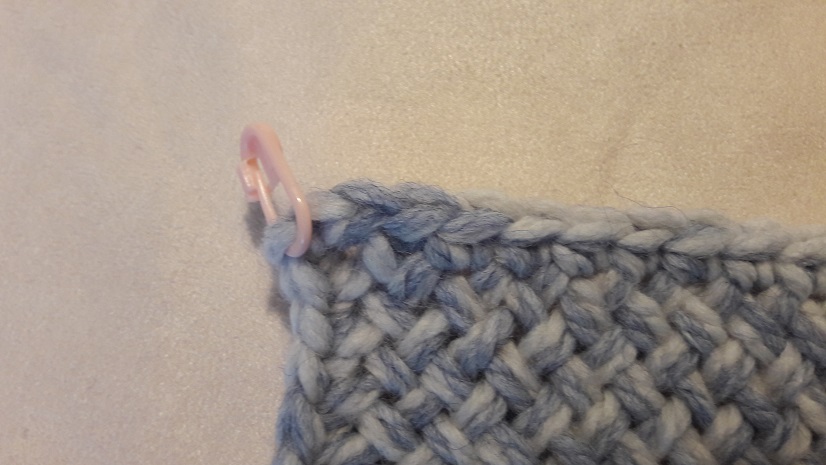
Now make the 2nd single crochet in corner B. This is the second stitch of side BC! I marked de 2nd chain stitch, stitch 1 of side BC, with a stitch marker.
Corners C and D
In the corners C and D you work just like at corner B: in the corner loop you make 1 single crochet, 2 chain stitches and 1 single crochet. Mark the 2nd chain stitch each time, so you know that’s the first stitch of the new side.
Ending
The ending is also a bit different now. But that only concerns where to do the last stitch with a needle (compare this with the previous 2 tutorials). You started all the way in the beginning with the last 2 stitches of side DA, in corner A.
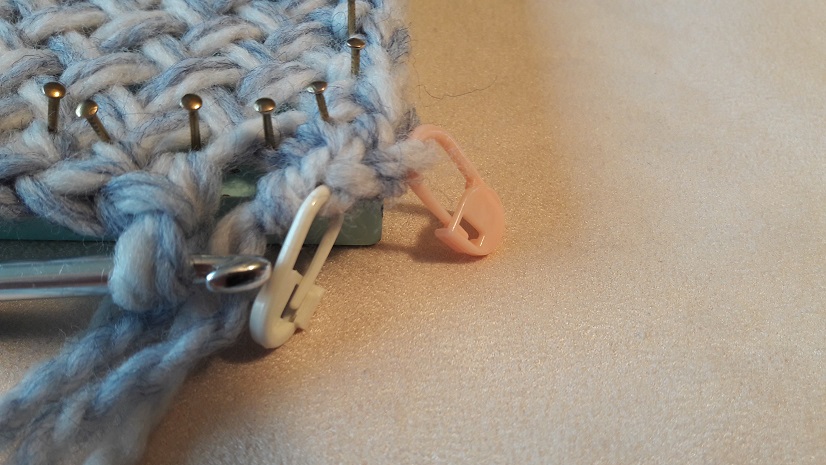
In the first picture I did the last stitch around the nail just before corner A, so, in the drawing, this is nail 8.
On my weaving frame that means I started with making 1 chain stitch plus 1 single crochet in corner D, and next I made 21 single crochets around the next 21 nails. That makes 23 stitches in total. The 2 stitches that are made at the start have to be adde to that, so that makes a total of 25 stitches for this side. So we still are missing 1, and we will be making this with a needle. In the 2nd picture the first single crochet in corner A is marked with the white stitch marker, and that’s the stitch where we have to work through with the needle. I will show it again step by step with the pictures.
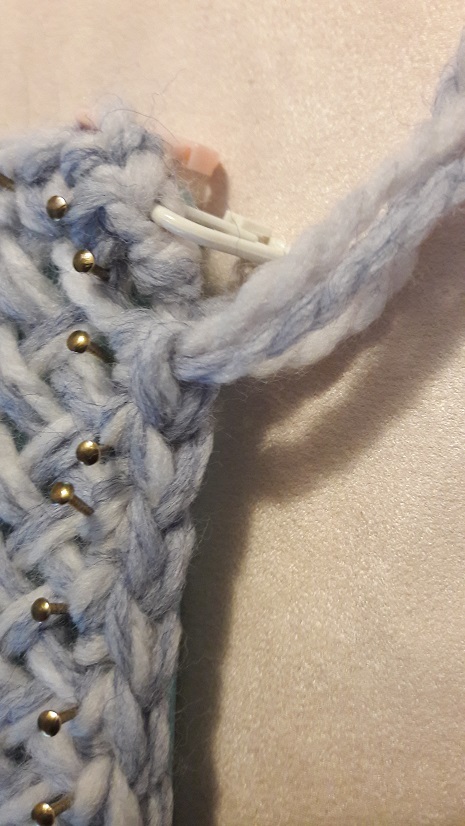
Cut the yarn and pull it through right away through the last stitch you made.
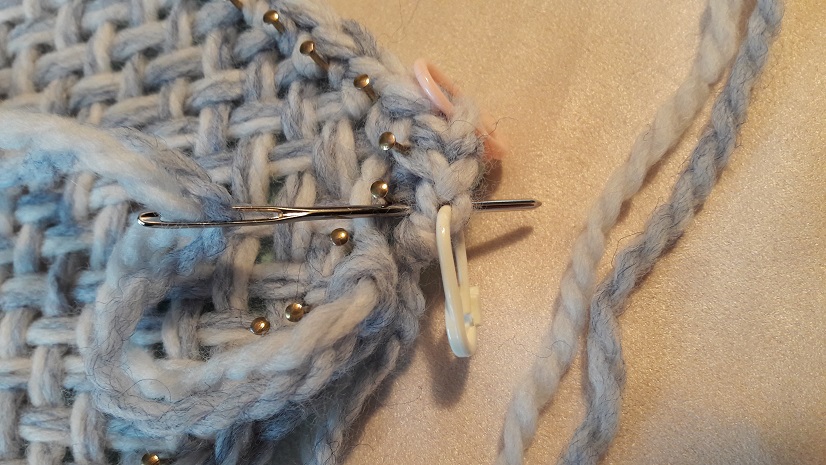

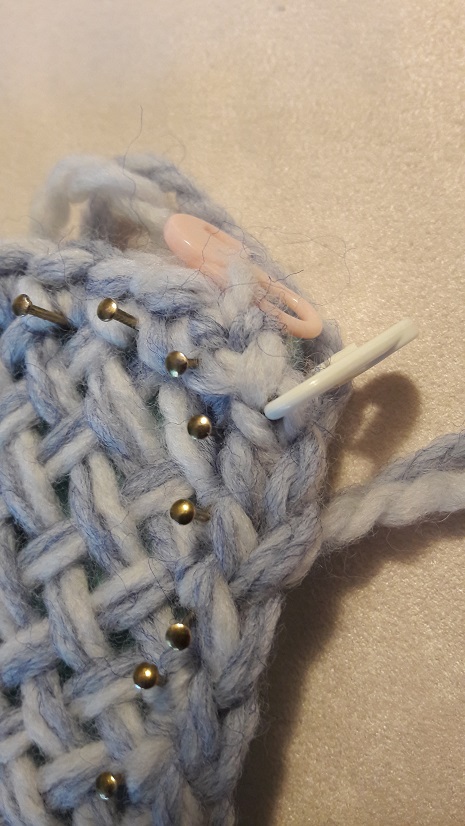
Make the last ‘stitch’ with the needle. Insert the needle into the 1st single crochet, under the 2 ‘legs’ of the V-shape, bring the needle back into the middle of the V-shape of the last stitch, and we are ready! Now there are 26 stitches on this side also. You can remove the marker there. In this case the white one, the pink one will stay in to mark the first stitch of side AB. This is handy later on when attaching other pieces.
This way we have again the same number of stitches, 2 more per side then when we did only 2 stitches in each corner.
The result
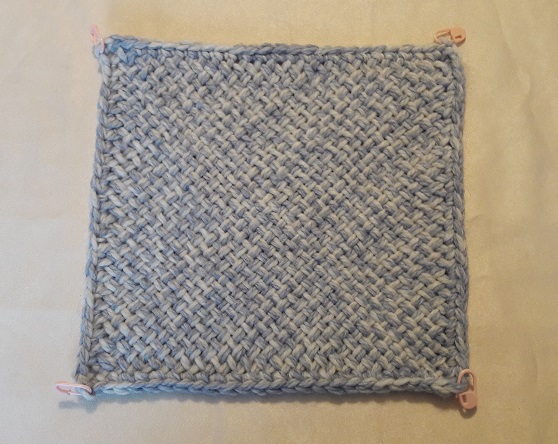
As you can see the result is very nice. There isn’t much difference with the result when doing 2 stitches per corner, without the chain stitches. The corners are lieing a little more flat. My conclusion is that it doesn’t matter a lot and that you choose the way you prefer.
Go to the next page with the buttons below if you want to see the result when you do 4 single crochets in each corner..