
The video’s
At the end of this tutorial are the links to the video’s that belong to this.
The tutorial
This tutorial tells you how to weave with a continuous thread on a pin loom. I will illustrate this as much as possible with pictures and drawings. The video’s of how to do this are also coming: I will add the links to this tutorial as soon as they are published. I’ve split up this tutorial in several pages, 5 in total, so go to the next page when you’ve gone through a page. You will find the buttons on the end of the pages!
You can find in the menu how you can make a pin loom very easily, or click here.
What do you need?
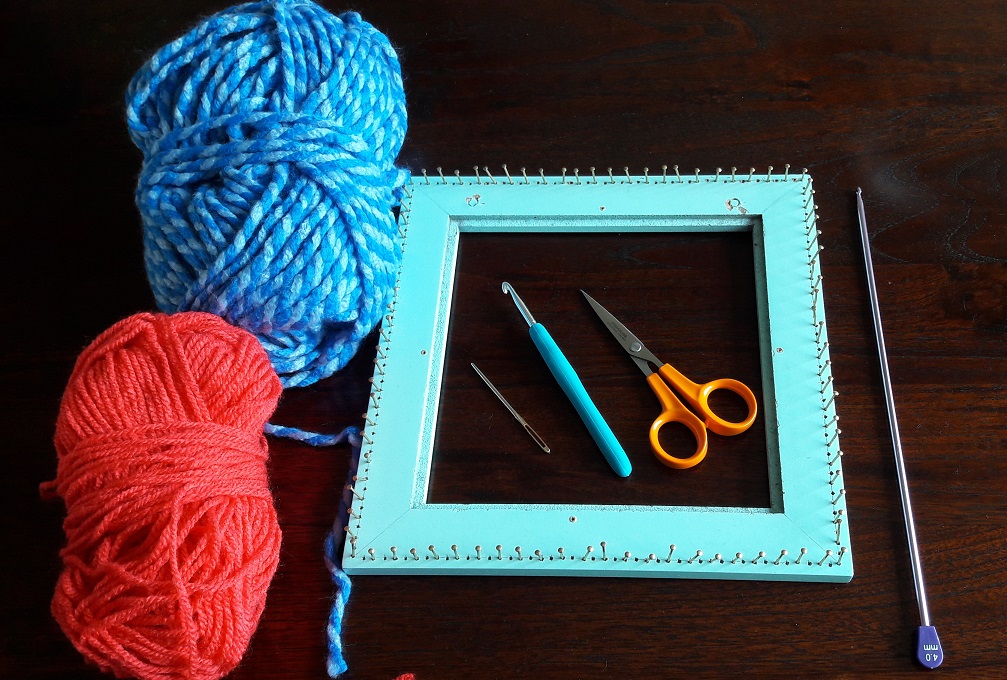
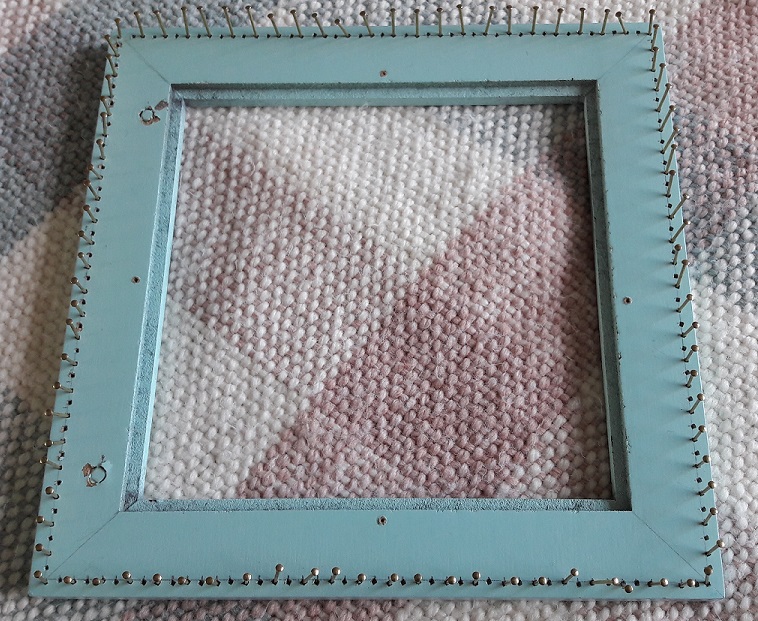
- Your pin loom (of course)
- Yarn: take a nice bulky yarn to get a close weave, but to try out the technique the first time, I advise to take a somewhat thinner yarn, for about needle size 6 (US) or 8 (UK). So you can easily see what you’re doing, and then later use other yarns
- A crochet needle
- A tunisian crochet needle, but it’s not really necessary, so that’s optional
- A blunt needle
- Scissors
A quick tip: take care not to wear clothing with holes in it, like a knitted or crocheted cardigan or sweater. The nails will grab your clothing, and that is very annoying! Not to mention it might get damaged!
I usually sit on the couch while weaving, with the loom in my hands and on my lap, but you can also sit at the table. Try what works best for you.
Before I start
Sounds a bit weird maybe, but I will first show you what weaving with a continuous strand of yarn is not! I will use the following drawing for that (click on it if you can’t see it clearly, it will show you an enlarged version):
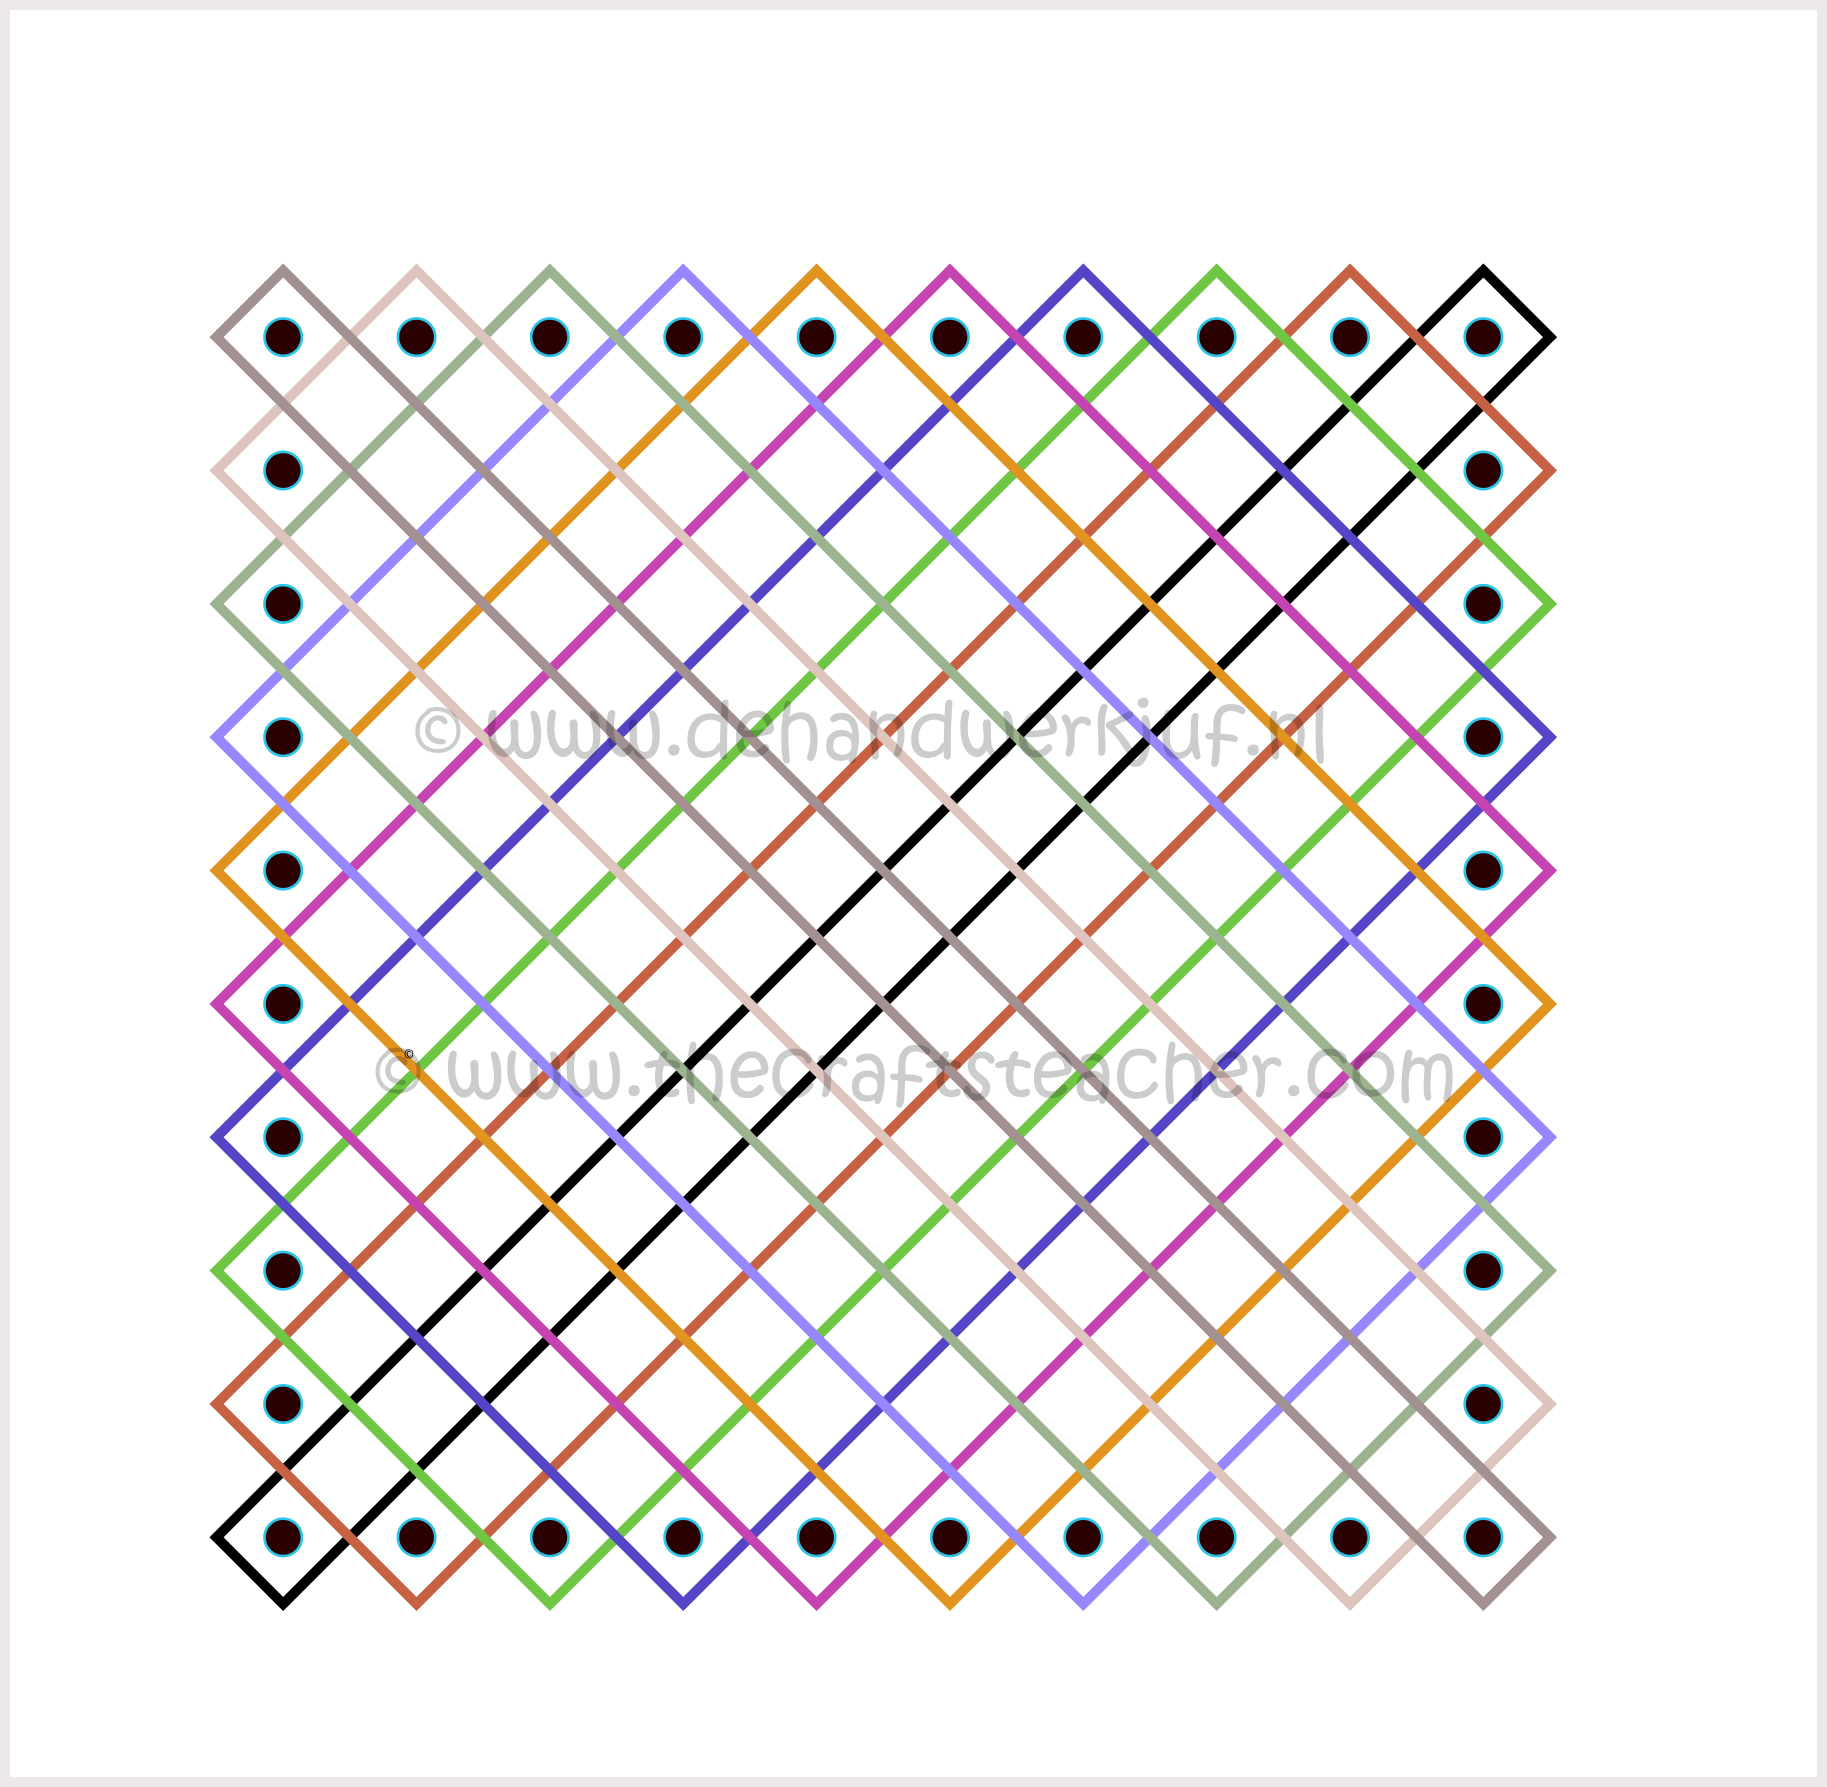
The black points stand for the nails or pins. In this drawing there are not the same number of nails as on my pin loom, but that doesn’t matter for the explanation. The colored lines are supposed to be the threads. If you would start at the bottom left side, at the black lines, and you follow the black line, you will see that the start and the end of the thread come together again, a closed circuit. The same goes for all the other colored lines. Well, you could actually do something with this also, and I will definitely work that out later (it would be a great project to get rid of leftover yarn!), but how is it then that you should do weaving with a continuous thread?
Step by step weaving with a continuous thread
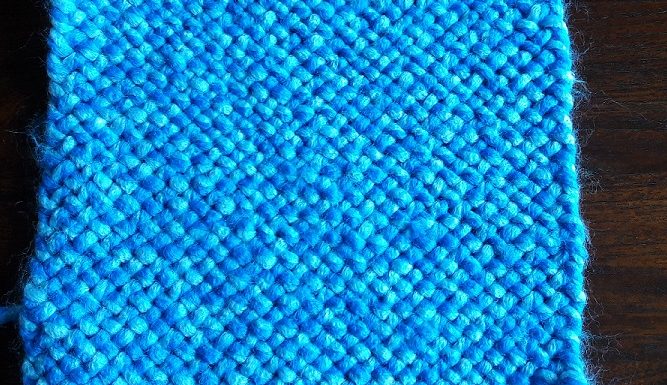
As you can see in the picture at the top of this page, you will make square patches, but the threads are going in a diagonal way. You will be working with a continuous thread. Of course, if you want to have striping with another color, you have to cut your yarn and attach a new thread with the other color to it, but you don’t need your scissors until the very end.
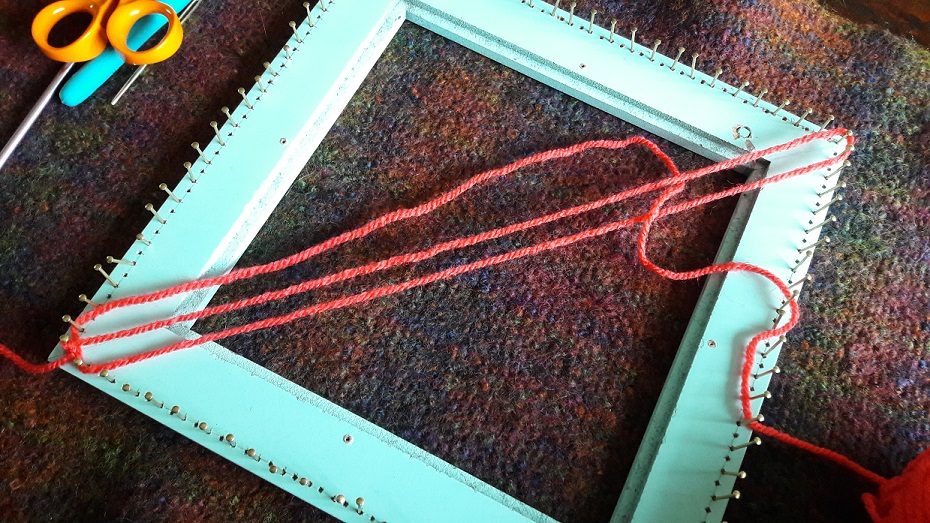
Step 1
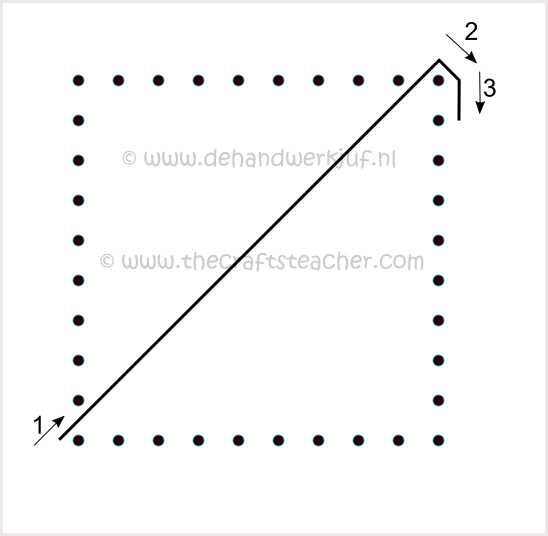
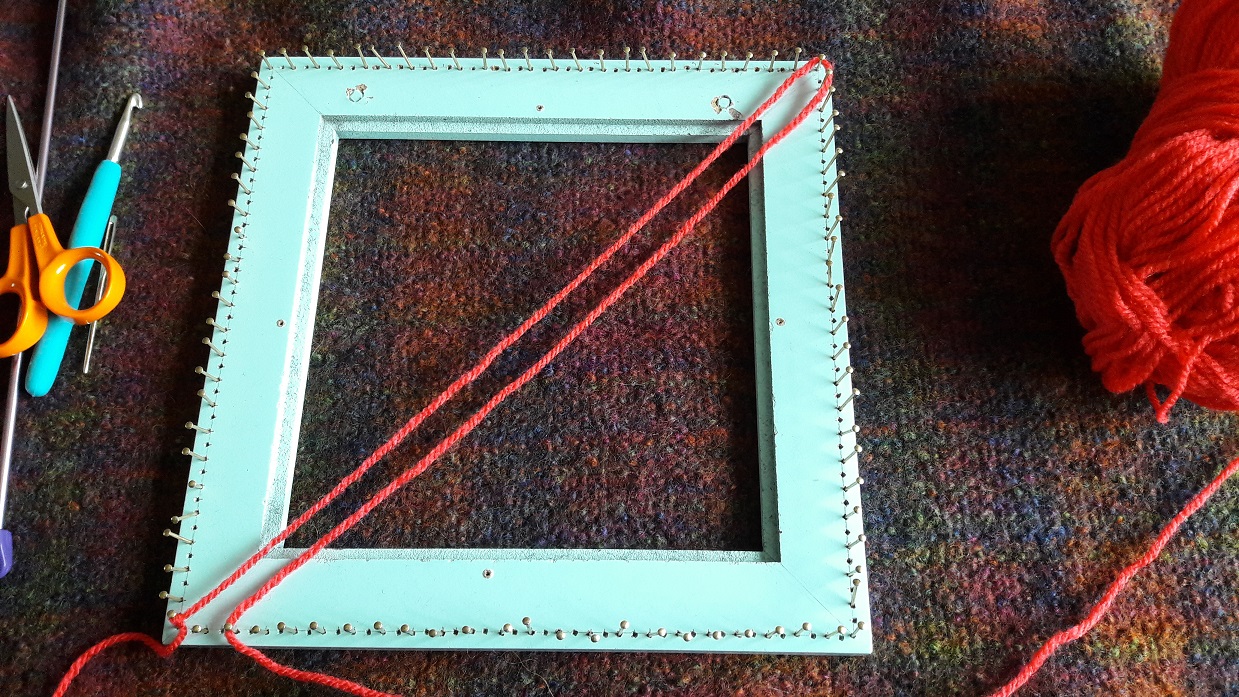
Follow the black line. You will start at the bottom left side. Attach your thread to the corner nail with a slipknot (nr 1), and bring the thread to the upper right side (nr 2) and go down around the upper 2 nails (nr 3).
Tension of the threads: important!!!
Don’t pull your yarn tight! Let the thread lay in a ‘relaxed’ state. This is a bit difficult to describe of course, but if you would lay your loom on the table, it shouldn’t be that loose that the yarns sag or even lay down on the table. Let the yarns run straight, but without tension. This is important, because, while weaving, the thread will get ‘shorter’. No, it will not shrink, but I will show it.

I tried to show this in a graphical way in the drawing. It’s a sideview of the weaving threads. The bottom line is a thread which is just laying straight, no weaving under or over it. The upper wavy line is a thread which is crossed with weaving threads that go over and under it. Because the threads will make a wavy movement because of the weaving, which is not the case yet at this moment, you have to anticipate on it with the length of yarn you will need in the end when all threads are woven in. For a wavy shape you need a longer thread than for a straight line. So, imagine that you would pull the yarn tight now, in the end a lot of tension will get on it. And changes are that the nails will be pulled out of your loom! And we definitely don’t want that to happen!
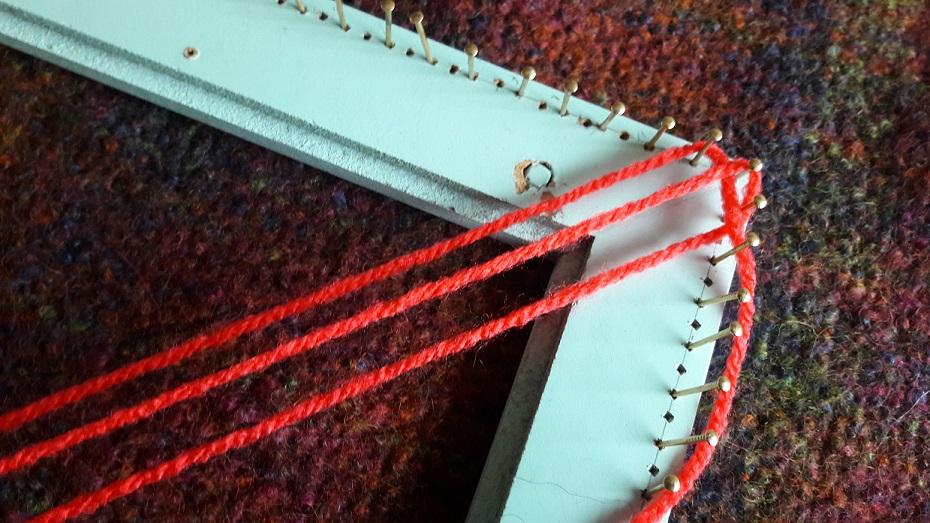
Step 2
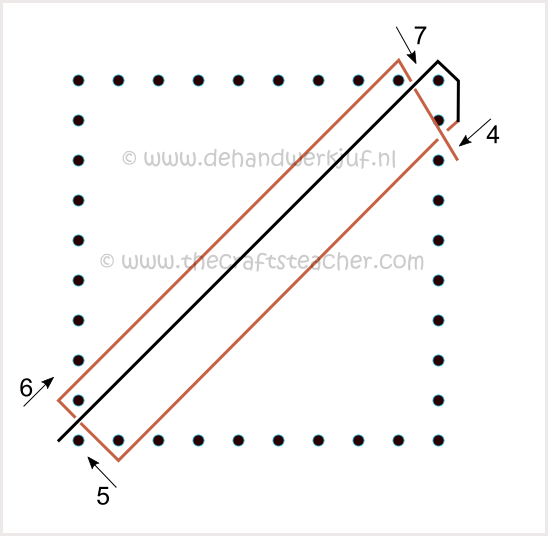
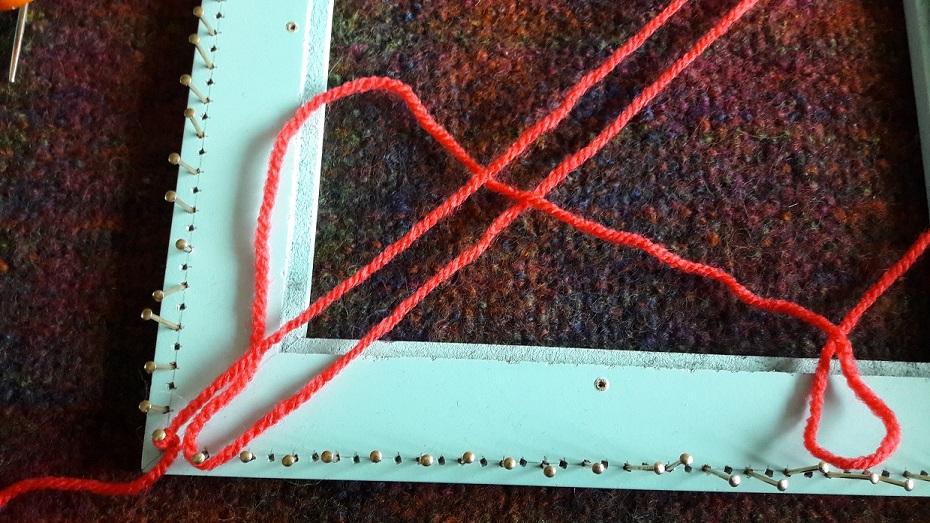
Follow the brown line. You will bring your yarn from the top right side (nr 4) to the bottom left side (nr 5). Next you have to cross over to the next empty nail on the left side (at nr 6). But for that, you need to go under the first thread that’s already there. If you zoom in on the drawing you will see that. The black line goes over the brown line, but because that was there first, you have to go under it with your thread!
Make a loop with your thread, and pull that loop up under the first thread to above. I usually just do that with my fingers, in this phase you don’t need a crochet needle yet. If you’ve put your ball of yarn to the right of your loom, you will see that you actually go under the first thread twice with the loop. Now, lay the left side of the loop around the nail on the left (nr 6), and the right side of the loop around the next free nail on the top, left of the corner nail (nr 7). You have to make the length of the yarn that long so it crosses the diagonal, but that speaks for itself! Take care that this new diagonal thread also stays relaxed, don’t put any tension on it! Now bring the ‘end’ of the yarn, that is attached to the ball, between the 2nd and 3rd nail on the right side.
Check check check
When you weave the loop through the other threads, always always always go under the first thread, and end with going under the last thread! At this moment there is only 1 thread that you can go under, but at the next steps you will encounter more threads.
Go to the next page for the next steps.