
Balanced mosaic knitting is a way of mosaic knitting that I developed to address an issue with regular mosaic knitting with large graphical designs, and which creates a slightly different look of the stitches compared to regular mosaic knitting. This makes the technique especially suitable for graphical designs. I have named the technique ‘balanced mosaic knitting’. I would appreciate it if you would mention me as the developer of this method when using it in publications or videos. I hold the copyright of the material on my website and YouTube videos. Look for the introduction and how it originated on this page: Introduction of Balanced Mosaic Knitting
What is mosaic knitting?
Mosaic knitting is basically done in 2 colors. Per row that you knit you only use 1 thread of yarn. You don’t have to, like for instance with fair isle knitting, carry a thread of a second color along the row and switch them. You knit each row 2 times with the same color, one time forth and one time back. After that you knit the next 2 rows with the other color, and that will be alternated all the time. By slipping stitches in a particular way a pattern emerges.
The videos
I also made videos for this tutorial. Click here for the entire playlist or look at the bottom of this page.
The pattern chart and explanation
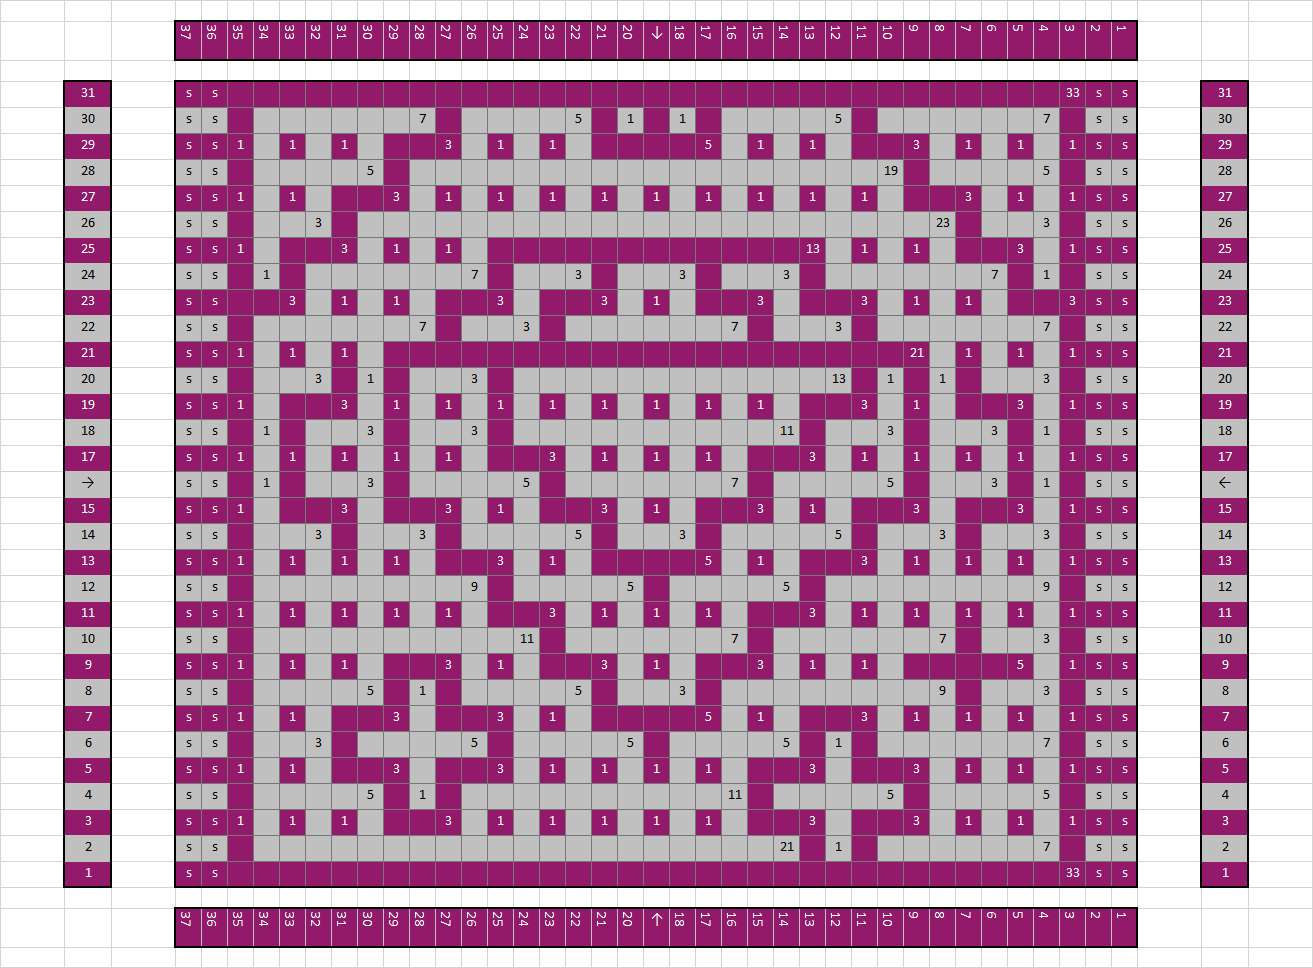
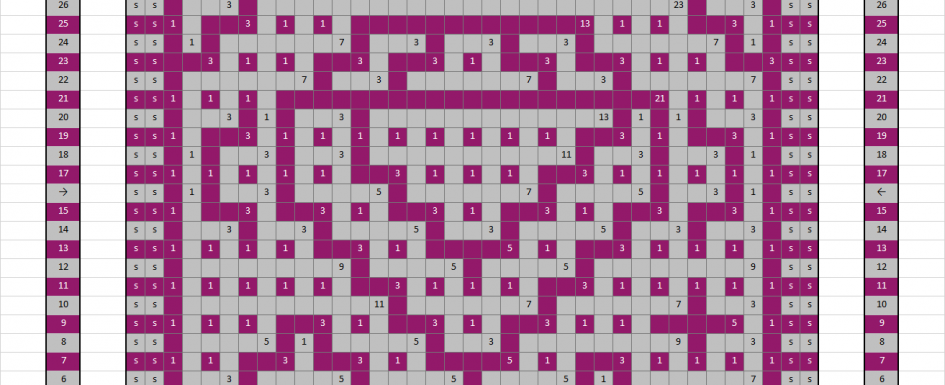
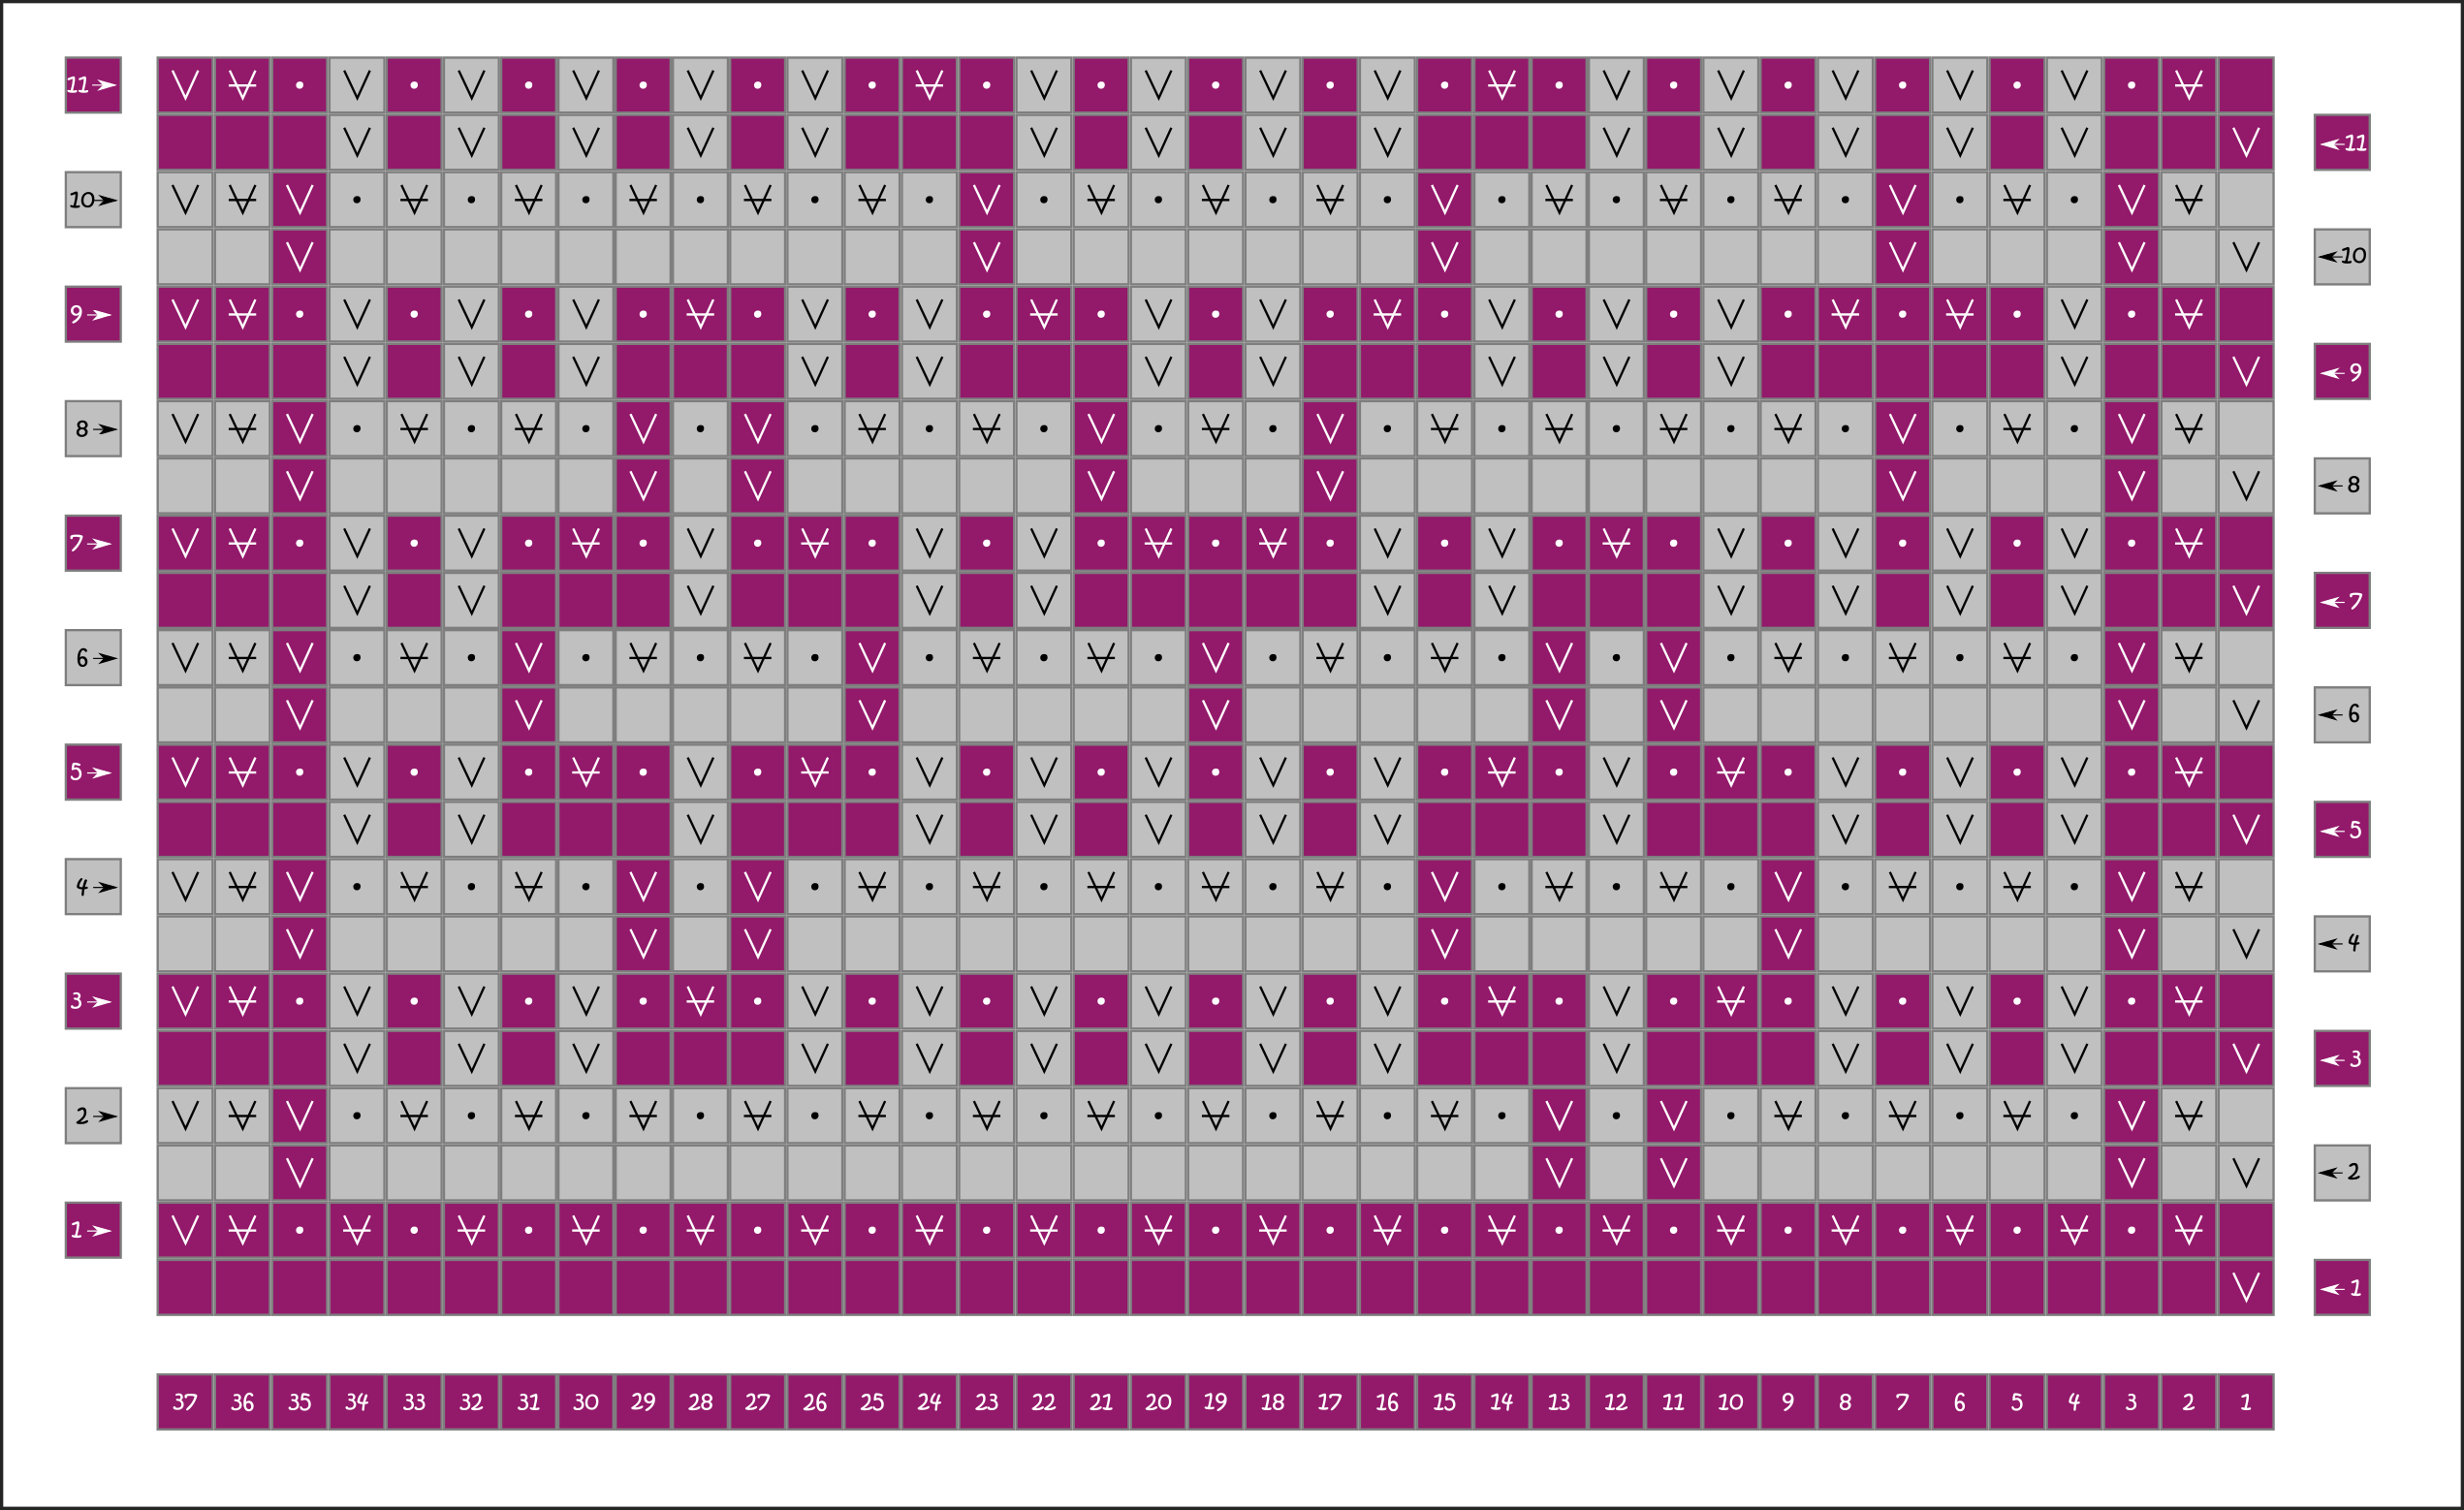
For this tutorial we will use this pattern. Click on the picture to see it in full and to download it. There is also a written version of it that I will supply later in this tutorial.
At the bottom and at the top of the chart you can see how many stiches wide the pattern is: 37 stitches.

On the left and right side of the chart you see the rownumbers. The rownumbers are colored differently alternating. In this case color 1 is the bordeaux red, color 2 is the grey. If a rownumber is in a square with the bordeaux, it means that that is your working thread. If a rownumber is in a square that’s grey, than this is the color of your working thread (or the colors of your own choice, of course).
 In the pattern itself you see the s’es on the sides. They stand for the side stitches. Why 2 side stitches and not just 1? This has to do with where to me the ‘real’ pattern starts and ends: it starts with stitch 3 and ends with the stitch befóre the second to last stitch. By ‘reserving’ 2 stitches at the sides you can be sure you see the full pattern and it doesn’t get ‘disturbed’ by the way you make the side stitches. Further on this page I show how to make a nice border, but this way you can choose to ‘hide’ the sides under a border you add later. In my patterns for interwoven crochet you will see the pattern without the 2 start and 2 end stitches. If you want to use these charts for this technique, you will have to add these side stitches yourself.
The numbers you see at the inside of the pattern tell you how many stitches of this color you have to knit consecutively. These numbers are only in the squares of the color you are knitting with. I explain this later.
The pattern with regular knitting symbols
Before I continue explaining the technique and the pattern chart, I will first explain this pattern (partially) with the use of regular knitting symbols. After this I will show why it is easier to use the ‘shortened’ pattern chart for this.
Used symbols
The symbols used here are the official symbols that the Craft Yarn Council uses (https://www.craftyarncouncil.com/) and they are applied in the charts according to their standards.
Important! The piece has a right side (front) and a back side (sounds a bit better than wrong side 🙂 ). I try to use these terms consistently in the following, so don’t confuse it with the working side. To emphasize it extra I made it bold, italic and underlined.
Symbol for a knit stitch: knit the stitch when at the front of the piece and purl(!) the stitch when at the back of the piece.
Symbol for a purl stitch: purl the stitch when at the front of the piece and knit(!) the stitch when at the back of the piece.

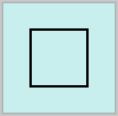
Symbol for slipping a stitch with the yarn at the back (wrong side): this means you slip the stitch off purlwise, but that the loop that forms by doing this will be at the back of the piece. So this is not at the side where the pattern shows. If you work at the front side of the piece you will first bring the yarn to the back of the piece (if it wasn’t already there) and you slip the stitch purlwise. If you work at the back of the piece you will again bring the yarn to the back of the piece (if it wasn’t already there) and you slip the stitch purlwise.
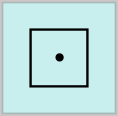
Symbol for slipping a stitch with the yarn at the front (right side): this means you slip the stitch off purlwise, but that the loop that forms by doing this will be at the front(!) of the piece. So this is at the side where the pattern shows. If you work at the front side of the piece you will first bring the yarn to the front of the piece (if it wasn’t already there) and you slip the stitch purlwise. If you work at the back of the piece you will again bring the yarn to the front of the piece (if it wasn’t already there) and you slip the stitch purlwise.
Pattern chart
This is a part of the pattern shown earlier in a way you are probably familiar with, with using regular knitting symbols. Click on the small picture again to see the entire chart.
The rules for balanced mosaic knitting
Please just read the rules first, but I will show you them step by step later in the tutorial, with pictures, so it will get clearer then. These are just the rules to follow, independent of what kind of pattern chart you use. And you can of course also watch the video’s.
The 2 side stitches at the start and end
The following description show how to get a nice border. I will see if I can improve on the left side in the future, but for now this is a good way if you do not want to hide your sides under another border. This is also a way that prevents rippling sides.
A general rule: make the side stitches loosely. This is a matter of feeling and looking at the sides closely, because you don’t want it to be too loose either.
- At the front of the piece you start by slipping the first stitch purlwise with the yarn in the back of the piece. You will make a color switch here (see further for the explanation). The second stitch is always a knit stitch.
- End the row with 2 knit stitches.
- At the back of the piece you start by slipping the first stitch purlwise with the yarn in the back of the piece. Important: The second stitch is always(!) a slipped stitch with the yarn in the front of the piece. This is to prevent the side to ripple. If you would knit this second stitch, there would be a column of knitted stitches, without slipped stitches in between. This column would be taller than the rest of the piece! This could mean, depending on the pattern to be knitted, that you have 3 slipped stitches after another. This is not a problem: just take care to work loosely and don’t pull the thread too tight!
- The second to last stitch is again always(!) a slipped stitch with the yarn at the front of the piece, no matter if the stitch before it is knitted or slipped. Again this is to prevent rippling of the side.
- The last stitch is purled.
As you can see here there are never 2 side stitches above each other that are knitted or purled. A knitted stitch in one row (or a purl stitch) is always followed by a slipped stitch in the row after it! This is an important aspect of balanced mosaic knitting: that a column of stitches (so on top of each other) never contains just knitted or purled stitches, but it is balanced by knitted stitches and slipped stitches!
Color change at the start of a row
If you have turned your work to start a new row with the next color (at the front of the piece), you first put the yarn of the previous color to the back and you get the yarn that you will be working with to the front and bring it to the back over the previous color.
Pay attention! The last stitch of the previous color is for example done with color 1. If you now will be working with color 2, and you slip off the first stitch like explained at how to do the side stitches, than the color that will be on your needle is that of color 1! This can be confusing, because in the chart you see the first 2 stitches in the same color, but on the right needle the first loop is in color 1 and the next in color 2.
Front side of the piece
When you work at the front side of the piece in color 1, you will knit the stitches of the pattern in color 1 , the stitches in color 2 will be slipped purlwise with the yarn to the back of the piece. The same goes when working with color 2 as the working thread. The stitches in the pattern in color 2 will be knitted, the stitches in color 1 will be slipped purlwise with the yarn to the back of the piece. Because the slip-loops are laying at the back of the piece, you will see that the slipped stitches come to lay on top of the piece, so that they will form a pattern. The loops of these stitches will be stretched out (because in the next row they will again be slipped), but this is the character of mosaic knitting.
You need the pattern chart for the front of the piece (or the written version of your pattern). This is the forth going row.
Back side of the piece
You actually don’t need the chart for doing the back of the pattern, because you can see what to do with a stitch based on the color of the stitches on your left needle! The back side of the piece is done in the same color that you used in the forth going row at the front of the piece. So this is the return row.
When you work at the back of the piece in color 1, you slip the stitches of color 2 purlwise with the yarn to the back of the piece. The slip-loop is again not visible on the front side of the piece, which makes that the stitch of color 2 will be stretched out even further.
For the stitches in color 1 you alternate with making a knit stitch and a slipped stitch with the yarn to the front of the piece. This means that if you only have to do 1 stitch in color 1, that you knit it. If you have to do 3 consecutive stitches in color 1 (it always(!!!) is an odd number of stitches), you will knit 1 stitch, the next stitch will be slipped purlwise with the yarn to the front of the piece, and the next stitch will be knitted again. With 5 stitches you will knit one, slip the second, knit the third, slip the fourth and knit the fifth. You always start and end with a knit stitch. This is also a good check if you have to do a lot of consecutive stitches in the same color: if you end with a slipped stitch, you have made a mistake along the way. If you made a mistake twice, you will not notice that now, but we never ever do that, do we? 🙂
If you work with color 2 it just works the other way around.
Pay attention: the first and last 2 stitches in a row must be done as explained at how to do the side stitches! So this schedule is only applied starting with stitch number 3 in a row, until you only have to do the last 2 side stitches.
And these are actually all the rules for balanced mosaic knitting.
Getting to work
In the next tutorial pagina’s (click here) I will show you this all step by step with lots of pictures, and I will also show how to do a provisional cast on with a helping thread.