
If you want to work work with several colors of solid colored yarns, and you would like to add stripes in your weave yourself, a plaid motif, you can do that! It’s quite simple. The only thing you have to do is cut off the yarn and attach a new one, and continue weaving like you worked with the original thread. But I will explain it further.
Where do you change colors
Actually you can do color changes at every place you would like to. But usually you do it in a ‘balanced’ way. In the drawing you can see that, for example, you have 3 diagonal ‘rows’ above the middle and 3 diagonal ‘rows’ below the middle. That is what I mean with ‘balanced’, that you will put your stripes equally on each side of the weave. You can choose yourself after how many rows you change colors. And you can do as much color changes as you like. If you would like to, you could even do it at every single nail on each(!) side, but that would get kind of crazy 🙂 . Maybe I will do that one day just for fun, but then I will definitely take care that it’s for a project for which I don’t have to finish the threads, because that would be lots and lots of them. So take that into account: for every color change you will get 2 ends with which you have to do something, and probably that will mean finishing it neatly. So be aware of that!
How do you change colors
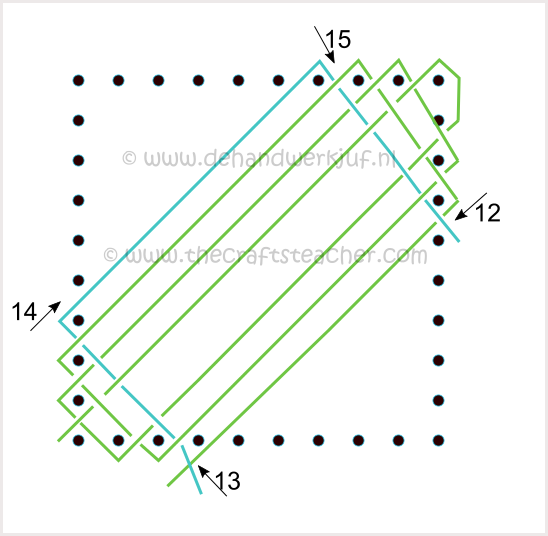
In this case the green line stands for the thread that you started with. In this example I chose to do a color change after 3 rows in green. If you now bring the thread around the 4th nail on the right to the bottom (from nr 12 to nr 13), you now have 3 threads on the upper side of the middle and the lower side of the middle. You can now cut off your thread. Leave a long enough tail, to be able to make a knot, but also to be able to finish the thread neatly afterwards in the weave. About 4 to 6 inch is enough.
Tip: You can also use these threads for fringe, if the woven square is on the side of your work where you have planned fringes. In that case you don’t have to weave them in. You have to take care in that case that they are long enough for the size you want your fringe to be!
You can now take a new thread in a different color (blue in the drawing), weave it through (from nr 13 to nr 14) and pull it to the top (to nr 15). Pay attention that you don’t pull the start of your thread out again while weaving in (but you will notice that very quickly 🙂 ), and that the starting tail of the yarn is long enough for making a knot and finishing it later.
You can now make a simple knot in the end of the green yarn and the start of the blue thread, knot them together, that is. Don’t make the knot too tight, it’s just a matter of letting the threads stay in position. Try to make the knot to stay at the outer side as much as possible, on a place where it doesn’t pull into the waeve. If that happens just a little, you can always untie the knot later and correct that while finishing. Also don’t pull too hard on the threads while making the knot, so there will not get too much tension on the threads!
And, ready! I will show some examples after this, and the link to the video in which I show how to do the color changes.
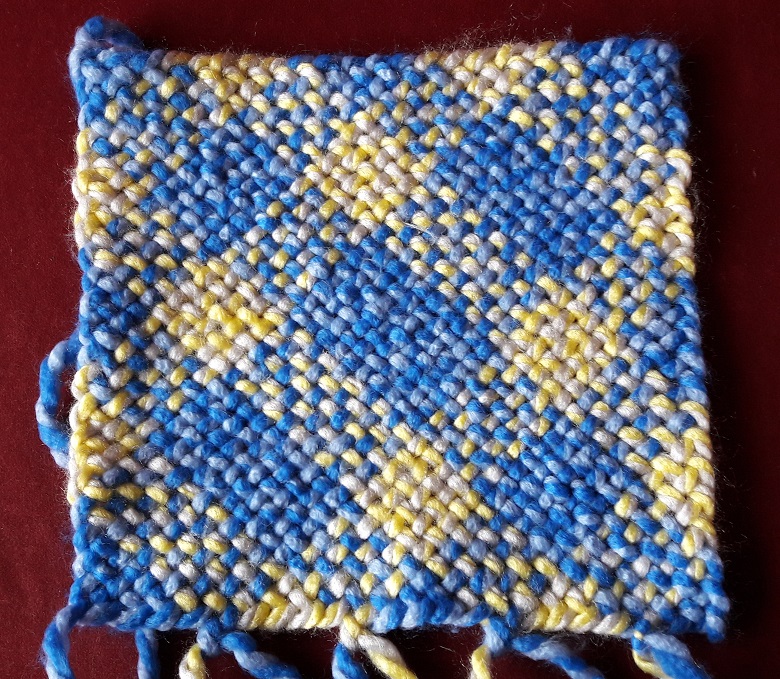
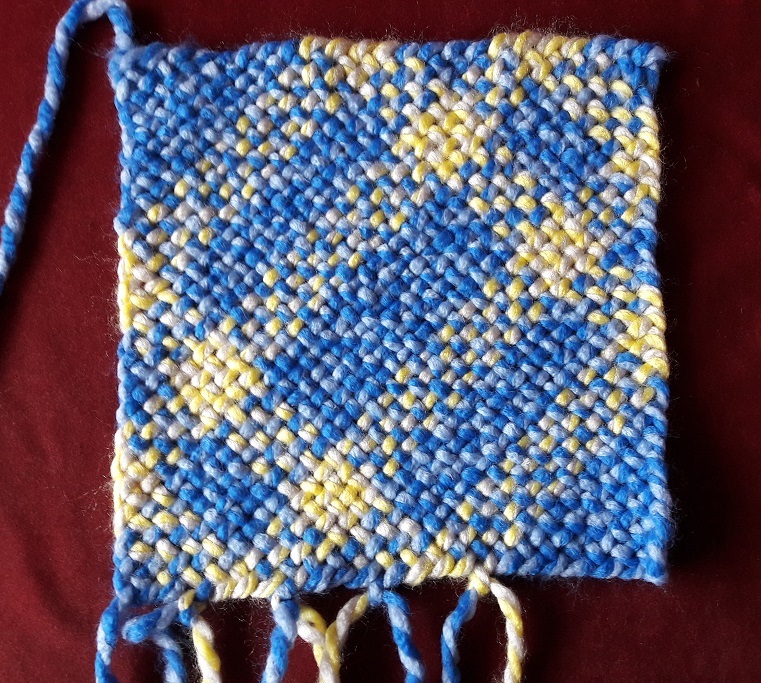
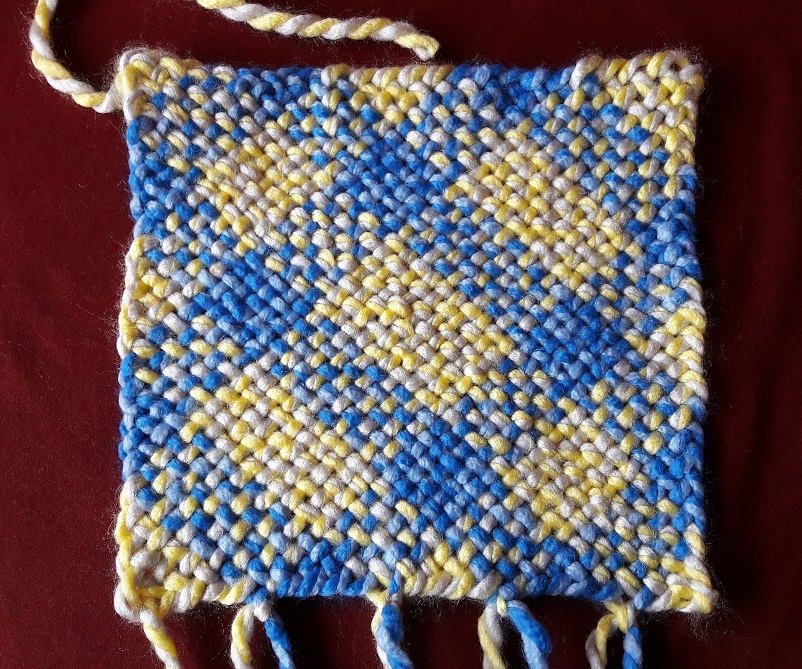
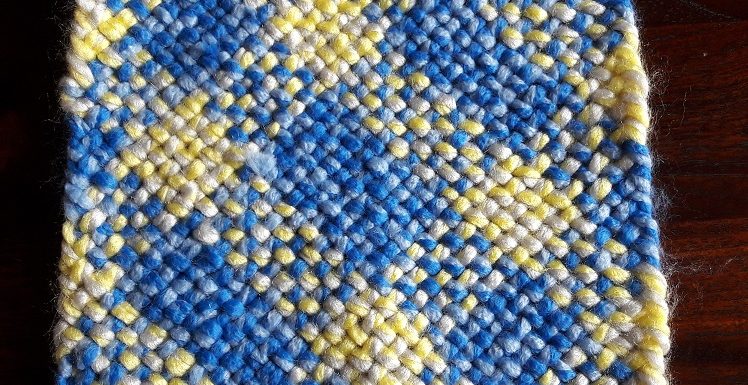
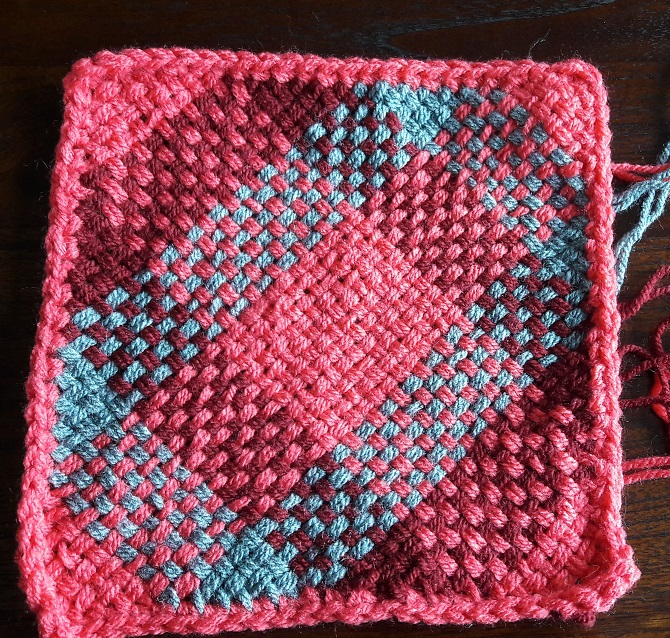
In these 3 examples I made different variations with the same 2 color yarns. In examples 1 and 2 I played with the places where the stripes came and with how wide they are, in example 3 I started with yellow, so that the corners have a different color than examples 1 and 2.
In this example I did color changes with 3 colors.
The link to the video (subtitles in English available!):