
A nice and simple surrounding border
When you’ve finished crocheting row 160a, do not cut off the yarn of color 1. The thread of color 2 can be cut off and you can darn in the end. We will now make a border of single crochets around the entire blanket with color 1, and we will only work into the outer border. This will make that the blanket gets a nice straigth edge.
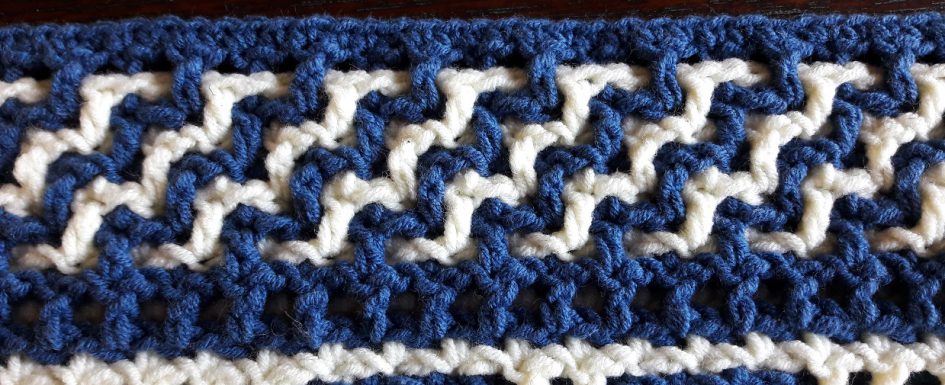
DThe border stitches of color 2 do not need finishing. They look good already because of the weaving through because of how the pattern was designed.
Important! Take a smaller hook than what you used to crochet your work with! And work a bit tighter if you crochet loosely. This prevents the border from getting wavy. I used a 4 mm hook for the blanket, and I switched over to 3.5 mm for the border.
The accompanying video
I made a video about how to finish the border. See especially the end, where I show the duplicate stitch method for an invisible finishing. You can click the link here to go to the video, or look at the end of the page.
The upper border
Turn your work and make a turning chain. Now make the first single crochet in the top of the last double crochet of row 160a. Mark this stitch with a stitch marker, this is handy for the neat finishing of this border at the end! You will make your next single crochet in the chain that’s in between the double crochets of the previous row. You will get the neatest result if you insert your hook into the stitch, so not into the chain space in between the 2 double crochets! Also take care of taking 2 loops of the chain onto your hook.
Make 241 single crochets in total and 2 chains at the end of the row. The last 2 single crochets have been made into the first 2 chains of the 4 turning chains of the previous row.
The left side
Now make single crochets in the side border. I insert my hook into the turning chains and into the posts of the double crochets. Make 2 single crochets per row.
Make again 2 chains at the end of the row.
The bottom border
If you used the long tail method for setting up, you can now easily see the stitches where to make your single crochets. Make a single crochet in each stitch and again 2 chains at the end of the row.
The right side
Make single crochets like you did at the left side. Make 1 chain at the end of the row, cut off your yarn, and make your last chain with a blunt needle by using the duplicate stitch-method (see also the video that accompanies the finishing of the Hooked and Locked CAL), which will give you a neat invisible finish.
The duplicate stitch method
Your yarn comes from the middle of the last chain you made. Insert the needle under the V-shape of the first single crochet of the upper border, which you marked with a stitch marker. Bring the needle back to the middle of the last chain and bring it through from the front to the back. You have now made a chain with the needle. Bring the thread back to the backside of the first single crochet of the upper border, and insert the needle there and finish the end invisibly.