
Step 3
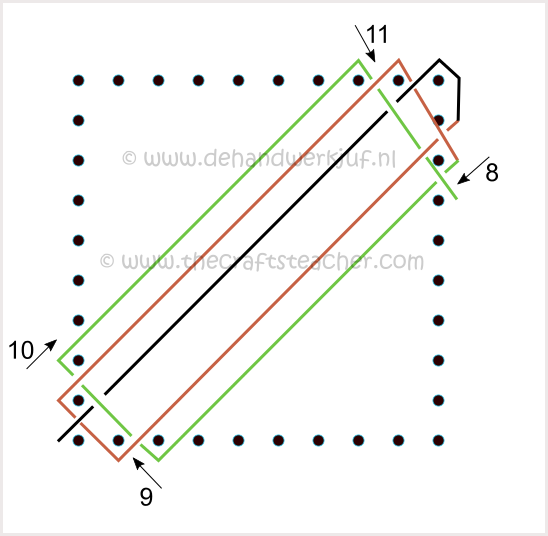
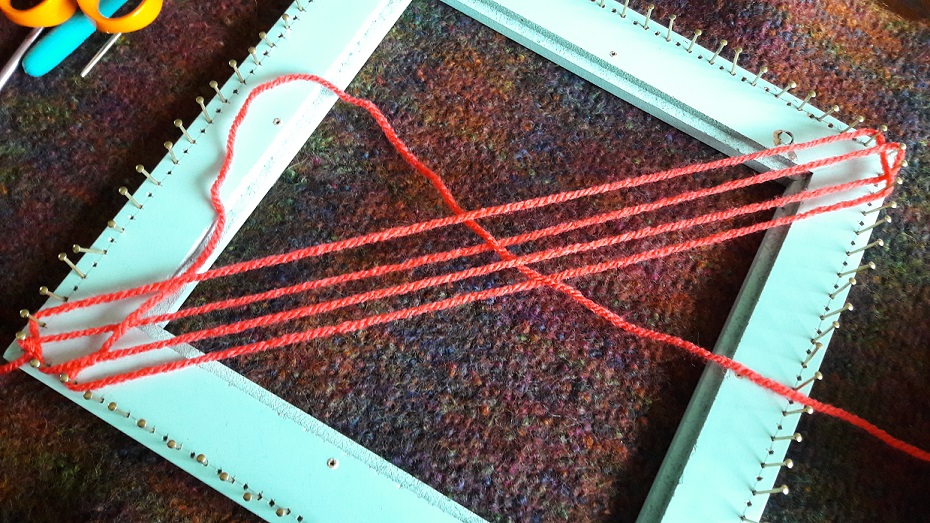
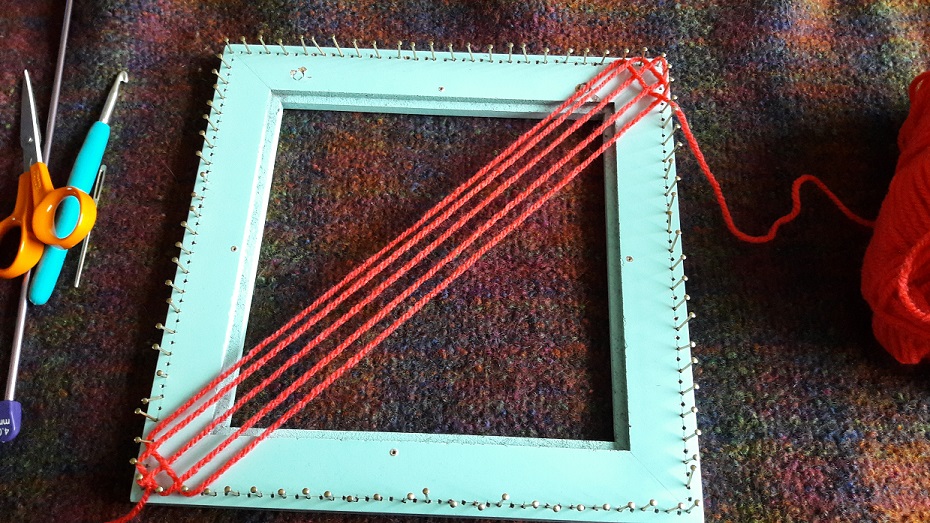
Follow the green line. You ended with your thread at the third nail at the top right side, and now again you bring your yarn from the right (nr 8), between the 3rd and 4th nail, to the bottom left side (nr 9) and go around the 3rd and 4th nail (this is the next free nail on the bottom side). Now again cross over to the first empty nail to the left side (at nr 10). For that, make a loop, weave through the 3 threads, with starting to go under the first (lower) thread, going over the second (middle) thread, and then under the last (upper) thread. Lay the left side of the loop over the nail on the left (at nr 10), pull the loop through to the upper rigth side and put the right side of the loop around the 3rd nail (at nr 11). And, I will keep emphasizing on it, put no tension on the threads!
Mirroring
You will see that the threads in the corner on the upper right side are at their right position automatically. The weaving that you do in the corner on the left bottom side, is mirrored in the opposite corner. You don’t have to do anything for that, it happens just all by itself with this method!
Keep the diagonal lines straight!
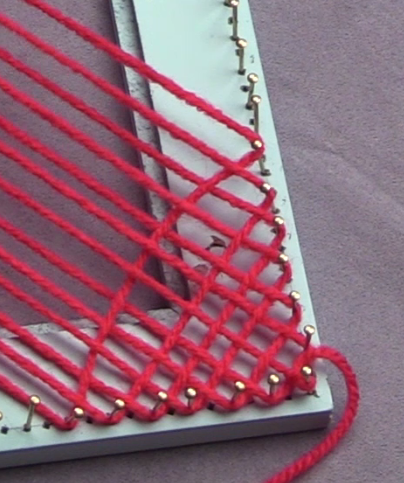
You will notice at a point that the the diagonal thread in the corners tend to have a rounded shape after weaving them through. First of all, also for these diagonals the rule is that you shouldn’t pull them tight. A short side step to ‘regular’ weaving. For example, with ‘regular’ weaving on a rigid heddle loom, you will often lay the weft thread in a wave (or slanting), so that, when beating the thread into place, the thread will not pull the sides of the weaving to go to the inside. This, again, has to do with the wavy movement of the thread through the weave, and by weaving the thread throug in such a way that the thread is long enough to make that wavy line, you take care that there will be no unnecessary tension to the thread and the sides. Back to the pin loom: when you see now that the thread is laying in a slight wave in the corners, that’s actually favorable. Take your crochet needle or your blunt needle, and slide the threads so they lay straight. When I’m a bit further weaving, I usually start sliding in the middle of the diagonal and work on both sides in turn, so that the threads lays straight as much as possible.
Sometimes you will notice that there still will be a little wave in the threads, just wait then till you have woven the next diagonal, and then continue to slide the previous diagonal in the right position. Well, don’t really fuss about it, just make the end result look good. But don’t wait till you have gone much further.
Go to the next page for the next steps.