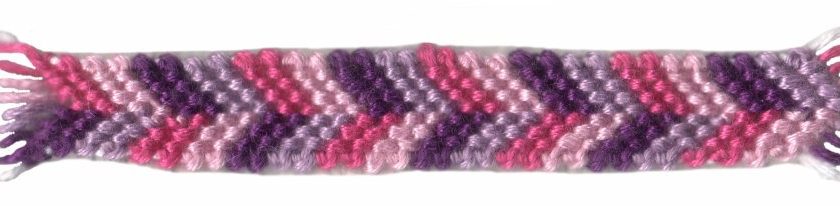
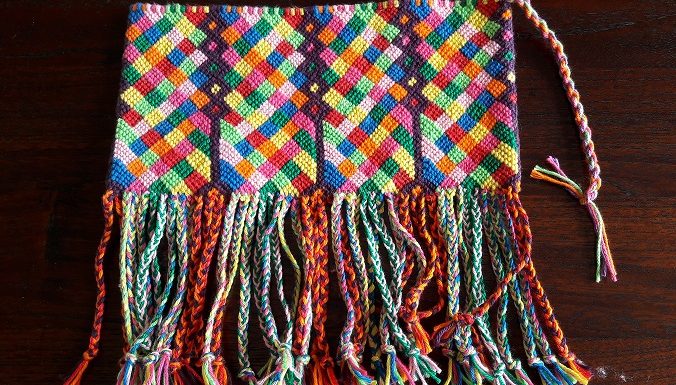
The lower border Almost finished! I want to share some last things with you. You can see in this picture that I ended at a certain length.  I had enough yarn left to continue for a couple of rows, but I thought it as ok actually. The bag had a nice depth for what I want to use it for, so time to end it. To get a straight lower border, you must first get all knots in a straight line.  With the colored block this is done by knotting half blocks. At the yellow parts you can see I did a row of 4Read More →

” slug=”Designs-hoesjes” order_by=”sortorder” order_direction=”ASC” returns=”included” maximum_entity_count=”10000″] The techniques I’ve shown so far were used to make bracelets. And of course that’s fun for young girls (and boys). But you can do so much more with this technique. It is simply a way to make nice motifs with a couple of threads. Why not go wider than the narrow bands? It will be nicer to work with thicker yarn if you don’t want to end up with a monks work, which will take you weeks or months to finish. Why not work in the round? That offers suddenly al kinds of applications. Make bookmarkers: use fineRead More →

With the explanation of the basic knots (see Basic knots) I explained how to read the patterns and how to make the knots. With this description you can start designing your own patterns. You have to know that each thread that leaves a knot will be used to make a next knot. So it is important at which side you let the threads come out. Will they come out at the same side as they were originally (combination knots), or do they switch places (double knots)? And for a next knot you can make a choice each time which color you want it to have.Read More →

Strepen in 4 kleuren

And this is the 4-colored variation. Used colors: Dark purple: 2327; Light purple: 2305; Dark pink: 2268; Light pink: 2260; for the sides a color of your own choice. You will see this color only in the braids. Usage: 4 Repeats of the pattern is about 8 cm (3.1 inch) long. For 4 repeats about 47 cm (18.5 inch) per thread is needed. Description: Always start at the left side by making 1 right/left knot and then 3 double right knots. After that make 1 left/right knot and 4 double left knots at the right side. Here you don’t have to take care with theRead More →

(Dubbele) linkse knoop

The left knot is made by knotting two threads together as follows. Step 1 Keep the left thread (orange) taut with your left hand and knot the right thread (the working thread, blue) around it with your right hand by putting it from right to left over the left (orange) thread. Step 2 Bring the blue thread to the right again underneath the orange thread and bring it to the left again on top of the orange thread. Step 3 Pull the knot tight. The first part of the double left knot is now finished. Step 4 Repeat this again to make a double leftRead More →

(Dubbele) rechtse knoop

Friendship bracelets are made with just two knots: the right and the left knot. By combining these two and using all kinds of colors and nice patterns, you will get great results. The right knot is made by knotting two threads together as follows. Step 1 Keep the right thread (orange) taut with your left hand and knot the left thread (the working thread, blue) around it with your right hand by putting it from left to right over the right (orange) thread. Short explanation with this picture: it looks like the blue thread is right of the orange thread (see at the top rightRead More →

Links-rechtse knoop

Sometimes it is necessary that the threads end on the same side as they were at the start of the knot. It is than necessary to make a combination of the right and left knot, depending on the situation. Here I show the left/right knot. First make a single left knot: the knotting thread goes from right to the left, see steps 1 to 3 of the double left knot (see here). Then make a single right knot: the knotting thread goes from left to the right, see steps 1 to 3 of the double right knot (see here). Take care that you make the knots aroundRead More →

Rechts-linkse knoop – patroonweergave

Sometimes it is necessary that the threads end on the same side as they were at the start of the knot. It is than necessary to make a combination of the right and left knot, depending on the situation. Here I show the right/left knot. First make a single right knot: the knotting thread goes from left to the right, see steps 1 to 3 of the double right knot (see here). Then make a single left knot: the knotting thread goes from right to the left, see steps 1 to 3 of the double left knot (see here). Take care that you make the knots aroundRead More →

Strepen in 3 kleuren

This variation on the stripes has 3 colors. Used colors: Yellow: 2043; Orange: 2064; Red: 2218: for the sides a color of your own choice. You will see this color only in the braids. Usage: 6 Repeats of the pattern is about 14 cm (5.5 inch) long. For 6 repeats about 66 cm (26 inch) per thread is needed. Description: Always start at the left side by making 1 left/right knot and then 3 double right knots. After that make 5 double left knots at the right side. Here you don’t have to take care with the combination knot in the middle like the variationRead More →

Strepen in 2 kleuren patroon

With this pattern we’re starting to make viariations with an increasing number of colors. We start with 2 colors. This bracelet is made with crochet cotton that’s thicker than embroidery floss. Used colors: Blue and yellow Usage: 9 Repeats of the pattern is about 14 cm (5.5 inch) long. For 9 repeats you need about 60 cm (23.6 inch) draad for the left blue and yellow threads , about 48 cm (18.9 inch) for the right blue and yellow threads. The difference in the needed length has to do with the fact that you make more knots with the left threads! Description: Always start withRead More →