

The techniques I’ve shown so far were used to make bracelets. And of course that’s fun for young girls (and boys). But you can do so much more with this technique. It is simply a way to make nice motifs with a couple of threads.
- Why not go wider than the narrow bands? It will be nicer to work with thicker yarn if you don’t want to end up with a monks work, which will take you weeks or months to finish.
- Why not work in the round? That offers suddenly al kinds of applications.
- Make bookmarkers: use fine yarn of course!
- Make cases for your mp3-player, your sunglasses, your mobile.
- Experiment with thick yarns.
- Think out-of-the-box: cut strips of plastic bags and look what you can do with it. Reuse!
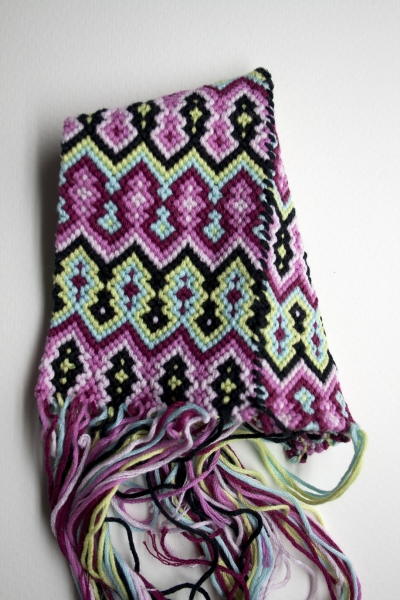
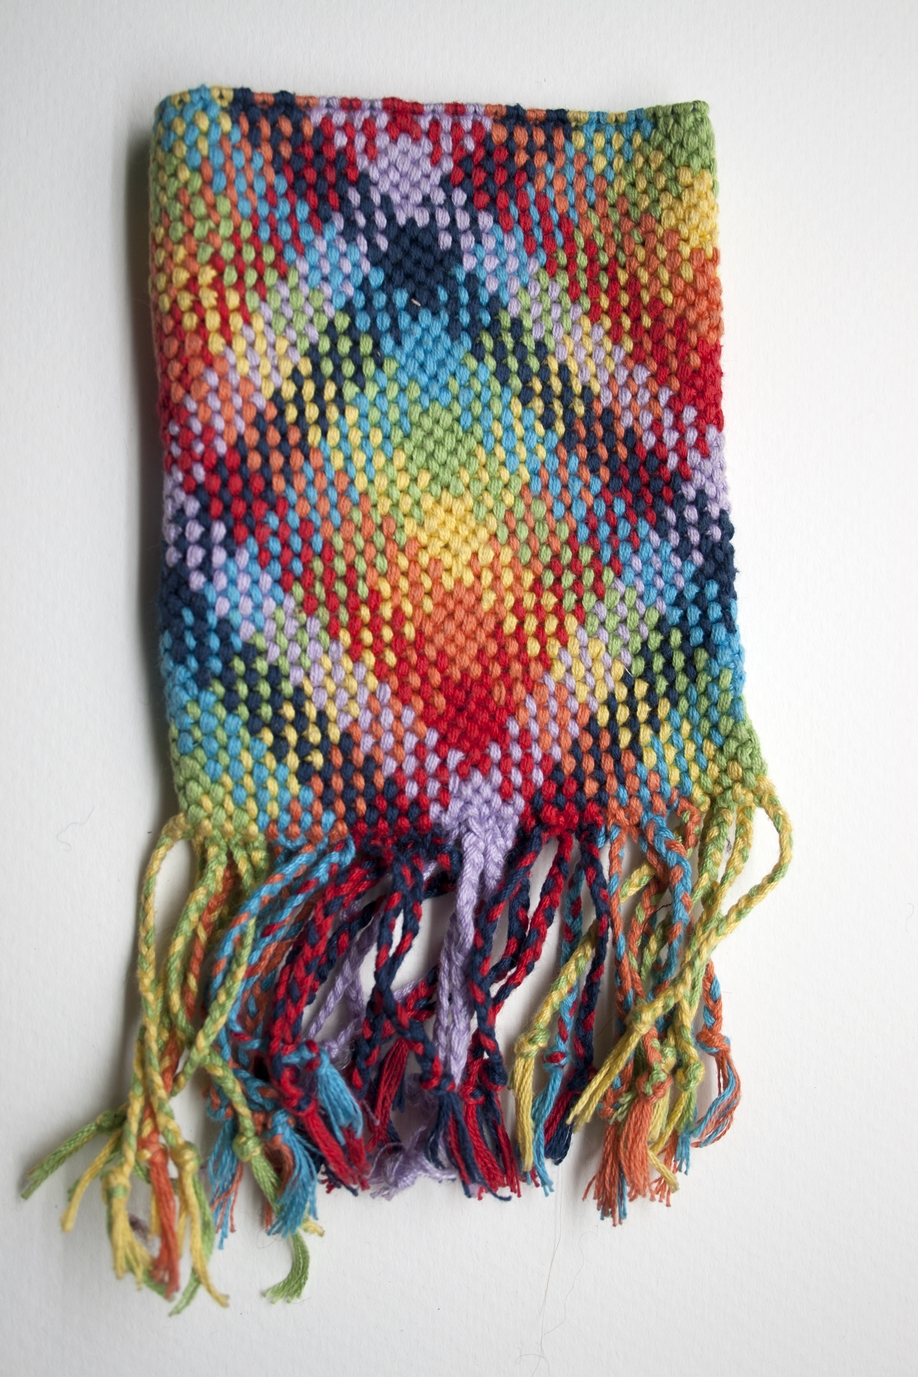
An example of working wider:
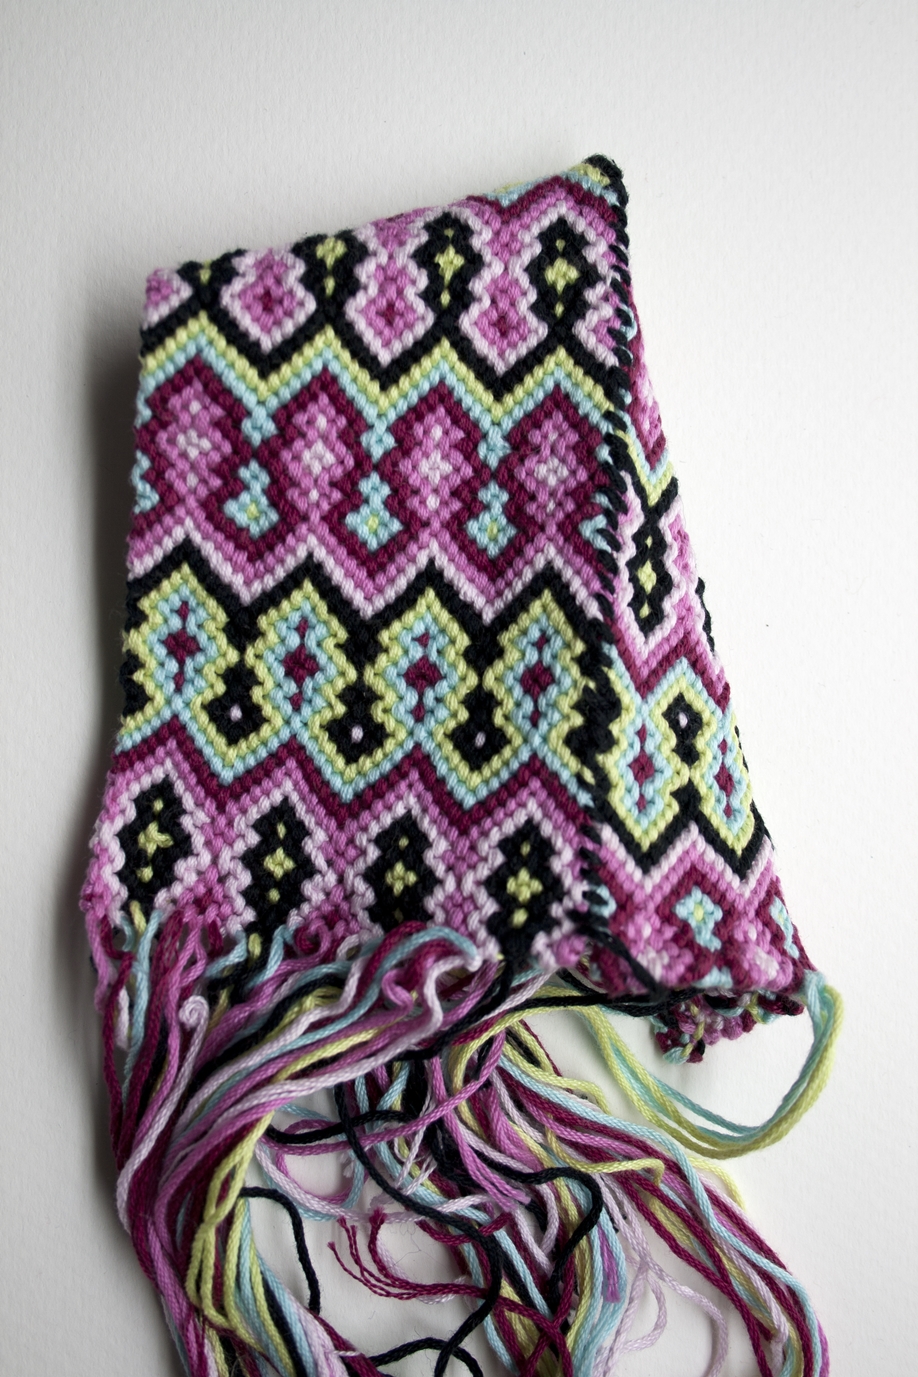
I took a motif here and repeated it a couple of times next to each other. I knotted quite a long piece. I then folded the knotted piece and attached it on the sides. As you can see it is not finished yet. The loose threads have to be finished and the other side also has to be closed. I am not sure yet if I will make the attachment visible and a bit ‘rough’ like the example here, or that I will make it ‘nicer’. What I’ve learned from this is that the loose threads are very hard to work into the knots on the backside for finishing. The knots are very tight, so it is extremely hard to finish it this way.
Let’s be honest: that’s why I have not finished it yet. I think I will use a nice band to finish it to ‘hide’ the threads, this will certainly work, and it will look good eventually, I’m sure.
Why do I share this with you quite frankly? To stimulate you and to tell you not to be afraid of trying things. The problem of the finishing off the threads inspired me subsequently to do this differently with a new design. I started thinking about how not to end up with a ‘less inspiring’ job when you’ve just finished something nice and beautiful. Continue reading…..
Working in the round:
I wanted to have a case for my mp3-player. And I didn’t want to end up with a lot of threads to finish on the upper side when I would be finished knotting. I got an idea, that when you cut the threads double length and secure it halfway at a ‘carrying thread’, you would get rid of this problem. I just tried it. Well….. not exactly that simple …. The pattern you use must be suitable to do this. You need a pattern where threads of a specific color are preferably next to each other. Sometimes you can adjust this a little bit and look how to put two threads of one color next to each other at the start, but it is a limitation you have to take into account. The choice of working in the round had the consequence that I had to make a choice which pattern to use. A thread in a ‘flat’ pattern, that comes out at the right end of the pattern, suddenly becomes a thread you have to use as a thread that comes in at the left end of the pattern for the next row. In this way it is possible to close the circle. With this pattern it was no problem.
In the picture below I show a detail of the edge, in which it will become clear (I hope) I fastened the threads halfway on a ‘carrying’ thread.
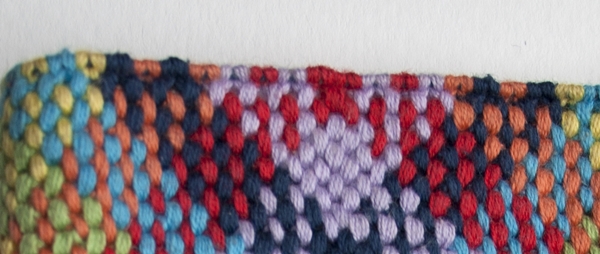
For the ‘carrying’ thread I used a multiplicity of the yarn I was knotting with. About 4 threads is a nice basis. I don’t estimate upfront how long these carrying threads have to be. I just use 4 loose threads that I finish neatly at the end. This can be done quite simply by making a knot in them or by braiding them and let it dangle on the case, but of course you can hide it inside by working it into the knots on the back (difficult though!).
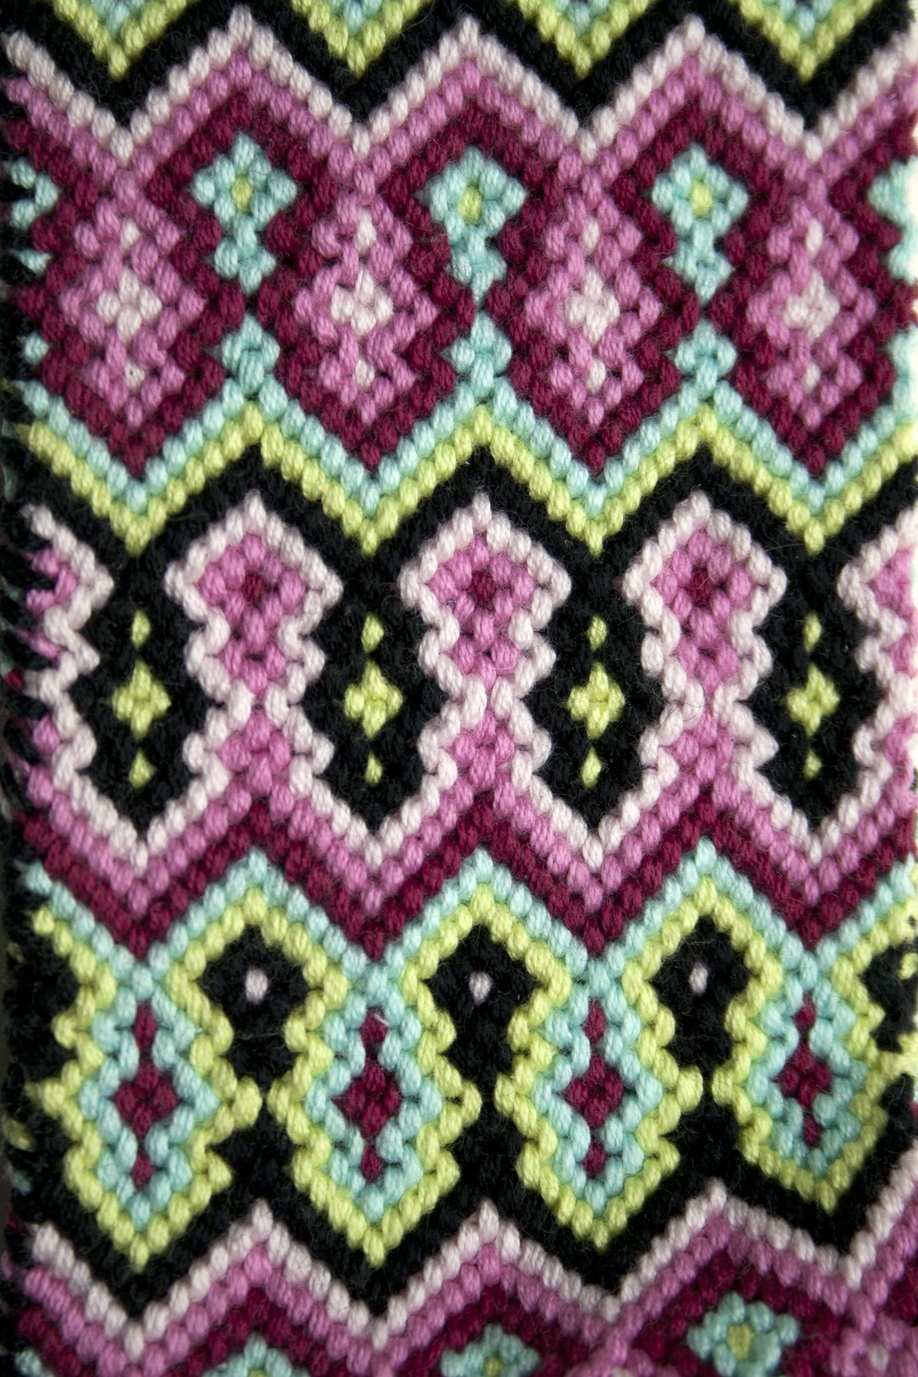
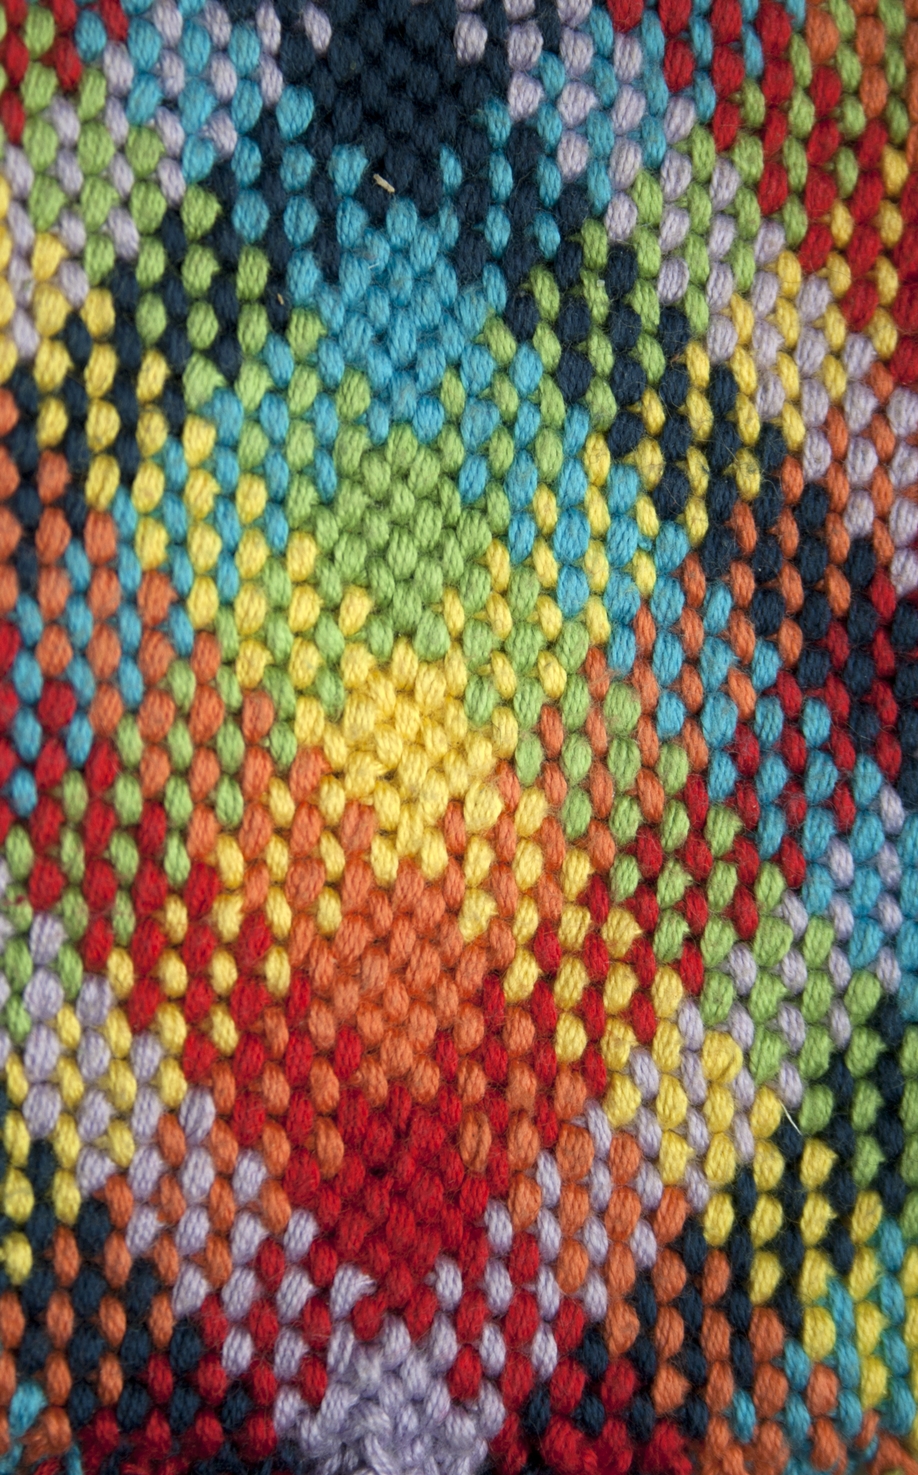
And hereafter a detail of the pattern. I left the dust particle. There is too much photoshopping in this world already :-).
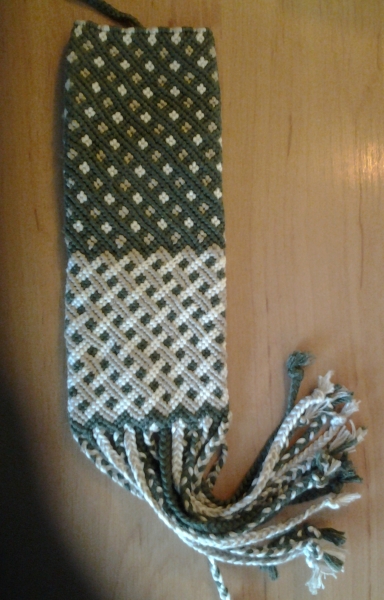
And here another example:
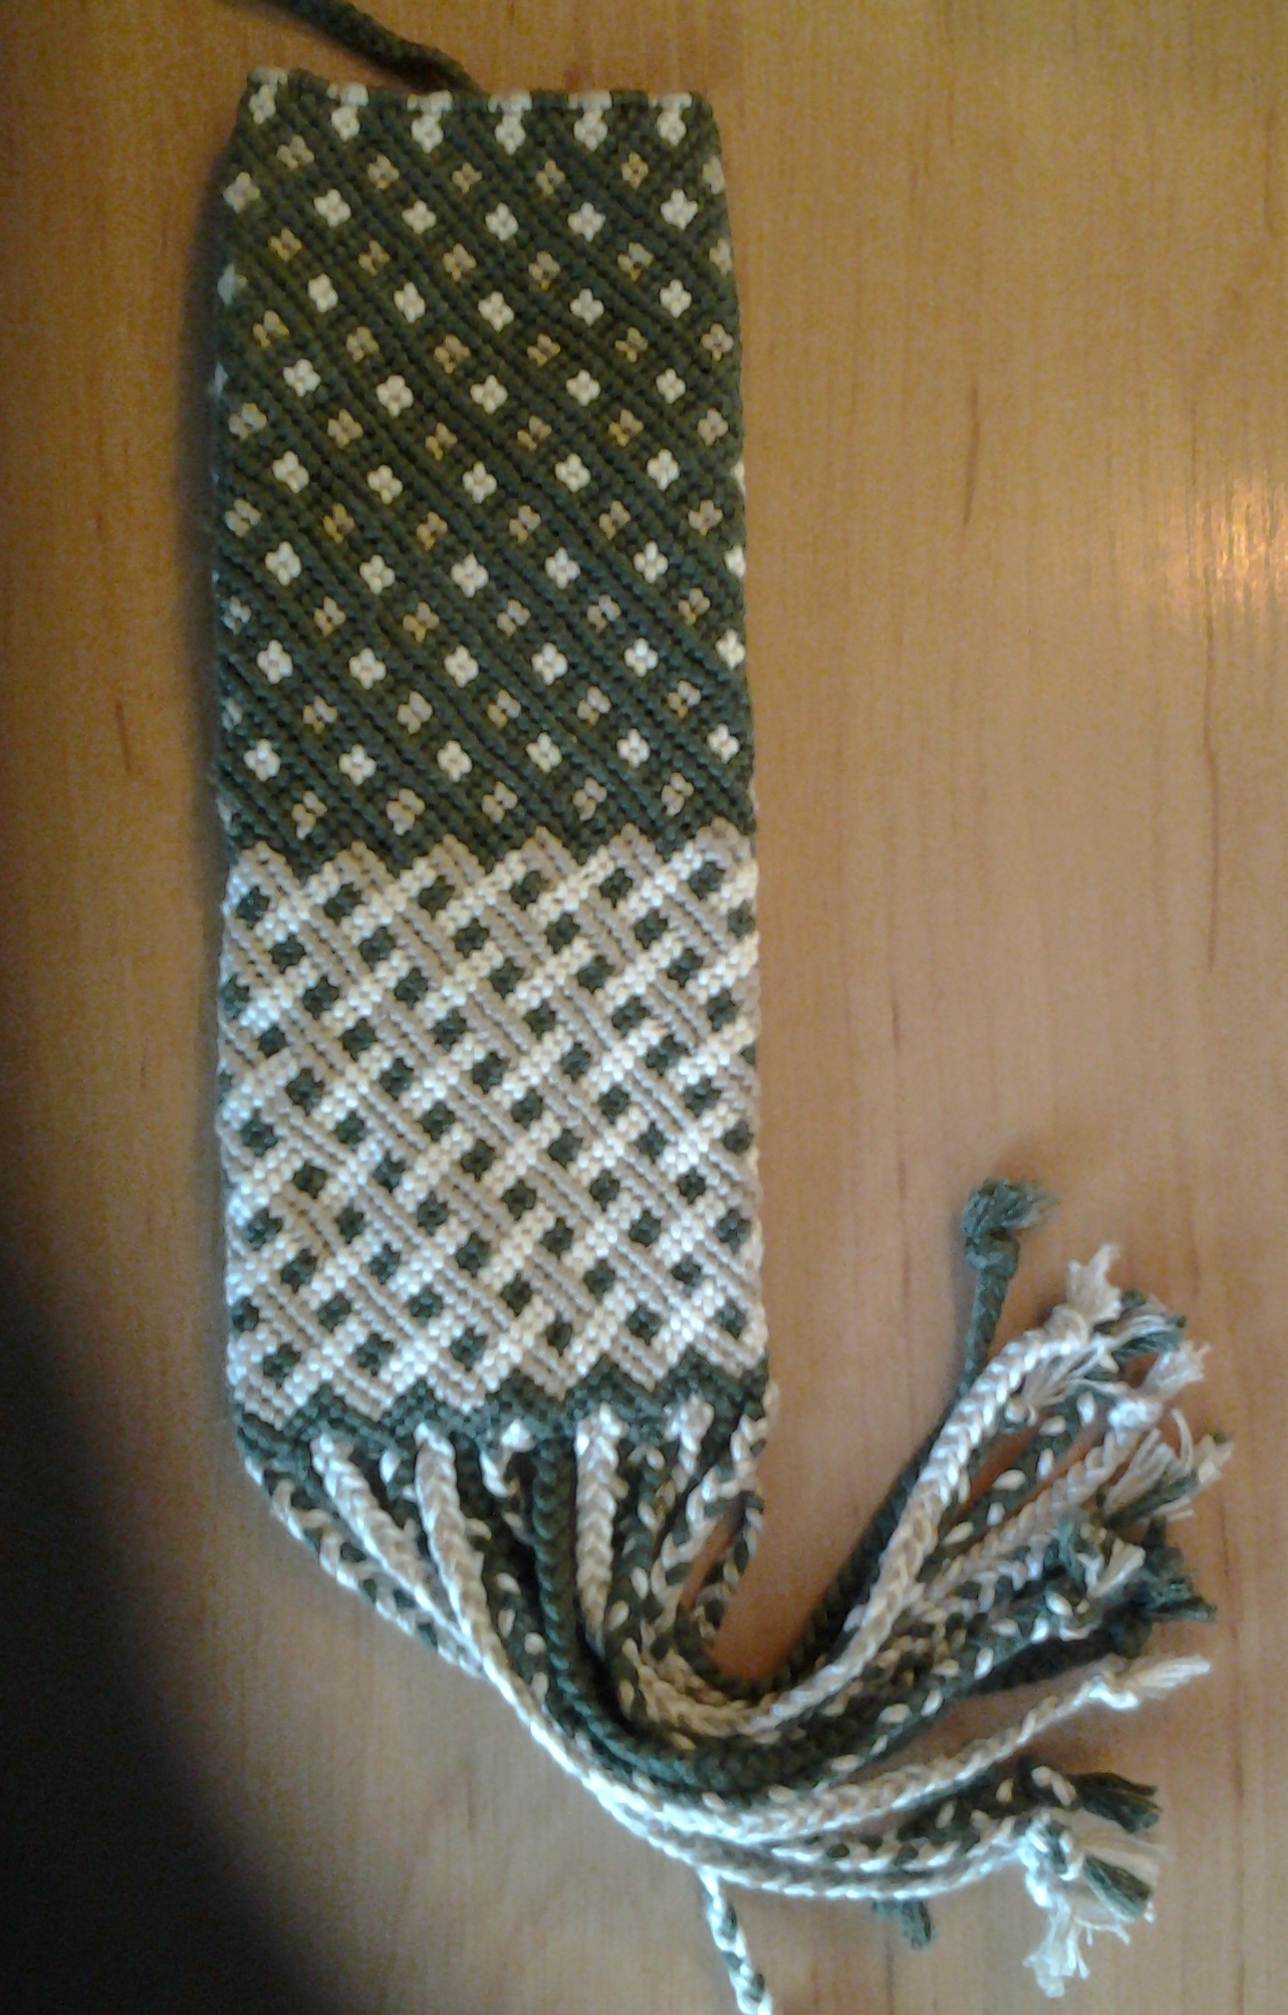
Een sunglass case (at least, it became one in the end) for my mum. As you can see, the pattern differs on the top from the pattern below. I cut all threads the same length, and I concluded at a certain point that I was left with lots of length of the creme-colored and light brown threads, and the green threads were shortening quite quickly. I could have figured that out beforehand, because there’s a lot of knotting with the green threads, and this uses much more thread. But the case was not at a length I wished it to be. So I had to figure out another pattern, and I was limited by the starting position of the threads of the upper pattern. But I succeeded in figuring out a pattern, and this was the result. My mum likes it very much 🙂
I hope I have inspired you with these examples. Maybe you’ve never thought further than making bracelets. In that case I hope you will get overwhelmed with all kinds of ideas. So I can say: ‘Mission accomplished’ 🙂