
Oh dear….
Well, not really 🙂 .
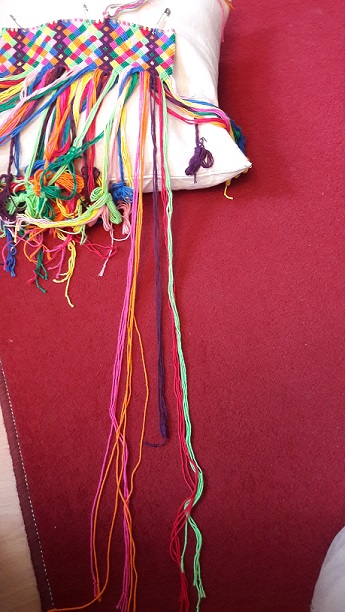
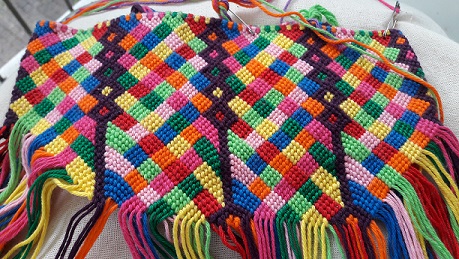
I ran into a ‘problem’, like I already mentioned in a previous post. As you can see in the picture here, I used a lot more of the purple yarns than I used for the other colors. At this point I had approximately 50 cm (20 inch) left of the purple threads, and about 70 cm (28 inch) of the other colors. Well, this is not exactly my very first design, so I could have foreseen this. I know that making a knot uses more length of your thread, than when you make a knot around this thread with another thread. Okay, no weeping! I didn’t want I had to be stopping my project too early because the length of my purple threads would be too short, so I again took my design paper, and started to try out some things to change the design so that I would use less purple knots. With each knot you make, and where 2 threads in different colors are involved, you have the choice which color the knot will be. So, with this knowledge in mind, I started drawing.
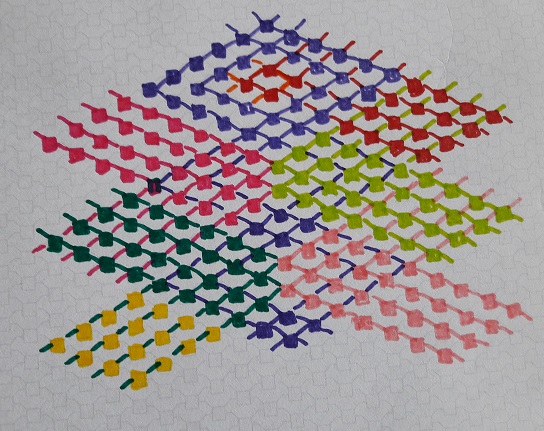
2 Options
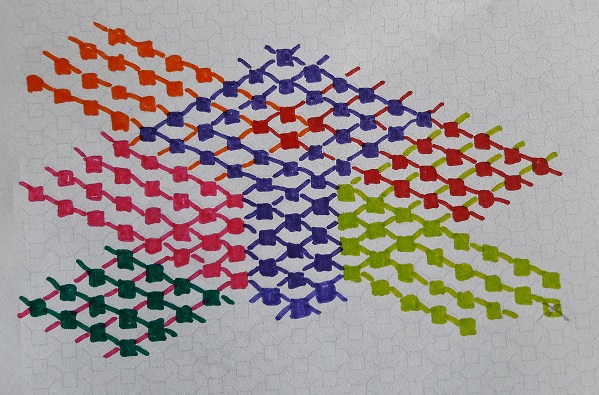
I ended up with 2 options. I actually liked them both, but I was in doubt which one to choose. So I asked my youngest daughter to look at it, and she preferred option 1, because it’s more easy to the sight. In this version, the blocks on the left and the right side of the purple, are still separate from each other optically. I agreed with her, but, it is just a choice, so if you are making this bag also and really do like option 2 better, please use that design!
The result

And here you see the result. You can see the switch in the design, and I can honestly say that I really really liked how it turned out! So you see, an unexpected ‘problem’, can change into something that is much nicer than what you actually had in mind. It is much more ‘lively’ to look at. It is not shockingly different, but it’s just that little bit….
Next time
In my next post I will show you how I finish the lower border. You can already see in my last picture how I knotted the lower border and to what point. If you are also making this along with me, you can make some extra rows if you like to, but I will also make braids, so save some yarn length for that!
See you next time!